Living in a BrightDrop Zevo 600 for a year
Two adults, a dog and a cat, full-time across the United States, in a discontinued electric step-van with 484 sq ft of thermal envelope, no alternator, and the largest usable box of any EV you can buy today.
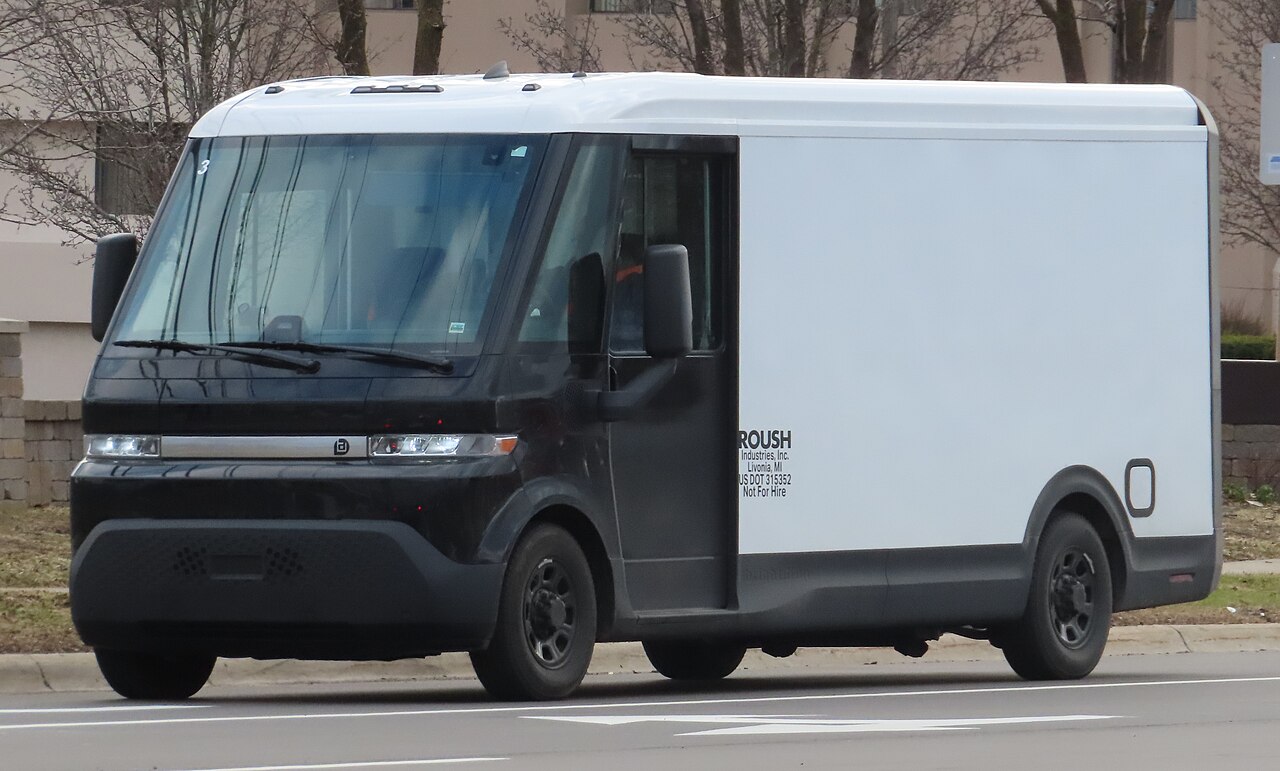
00The van, delivered
Delivered 6 September 2026. Buyer's order signed 19 August 2026 with a $5,000 deposit; financing, funding and title transfer all closed. 2024 BrightDrop Zevo 600, AWD, 20-module Max Range, C7E — VIN 2G58J3TZ8R9101101, 76 miles, sold used as-is by Leaselot Inc. dba Recharged, Richmond, Virginia. Everything below this section was written before the paperwork existed. Where it disagrees with the measured numbers here, the measurements win.
The van is in hand as of 6 September 2026. The purchase closed — financing secured, funds moved, title transferred — and insurance was bound at signing (State Farm, effective 19 Aug 2026). The two contingencies that governed this section between 19 August and 6 September, outside financing within 2 business days and funding/title transfer, are both resolved; the $5,000 deposit is no longer the exposed position. Every figure below is still a projection until it is measured on the actual van. That is now a tape-measure task, not a paperwork one — where a projection disagrees with a field measurement, the measurement wins.
The analysis in §04 recommends AWD Standard Range and rejects Max Range on payload. That verdict has not been withdrawn — the order was signed against it as an informed call, for the 53 extra miles of winter highway range that cannot be added later. What changes is the shape of the problem: vehicle selection is closed (contingent only on financing), and the payload ceiling is now a measured 2,310 lb rather than an estimate. The build has to close inside it or it does not happen.
0.1 What the buyer's order says
| Line | Amount |
|---|---|
| Vehicle price | $34,795.00 |
| Vehicle delivery | $1,405.00 |
| Sales tax — Texas 6.25% | $2,174.69 |
| Processing fee | $699.00 |
| Electronic filing fee | $300.00 |
| Registration | $177.75 |
| Title | $20.00 |
| Total | $39,571.44 |
| Deposit paid | −$5,000.00 |
| Balance due | $34,571.44 |
$34,795 × 6.25% = $2,174.69 exactly — Texas motor vehicle sales tax, with the order marked for Tarrant County registration. An earlier draft of this sheet taxed at Virginia's 4.15% and this document flagged ~$700 of exposure and a titling-state risk; the signed order taxes and registers in Texas, so that flag is closed. The line items also sum to $39,571.44 with no rounding gap — the earlier sheet was $1 off.
The previously quoted terms were 5.99% APR × 72 months. Applied to the $34,571.44 balance due: i = 0.0599 ÷ 12 = 0.00499167; (1+i)72 = 1.43119; P = 34,571.44 × 0.00499167 × 1.43119 ÷ 0.43119 ≈ $572.79/mo. Total of payments ≈ $41,241, plus the $5,000 deposit = ≈ $46,241 all-in, of which ≈ $6,670 is interest — if a loan lands at those terms. No loan has landed. Rate shopping is live, and the 2-business-day clause makes it urgent.
0.2 Two flags on the signed order
The buyer's order prints 16520 in a position where a mileage reading is easy to assume — it is the deal number. The odometer is 76 miles, matching the listing: a delivery-miles van, and the battery state-of-health check in item 4 below describes a pack with essentially no cycles on it. First drafts of this section misread that field; kept here because it's exactly the kind of error the "re-verify everything on paper" rule exists to catch.
The order's warranty section is explicit: as-is, all faults accepted at sale. Whatever remains of GM's factory EV-component coverage is a question to answer in writing, not an assumption. Every line of the 0.3 pre-delivery checklist is now load-bearing, because the inspection window is the only protection there is.
$699 processing plus a $300 electronic filing fee — the double-dip flagged on the first draft made it onto the signed order intact. $1,405 of delivery is also on the sheet, and the earlier drive-it-home-for-the-data advice doesn't survive contact with the arithmetic. Self-driving Richmond → DFW is ~1,250 miles: an empty step van at highway speed burns ~1.2 kWh/mi ≈ 1,500 kWh, which at typical DC fast-charge pricing (~$0.45/kWh) is ≈$650–700 in charging alone. Add a one-way flight to Richmond (~$200) and two to three nights of hotels and food (~$350) and the hard costs land at ≈$1,200–1,300 — saving roughly $100–200 in exchange for three to four days of time, 8–10 charge stops in a 9½-foot-tall box that rarely fits under charger canopies, I-40 charger gaps through Arkansas, and the first 1,250 miles of an as-is, discontinued platform happening a thousand miles from home, where a single tow could erase the savings twice over. The measured kWh/mi baseline comes from the first shakedown runs instead — a weekend's data, not a road trip's.
0.3 Pre-delivery checklist
Eight items, none of them optional. Items 2 and 8 are the ones that actually move the build arithmetic.
| # | Item | Why it matters |
|---|---|---|
| 1 | Deposit refundability and the length of the return window | Everything else on this list is only actionable while that window is open. |
| 2 | Cargo-area photographs — does the Adrian Steel upfit include a floor? | Still the single fact that decides the build. Shelving and a partition strip clean; a floor does not. A Ranger-Design-class E-floor is ~119 lb, and buying one back exceeds every margin under discussion. |
| 3 | Confirm the 8 factory tie-downs are intact and uncovered | 1,000 lb each, and the only crash-rated anchors in the vehicle. Upfitters cover or remove them. |
| 4 | Battery state-of-health report and a DC fast-charge test | No alternator — the traction pack is the entire energy system. |
| 5 | Clean title and history, open recalls | Fleet unit, altered by a second-stage manufacturer in 01/2024. |
| 6 | DFW service coverage — locate the certified servicing dealer now | GM wound BrightDrop down into Chevrolet commercial. A thin service network is plausibly a larger ownership risk than pack degradation. |
| 7 | Photographs of all three labels | GM certification, tire & loading, and the yellow reduced-capacity notice. Only the GM certification label is archived so far. |
| 8 | Certified per-axle scale ticket before the strip and after the strip | Do not assume the 416 lb comes back. Mounts, rails and patched holes stay behind. |
The money changes none of the arithmetic. An honest aggressive build is 1,637 lb, plus 777 lb of occupants and gear = 2,414 lb against a 2,310 lb ceiling — over before any ready-to-travel reserve. Add a 200 lb reserve and the overrun grows; the exact figure is pending the bottom-up SKU mass ledger and is not quotable until that rebuild closes. Bathroom, water and gear are already cut. The insulated floor, real insulation, two fans, and the fuel heater plus its tank are locked and do not absorb further cuts — allowing them to is precisely the mechanism that produced a false "fits by 98 lb" answer once already. The remaining levers are panel and cabinet materials, and the 320 lb gear allowance. Worked through in §4.7.
01The vehicle
2024/2025 Chevrolet BrightDrop Zevo 600 — model CJ32905 (FWD) / CM32905 (AWD). Dead platform, 60%+ off MSRP, and a cargo box roughly twice the envelope of a Sprinter 170 EXT with none of the systems a van conversion assumes.
1. Delete the rear roll-up door. 82" is the height with it closed, 76" with it open — the coiled curtain eats 6" permanently, and it is also the worst-insulated surface on the vehicle.
2. This is not a steel van. 1.6 mm composite (SMC/FRP) skin over a steel skeleton. No welding, no magnets, and rivets into the skin carry nothing.
3. The cargo box has no side door. Two entrances: rear roll-up (26.39" step) or cab → bulkhead door (28.21" wide). This constraint drives every floor plan.
4. Buy the C7E GVWR code. C5F and C7E have identical curb weights — it is a ratings change worth +1,010 lb of payload for about $1,000.
5. You cannot electrically heat this box off-grid in real winter. ~590 W of continuous heat at ΔT 60 °F ≈ 14.2 kWh/day against ~3.6 kWh/day of winter solar. Fuel-fired heat or shore power is mandatory.
Cargo box dimensions
| Dimension | Inches | mm | Note |
|---|---|---|---|
| Internal cargo length | 168.9 | 4290 | bulkhead to rear face |
| Internal width, wall to wall | 83.68 | 2125 | ~78.7" after a 2.5"/side build-up |
| Internal width between wheel housings | 53.53 | 1360 | intrusion 15.08" per side |
| Internal height, rear door closed | 82 | 2083 | the real number once the roll-up is gone |
| Internal height, rear door open | 76 | 1930 | coiled curtain overhead |
| Bulkhead access, W × H | 28.21 × 75.81 | 717 × 1926 | the only cab ↔ box path |
| Rear cargo access, W × H | 57.57 × 73.44 | 1462 × 1865 | clean rectangle — good for a catio panel |
| Cargo floor to ground | 26.39 | 670 | too high for an aging dog |
| Rear step bumper height | 18.09 | 460 | add grippy tread |
| Curbside cab step, height / depth | 15.49 / 12.2 | 393 / 310 | route the dog through here |
| Curbside cab door opening width | 36.67 | 931 | |
| Charge port height to ground | 35.29 | 896 | |
| Cargo volume (mfr) | 614.7 cu ft | 17,406 L | gross box computes to 670.7 |
The frequently quoted "180" × 76"" figure is the usable roof area for solar (≈95 sq ft) from the platform baseline, not the cargo bay. Interior planning uses 168.9 × 83.68, finishing to about 78.7 × 78.5 after wall and floor build-up.
Ranger Design publishes an upfitter layout guide for this exact model and wheelbase. Several of its callouts sit near the figures above, but it is a shelving-placement drawing with its own definitions — its 76" is a maximum suitable shelf height, not a roll-up-door-open ceiling, and its length and width are usable floor area rather than wall-to-wall. Read it as a comparison, not a confirmation of anything above. Every callout on that drawing, and the tape-measure list it still waits on, is on the projected dimensions page.
Chassis
| Item | FWD | AWD |
|---|---|---|
| Wheelbase | 183" | 183" |
| Overall length | 290" | 290" |
| Front overhang | 33.99" | 33.99" |
| Rear overhang | 72.57" | 72.57" |
| Overall height | 108.87" | 108.79" |
| Ground clearance | 7.51" | 7.51" |
| Width without / with mirrors | 86.52 / 106.2" | 86.52 / 106.2" |
| Turning circle, curb to curb | 54.8 ft | 51.5 ft |
| Departure angle | 12.6° | 12.6° |
| Motor output | 240 hp / 300 lb-ft | 300 hp / 390 lb-ft |
Derived geometry that matters: the rear axle sits 73.01" forward of the rear body face (290 − 33.99 − 183). On the interior datum where station 0 = bulkhead, the rear axle is at ~station 96 and the wheel housings occupy roughly stations 76–118. Everything heavy goes forward of station 96. The 72.57" rear overhang is also the only part of the underbody outside the battery footprint — it is where a floor drain penetration is legal.
Battery and range, unmodified
| FWD Std (ETC) | AWD Std (ETC) | AWD Max (ETJ) | |
|---|---|---|---|
| Modules | 12 | 12 | 20 |
| Useful energy | 102.4 kWh | 102.4 kWh | 173.3 kWh |
| Pack mass | 1,605 lb | 1,605 lb | 2,321.5 lb |
| City range | 193 mi | 200 mi | 303 mi |
| Highway range | 151 mi | 152 mi | 234 mi |
| Combined | 177 mi | 179 mi | 272 mi |
Charging: L2 AC at 11.5 kW (17 mi/hr) or 19.2 kW optional (26 mi/hr); 0–100% in 9.5 hr standard, 17 hr Max. L3 DC peaks at 120 kW on a 400 V architecture, low → 80% in 45 min (Std) / 70 min (Max). Battery warranty 8 yr / 100,000 mi. The 12 V service battery is a BCI LN1, 80 Ah, 800 CCA. An 11.5 kW onboard charger nearly maxes a 50 A RV pedestal, so campground charging is a genuine strategy — roughly 15 hours to full off a pedestal.
The body builder manual data gives 12-module / 102.4 kWh and 20-module / 173.3 kWh useful. The GM marketing material and MSRP sheet describe a 165 kWh, 14-module pack expandable to 20. Those cannot both be nameplate figures — 173.3 kWh "useful" exceeds the 165 kWh "total" claim. Treat 102.4 / 173.3 as the planning numbers (they are the manual's) and do not size a charging plan around the 165 kWh figure. Confirm against the actual window sticker for the specific VIN.
What is different about converting an EV step van
The standard house-charging path does not exist
Every Sprinter/Transit build assumes a DC-DC converter fed by an engine alternator that dumps 40–100 A into the house bank while you drive. There is no engine. Your house system is 100% solar + shore. Plan the bank and the panel array as if driving contributes zero, because it does.
Factory upfitter power is a rounding error
What GM gives you: a fused 10 A ignition circuit, a 30 A relay output, a 10 A relay output, and a single 400 W 120 V outlet in the cargo area. Real 7.2 kW vehicle-to-load is 2026 model year only, and production ended — 2026 units are thin to nonexistent. An owner on the forum called the 400 W limit "pathetic" and confirmed the offboarding module is not retrofittable.
The traction pack is structurally unusable
A direct HV tap is defeated by the interlock loop (HVIL), insulation monitoring (IMD) and the contactor/precharge handshake — the van faults and may refuse to drive. ~400 V at pack energy is serious arc-fault territory, it voids the HV warranty and likely voids fire insurance. The onboard AC charger is input-only and cannot be reversed. You carry a second, separate battery bank.
No engine to run for A/C
The gas-van fallback of idling for climate control is gone. Worse: the factory dash heat pump has a 1-hour remote-start limit. Owners work around it via the electric parking brake into neutral. Never rely on it for pets — see the failsafe stack.
Best solar surface in class
≈95 sq ft of flat, unobstructed roof supports 1,200–1,500 W where a typical Sprinter build lands at 400–800 W. Peak summer southwest yield 6–8 kWh/day; winter/overcast 3–4 kWh/day. Oyster White is the only factory color, which is a free Arizona advantage.
You cannot drill the floor
The Ultium skateboard pack spans nearly the entire cargo floor between the axles. GM's manual is explicit: no drilling above the HV battery. This kills undermount tanks, floor-bolted furniture, and conventional through-floor plumbing in one stroke. Everything in section 02 exists because of this line.
The pricing arbitrage
Production is dead. CAMI (Ingersoll, Ontario) paused May 2025; Mary Barra announced cessation October 2025 citing slow demand and a regulatory shift. Confirmed not relocating. That is why the numbers look like this:
| Config | MSRP new | Used market | Discount |
|---|---|---|---|
| 600 FWD, standard range | $76,800 | $28,000–53,000 5 to ~70,633 mi | ≈60%+ |
| 600 AWD, standard range | $79,400 | ||
| 600 AWD, 20-module Max Range | $87,400 |
Supply as last surveyed: ~147 used nationwide on TrueCar, ~43 on Commercial Truck Trader. This is a distressed-fleet play — you are buying a 100–173 kWh vehicle for the price of a used Transit.
A discontinued line. Parts availability, service network and residual value all get worse from here, and very few dealers have BrightDrop service training. Traction battery service on a dead product line is the year-four problem, and it is not priced into the discount — it is the discount. For a one-year build-and-live plan this is an acceptable risk. For a ten-year hold it is not.
Buying guide
Decode the VIN before you call. Verify the option codes on the door jamb, not the listing.
VIN position 8 = battery and drive
Verified today against GM window stickers for 2025 model-year listings via cws.gm.com/vs-cws/vehshop/v2/vehicle/windowsticker?vin=. This is the single fastest filter you have — one character tells you whether the listing is the truck you want.
| 8th VIN char | Configuration | Advertised range | Verdict |
|---|---|---|---|
| Z | Max Range AWD — 20-module (ETJ) | 272 mi | The range truck. Costs ~700 lb of curb weight. This is the van — ordered 19 Aug 2026, delivered 6 Sep 2026 (§00). |
| Y | Standard Range AWD — 12-module (ETC) | 164 mi | The payload/range compromise. Was the pre-purchase recommended base — superseded by the signed buyer's order (§00). |
| 6 | Standard Range FWD — 12-module (ETC) | 180 mi | Most payload, least winter capability. |
The window sticker calls the Standard Range AWD 164 mi; the body builder manual's combined figure for the same config is 179 mi. The FWD numbers are close (180 vs 177), so the AWD gap is the outlier. Do not build a route plan on either until you have the sticker for the specific VIN. Every real-world number in section 04 is derated hard from the manual figure anyway.
Dealer listings mislabel range constantly — standard-range trucks get advertised as "272 mile" because that is the headline number for the model line. The GM window sticker is unambiguous: it prints "BATTERY, MAX RANGE" as an explicit line item. If that string is absent, it is not a Max Range truck regardless of what the listing says. Pull the sticker yourself with the VIN before you spend a phone call.
Verified example
| Field | Value |
|---|---|
| VIN | 2G58J3TZ0S9105178 |
| 8th character | Z → Max Range AWD, confirmed on the GM sticker |
| Dealer | AutoNation Chevrolet Greenacres, FL |
| Advertised | $55,644 |
| Sticker MSRP | $82,150 |
Note that $55,644 sits above the $28–53K used band. It is an asking price on a near-new low-mileage unit, not a transacted price, and Max Range commands the premium. Do not anchor on the first Z-code truck you find — the arbitrage lives in the higher-mileage fleet returns.
locategmfleetworktrucks.com carries duplicated and stale syndicated inventory — the same VIN appears at multiple stores, and trucks that sold months ago are still listed. Call and confirm the van physically exists on the lot before you plan travel or wire a deposit. Ask them to walk out and read the door jamb sticker to you.
Option codes to demand
| Code | What it is | Position |
|---|---|---|
| C7E | 11,000 lb GVWR | Buy this. Identical curb weight to C5F, +1,010 lb payload, ~$1k option when new. Confirmed on the BrightDrop Forum. Without it this build does not fit. |
| C5F | 9,990 lb GVWR | Walk away. Same truck, 1,010 lb less legal payload. |
| ETC / ETJ | Standard (102.4 kWh) / Max Range (173.3 kWh, AWD only) | Cross-check against VIN position 8. |
| CC4 | Translucent cargo roof | Neutral. Real feature, real problem — see section 02. Do not pay a premium either way. |
| PCP | Power door package (power bulkhead + power passenger door) | Nice to have. A power bulkhead door is a cat-escape vector; wire it so it defaults closed. |
| GRO / WA-673G | Oyster White | The only exterior color offered. Free solar-gain advantage. |
C7E puts you over 10,000 lb, which carries commercial-registration and DOT implications in some states. Generally resolved by re-titling as a motorhome after conversion, but verify in your domicile state before you buy — SD, TX and FL are the usual full-timer domiciles and they do not treat this identically. This is a paperwork question with a real answer; get it before, not after.
Inspection checklist — bring a tape measure and a magnet
- Door jamb sticker: C7E vs C5F. The listing will not tell you and the salesperson will guess wrong.
- ETC vs ETJ confirmed against VIN position 8 and the printed window sticker.
- CC4 translucent roof present or not — changes the fan and insulation plan.
- Wheel-housing fore/aft extent and height above floor. The manual gives width intrusion only (15.08"/side). Estimates are ~42" long and 13–15" tall. Measure. Cabinetry depends on it.
- Exact lateral position of the 28.21" bulkhead doorway. Every floor plan here assumes it is curbside-biased.
- All 8 tie-down locations — the only 1,000 lb crash-rated anchors in the vehicle. Note whether any land where cabinetry wants to go.
- Factory-blanked side-door provision? A forum owner reports the Zevo 400 has side door covers. If the 600 does too, cutting a curbside entry door gets dramatically cheaper. Look for a scribed or filled panel outline forward of the curbside wheel arch.
- Roof gutter studs — confirm M8-1.25 threaded studs are present and undamaged. They are the candidate rack attachment, and no rack maker has yet confirmed a product that lands on them (the research →).
- Battery state of health and DC fast-charge history. Fleet returns get hammered on DC. 8 yr / 100k warranty transfers, but you want to know.
- Who services it. Get the nearest BrightDrop-trained dealer in writing before purchase, not after.
- 25MY Chevrolet BrightDrop 400/600 Body Builder Manual — gmupfitter.com (local copy in
reference/brightdrop/) - GM window sticker service —
cws.gm.com/vs-cws/vehshop/v2/vehicle/windowsticker?vin= - GM fleet inventory locator —
locategmfleetworktrucks.com(duplicated/stale syndicated data) - BrightDrop Forum, Building out a camper — C5F vs C7E identical curb weight
- BrightDrop Forum, Power offboarding — 400 W factory ceiling, no retrofit
- Grounded G3 coverage — InsideEVs, GM Authority
02Insulation, mounting & cutting
A 484 sq ft envelope with no engine heat, a 1.6 mm composite skin you cannot rivet into, and a traction battery under the floor you cannot drill through. Generic van content is wrong on all three counts.
No drilling above HV Battery — the pack spans nearly the entire cargo floor between the axles.
No cutting of orange HV cables
No modifications to HVAC plumbing
Do NOT lift the vehicle from any locations on the high voltage battery
Underbody color code, all off-limits: HV battery and cables/modules/drive units orange, 12 V wiring green, brake lines red, HVAC plumbing pink. AWD adds a rear drive unit and its cables. Also documented and to be avoided: the SRS airbag module (centrally located under the lower IP bin) and 6 impact sensors, 8 keyless-entry antennas, and the inclination/movement theft sensors.
2.1 Insulation
| Surface | Area |
|---|---|
| Side walls (2 × 168.9 × 82) | 192.4 sq ft |
| Ceiling | 98.1 sq ft |
| Floor | 98.1 sq ft |
| Rear face | 47.7 sq ft |
| Bulkhead | 47.7 sq ft |
| Total envelope | 484 sq ft |
| Walls + ceiling + rear (what you actually insulate) | 338.2 sq ft |
A Sprinter 170 EXT is roughly 250 sq ft of envelope. You are insulating 1.9× a Sprinter, with no engine heat and no alternator. That single ratio is the most under-appreciated fact about step-van conversions and it propagates into every heat-load, battery-sizing and heater decision downstream.
| Material | R/inch | Practical R here | $/sq ft | Verdict |
|---|---|---|---|---|
| Polyiso, foil-faced | 6.0–6.5 | R-9 to R-10 @ 1.5" | $0.50–0.90 | Primary. Walls and ceiling flats. |
| 3M Thinsulate SM600L | 3.25 | R-5.2 @ 1.65" | $2.26–2.38 | Curves, corners, rib returns, door surrounds. |
| Havelock Wool PRO | 3.6–4.0 | R-7 to R-8 @ 2" | $1.50–2.50 | Viable alternative; buffers humidity; 24" OC batts as of Apr 2026. |
| XPS | ~5.0 | — | $0.60–1.00 | Not on the ceiling. 165 °F service limit; a BrightDrop owner flagged this on his own build. |
| Low-E / reflective bubble | R-1 to R-3.5* | — | $0.60–1.20 | *Only with a true ≥3/4" air gap. Not insulation. Roof radiant barrier in AZ, nothing more. |
| Closed-cell spray foam | 6.5–7.0 | R-10+ @ 1.5" | $1.50–3.00 | Rejected. Irreversible, hides corrosion, cracks with body flex, exotherm and adhesion risk against a 1.6 mm composite skin. |
The composite skin is a weak thermal bridge. The steel skeleton is the condensing surface. Cap every steel rib face with a 1/2" polyiso strip or a Thinsulate wrap before any bay insulation goes in. On a 484 sq ft envelope with a steel skeleton, uncapped ribs are the difference between a dry van and a wet one. Highest ROI single step in the entire insulation package.
Then, in order:
- 1.5" foil-faced polyiso in the large flat wall bays, foil tape every seam. Polyiso is terrible in a curvy Sprinter rib; the Zevo's flat square walls negate its only weakness.
- 2" polyiso in the ceiling. Never XPS — the roof cavity exceeds its 165 °F service limit.
- Thinsulate SM600L stuffed into every corner, radius, rib return and door surround polyiso cannot reach.
- Floor: 1" polyiso (R-6), loose-laid over the factory 8 mm composite mat. It floats — you cannot fasten it. See 2.2.
- Replace the rear roll-up with insulated swing doors or a bonded insulated panel. The slatted curtain is uninsulated, and it also steals 6" of headroom.
Target assembly: R-9 to R-10 walls, R-12 ceiling, R-6 floor, effective whole-envelope ~R-8 after bridging losses. Material budget $1,100–1,500.
Do not install poly sheeting or any Class-I vapor barrier. The reason is your itinerary specifically: Phoenix in July drives vapor inward; Montana in January drives it outward. A Class-I barrier is correct for exactly one of those and becomes a moisture trap for the other. Seasonal vapor-drive reversal is why full-timers who install poly find black mold behind it within a year.
Instead:
- Air-seal obsessively. Air leakage carries 10–100× more moisture than diffusion. Tape every polyiso seam, seal every penetration, gasket every cabinet-to-wall junction.
- Foil-faced polyiso is its own ~Class II vapor retarder — the right permeance, and taping the foil gives you the air seal in the same operation.
- Ventilate mechanically. Two humans, a dog and a cat put roughly 1–1.5 gallons of water per day into ~500 cu ft of finished volume. Ventilation is a system, not a nice-to-have.
- Froli or 3D mesh under the mattress. The underside of a mattress on a solid platform is the number one mold location in every documented van build. Non-negotiable.
- Wool anywhere you can afford it. It buffers moisture and dries without failing. Foam does not.
2.2 Attaching everything without drilling the floor
| Rank | Method | Rating / spec | Use for |
|---|---|---|---|
| 1 | Factory cargo tie-downs (8×) | 1,000 lb each | The only genuinely crash-rated anchors in the vehicle. Pet crates, house battery, anything that becomes a projectile. |
| 2 | Ranger Design Mounting Track Kit 6550-BZL | Aluminum, purpose-built for the Zevo 600, driver or curbside | Primary cabinet and wall anchoring. Drill-free. |
| 3 | Ranger Design E-Floor 6541-BZL | 162.65 × 82.40 × 0.67", 119.2 lb | Ready-made anchored deck, marine ply, integrated inserts, retains battery access covers, 0.5 hr install. See the caveat below. |
| 4 | Rivnuts into the steel ribs — never the composite skin | M6 / M8 | Wall framing, upper cabinet hangers. |
| 5 | Factory M8-1.25 roof gutter studs | Threaded studs above the rain gutter | Candidate rack attachment, no rated capacity published. See 2.3. |
| 6 | Structural adhesive | See table below | Supplement and shear load only. |
It is the obvious answer and it is a good product, but: it is 162.65 × 82.40" against a 168.9 × 83.68" floor, so you detail ~6" fore/aft and ~0.6"/side yourself. At 0.67" thick there is no room for insulation underneath it — an uninsulated floor over a cold battery pack in a vehicle with no engine heat is a real comfort and condensation problem. And 119.2 lb is 4% of your entire payload for a subfloor.
Verdict: buy the Mounting Track Kit (cheap, light, drill-free, purpose-fit, gives you real wall anchoring). Build your own insulated floating floor instead of the E-Floor.
Adhesives that actually work on composite plus steel
| Product | Spec | Use |
|---|---|---|
| 3M 08115 panel bonding adhesive | 2-part epoxy; bonds steel, aluminum, SMC, FRP. 90 min work / 4 hr clamp / 24 hr full cure. Glass beads control bond line. | Primary structural bond. Aluminum cleats to composite skin, window sub-frames. |
| 3M 08219 | SMC / fiberglass adhesive | Composite to composite. |
| Sikaflex-252 + Primer-215 | ~5 MPa (725 psi) shear | Long cleats, floor perimeter capture. A 2 × 24" cleat = 48 in² → ~34,000 lb theoretical, ~3,400 lb after a 90% derate. |
| 3M VHB 5952 / 4941 | — | Use as a cure clamp, not as the structural bond. |
| Loctite PL Premium | — | Wood to wood inside cabinetry only. Never to the vehicle. |
Adhesive in shear, never in peel. A bonded cleat loaded in shear is enormously strong; the same cleat loaded in peel fails at a fraction of that. Orient every bonded joint so crash loads try to slide it, not lift its edge.
The floor build-up — a floating, laterally captured deck
| Layer | Thickness | R |
|---|---|---|
| Floating click-lock LVP | ~3/16" | — |
| 1/2" plywood, in modular lift-out panels over each battery access cover | 1/2" | — |
| 1" polyiso, loose-laid, seams taped | 1" | R-6 |
| Factory 8 mm composite anti-slip mat (existing) | 8 mm | — |
| Capture: wall framing traps the deck laterally; bonded aluminum cleats (3M 08115) at the bulkhead and rear sill trap it fore/aft. Zero fasteners through the floor at any point. | ||
Roughly 165 lb and costs about 7/8" of headroom — you have 82", you can afford it. The deck cannot slide because the walls and the two bonded end cleats box it in; it cannot lift because the cabinetry sits on it and the cabinetry is anchored to the mounting track. Battery access covers stay reachable via the modular panel layout. Mark them, label them, make them tool-free.
Wall and ceiling build-up
| Assembly | Layers, outside → in |
|---|---|
| Wall 2" best case, plan 2.5" per side → finished interior width ≈ 78.7" | Composite skin → steel rib capped with 1/2" polyiso thermal break → 1.5" foil-faced polyiso in the bay, taped → 1×2 furring bonded to the skin with 3M 08115 between ribs and rivnutted to the ribs → 1/4" birch ply or 3 mm skin. The 2" figure only holds if the furring sits coplanar with the foam rather than on top of it; stacked, the assembly is 2.5" before adhesive and tolerance. Build a one-bay mock-up and measure it before committing joinery widths. |
| Ceiling 2" | 2" polyiso between ribs, ribs capped, all seams taped → furring bonded and rivnutted to ribs → thin panel or fabric-over-frame |
Design the interior as a self-supporting monocoque — a rigid box of cabinetry that is structurally complete on its own — then tie it to the mounting track and the 1,000 lb tie-downs. Do not ask any single adhesive joint or any single rivnut to be the thing that stops 500 lb of galley in a 30 mph stop. Redundancy: track + tie-downs + bonded cleats + the cassette's own rigidity.
The metal that cassette gets built out of is now specified by job — light 6061-T6 rails for the wall and ceiling finishes, heavier sections for braced floor-supported bed and cabinet modules, bolted with gussets and crush sleeves rather than welded: The interior frame — aluminum sections, bolted modules →
2.3 Cutting: windows, fans, roof access
The manual's documented restrictions are the HV battery zone, orange HV cables, HVAC plumbing, the SRS module and 6 impact sensors, 8 keyless antennas, theft/inclination sensors, and the roof-rail airbag. The roof-rail airbag is 50 mm × 1,087 mm tall × 1,800 mm wide — that is cab only. It does not extend into the cargo box. The cargo-box side walls therefore sit outside every documented restricted zone and are the safest place to cut.
Composite construction imposes its own rules:
- Cut only in the flat bay between steel ribs. Never through a rib. The ribs are the structure; the skin is a skin.
- Cut from the inside with a fine-tooth downcut blade or an oscillating tool, to avoid chipping the outer gelcoat.
- Reframe before glazing. Bond an aluminum sub-frame around the aperture with 3M 08115 and let it fully cure. The 1.6 mm skin alone cannot carry a window's load or resist flex around a hole.
- Seal 100% of every raw composite edge. Composite wicks water along cut fibers. Epoxy or urethane edge seal, no exceptions.
- Verify locally with a magnet and a borescope that you are not over one of the 8 keyless antennas or a harness run before committing. GM's own warning: covering antennas will impair keyless entry performance.
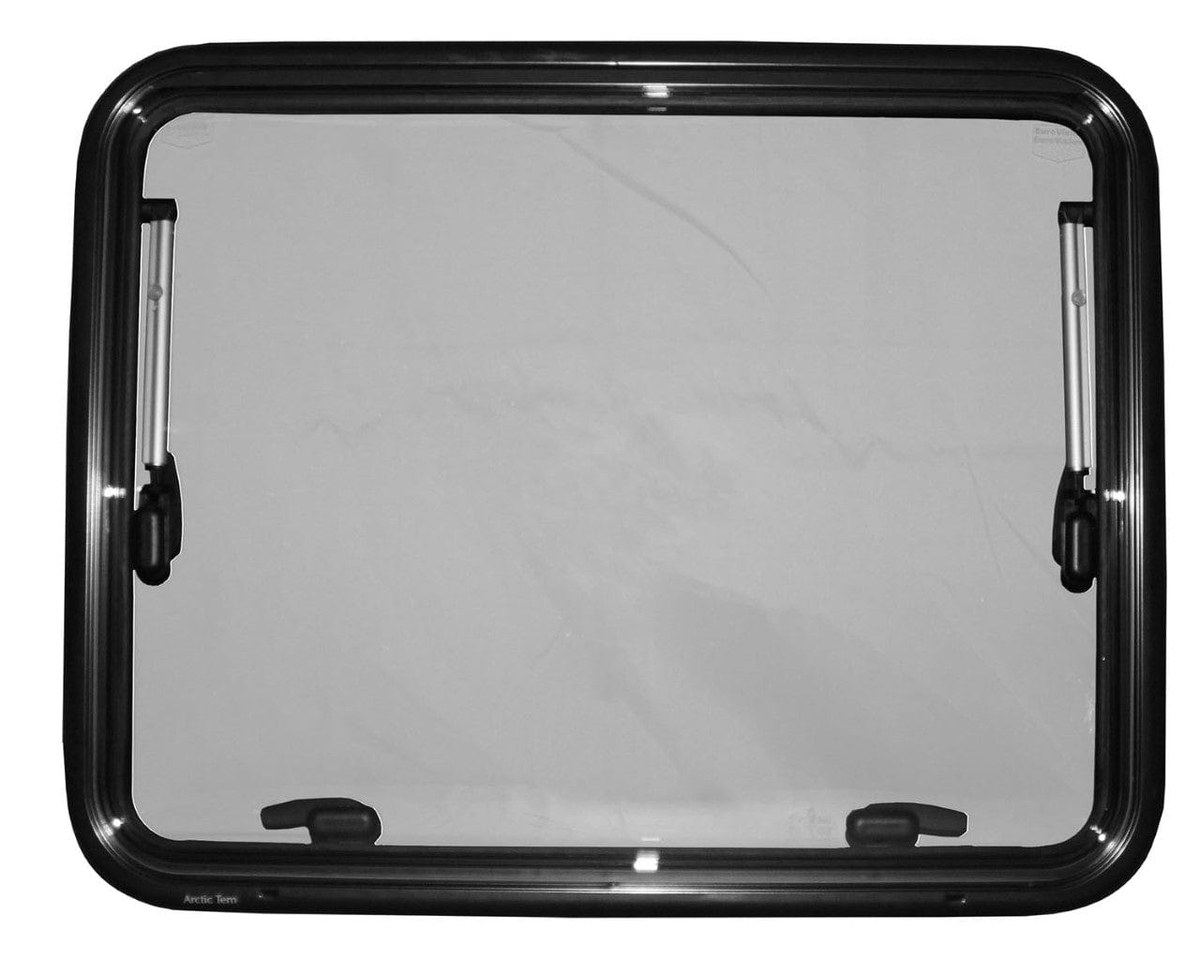
Windows
| Product | Size | Price | Notes |
|---|---|---|---|
| Arctic Tern double-pane acrylic | 450 × 500 | $640 | R-2.5, integrated blind and screen. The default choice. |
| 550 × 700 | $778 | ||
| 550 × 900 | $873 | ||
| 550 × 1100 | $1,041 | ||
| Arctic Tern Flat | 500 × 300 / 550 × 1100 | $611 / $1,085 | Flush-mount aesthetic. |
| AM Auto universal half-slider | 9.4 × 30.7" / 15 × 40" | $264 / $350 | Cheapest real option. |
| CR Laurence T-vent / fixed bonded | various | $200–600 | |
| VanMade insulated covers | per window | $80–200 | Buy these regardless. Worth more R-value than upgrading the glass. |
Spec four windows. Double-pane vs single-pane over ~12 sq ft of glazing is worth about 40 W at ΔT 50 °F ≈ 1 kWh/day ≈ 7% of a 15 kWh bank. Worth it for a full-timer. The insulated covers do more than the glass upgrade for a tenth of the price.
Roof fans
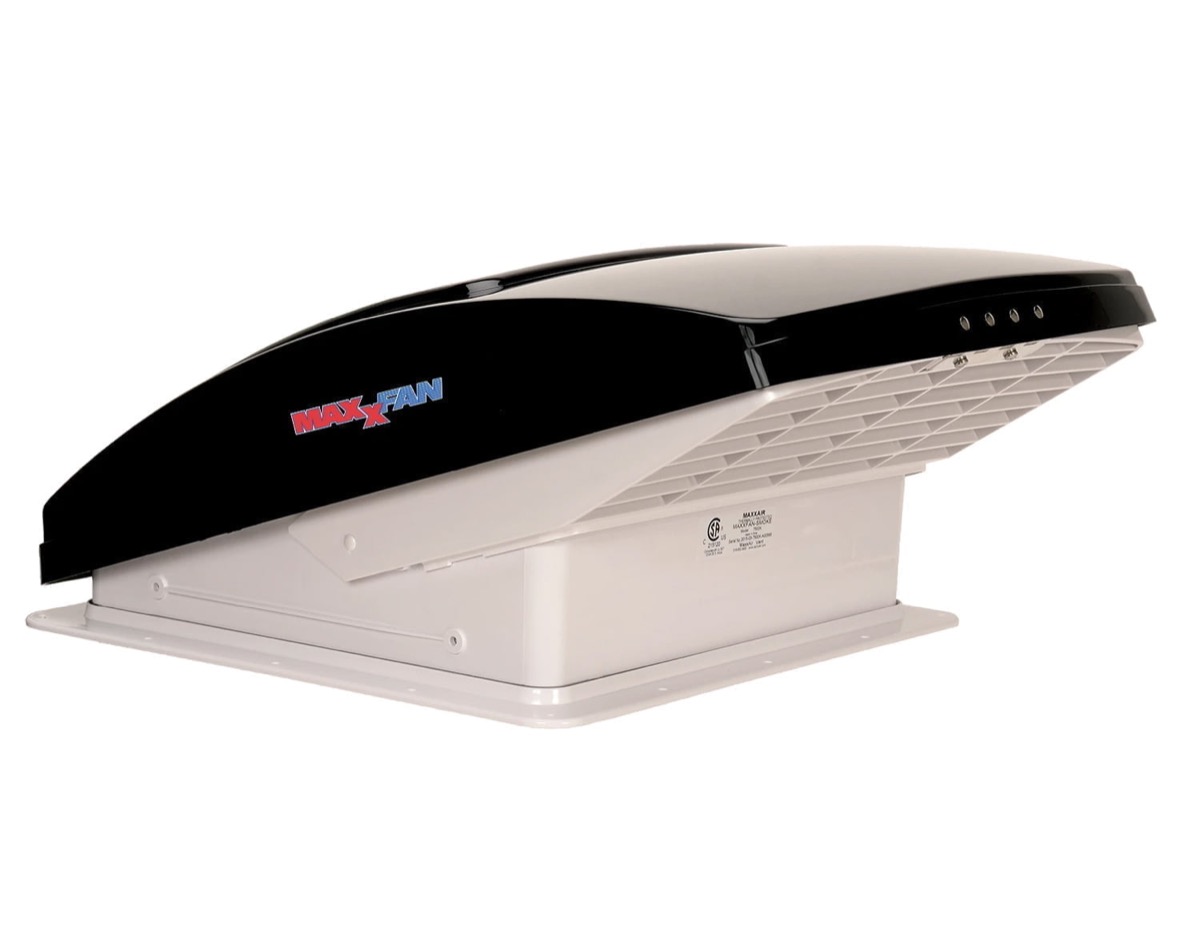
MaxxFan Deluxe 7500K peaks at 900 CFM; Fan-Tastic 7350 at 920. At 900 CFM the ~500 cu ft finished volume turns over in 33 seconds. Capacity is not the constraint — airflow path is.
- Fan 1 at ~station 30 (galley) — exhaust.
- Fan 2 at ~station 140 (bed/lounge) — reversible, intake.
- That is a ~110" longitudinal sweep through the whole box.
- Plus a low-level louvered intake near the rear, below the axle line and not over the pack, so incoming air crosses the animals at floor level where they actually live.
The integrated rain shield lets you run it with the lid closed. In a thunderstorm with pets aboard, a Fan-Tastic has to be shut. That is the whole argument and it is sufficient.
Roof rack and solar — a DIY rack from standard fittings
The factory roof has M8-1.25 threaded studs protruding above the rain gutter, and owners on the forum have built onto them with no holes and no adhesive. That is the attachment this build follows: slotted channel side rails down both gutter lines, raised supports, crossbars above the roof crown.
What changed on 2026-09-16 is how the supports get made. Instead of cutting baseplates, angles and gusset cheeks, the braced corners are ordinary catalog strut fittings — Unistrut P2484 at $14.30 each does the job of a plate plus a gusset in one stocked piece. Members still get cut to measured length; brackets do not get made. The shortlist → · the parts and connections, drawn →
Not buying a branded rack kit. Earlier text here claimed a Torklift no-drill rack fitting the 2022–2025 BrightDrop with 500 lb capacity and Weather Guard EZ-Glide compatibility. None of that was supported by a primary source and all three claims are withdrawn.
| Panel | Spec | W/lb |
|---|---|---|
| Owner's pre-tensioned flexible array | 1,170 W for 72 lb | 16.3 |
| Longi HiMo X10 Guardian Lightweight 560 W | 1.6 mm glass, 40% lighter/W, 1,990 mm long, ~$170/panel shipped from China. 25 mm hail rating vs 65 mm standard. | 10–12 |
| Bila Solar BF / DF | 17 lb (84.5 × 47.1") / 24.5 lb framed | high / mid |
| Typical rigid glass | — | 6–8 |
Target was 1,350 W before the rooftop A/C call. The current design now reserves the rear roof band for A/C, so the array must be re-laid around that unit before panel count or harvest is quoted as final. Mount flush with a ~1.5" air gap and a leading-edge fairing. Do not build a tall rack and do not build tilt. Owners consistently report tilt is not worth the cost, complexity or weight — a 2 m² panel makes 1.5–2 kWh/day, while a bad rack has cost documented vans about 2 mpg. On a BEV that aero penalty is paid in range every single mile. For roof access, carry a stored ARB Altitude-style wide-step ladder; a permanent bonded ladder is drag, weight, a bond you have to trust, and a theft aid.
If the unit has CC4: one owner reports the daylighting is transformative enough that he "feels no need to install side windows," and it enables total stealth (no visible windows from outside). Against that, it is a large uninsulated aperture in both Arizona and Montana, and you cannot cut it for a roof fan.
If you find a CC4 truck, treat it as a feature and build a removable insulated panel under it — magnets will not work on composite, so use twist latches or hook-and-loop to a bonded frame, and relocate the fans to solid roof sections. If you find a solid-roof truck, that is the simpler build. Do not pay a premium either way.
Undermount tanks are out twice over: the pack occupies the conventional undermount zone, and 7.51" of ground clearance against an 8–10" tall 20–25 gal tank hangs to zero. Put the tank inside — 25 gal is ~4 cu ft against 614 cu ft of box, and an interior tank solves freeze protection on a vehicle with no engine heat to borrow.
Drilling per se is not banned; drilling above the HV battery is. A gravity floor drain is legal only behind the rear axle, in the 72.57" overhang, and 26.39" of floor height gives you over two feet of head — no pump, no macerator. Still-live hazards in the overhang: 12 V wiring, brake lines, HVAC plumbing, and on AWD the rear drive unit and its cables. Van on a lift, mark from underneath, drill from inside, bulkhead fitting and sealant rather than a raw hole. Keep the ball valve inside the heated envelope with a short insulated stub, and vent the tank or it airlocks. Zero-hole alternative: route the drain out through the rear door threshold — no penetration, no warranty argument, which matters on a discontinued platform.
- Ranger Design Mounting Track 6550-BZL and E-Floor 6541-BZL
- BrightDrop Forum, Roof rails / racks — M8-1.25 gutter studs, one owner's no-hole Unistrut build
- Unistrut Service Company — P2484 gusseted fitting, P1026 90° fitting, P1000T channel
- BrightDrop Forum, Roof insulation — XPS 165 °F service limit
- BrightDrop Forum, BrightDrop 600 as a camper — roll-up removal, translucent roof, thermal curtains
03Floor plans
Datum: station 0 = bulkhead, station 168.9 = rear face. Finished interior ≈ 78.7" wide × 78.5" high, assuming the roll-up door is deleted. Rear axle at ~station 96; wheel housings ~stations 76–118, intruding 15.08" per side.
The latest furnished concept is published as its own page with corrected equal-axis 3D proportions, same-scale top/side/end views, reviewed plan and five-page revision 2 PDF: Interior layout concept →. It uses GM p12's 600 cargo envelope, subtracts explicit finish allowances, and keeps the open gates visible: front bulkhead datum, rear egress, window cut approval, wheelwell stations, occupant heights, anchor/payload review and roof-appliance coordination. Revision 2.2 adds two standard-bed options, queen and king drawn on the same plan (plus an optional short-RV-queen comparison): both only fit lengthwise, and each costs 26" of kitchen and 16" of sofa.
These layouts were drawn before a physical van and its labels existed. Two assumptions inside them are now superseded: the 20 gal fresh tank shown in the galleys is now 16 gal (§06, §08), and the 36 × 36" wet bath is no longer a baseline fixture — against the measured 2,310 lb ceiling, the bathroom is the last thing in, if it goes in at all (§8.5). The stations, aisle widths and bed logic all still hold; re-draw the bath bay as wardrobe/storage until the weight budget says otherwise.
Fixed bed wins, and for a reason generic van content will never tell you: the BrightDrop is one of the only vans where a fixed bed does not cost you the van. 78.7" of finished width means you sleep crosswise, full-length — impossible in a 70" Sprinter, marginal in a 75.5" ProMaster. A crosswise bed costs ~54" of length instead of ~78".
Lift/elevator bed: legitimate only if you want both a rear lounge and the rear porch. $2,500–4,000 and 120–180 lb of actuators plus a motor that can fail 300 miles from a dealer. The box's top-corner diagonal gussets rule out a crosswise elevator bed, so a lift bed here must be lengthwise (60 × 76") — you forfeit the crosswise advantage.
Murphy bed: rejected. You will remake it 365 times, and a forum owner notes it blocks one whole wall of windows.
Plan A — The Loft
max storage · lightest · cheapestMaximum storage, minimum complexity, lowest weight and cost. No moving parts anywhere.
| Station | Zone | Detail |
|---|---|---|
| 0–40 | Entry / systems / dog | House battery and inverter driver side. 40 × 30" floor-level dog berth curbside, right at the bulkhead door — where the dog enters and where the dog wants to be: near you, near the door, low. |
| 40–78 | Galley | 38" run, 26"-deep counter driver side. Fridge, pantry and the 20 gal fresh tank curbside. |
| 78–114 | Bath + closet | Straddles the wheel wells — the correct use of that intrusion. 36 × 36" wet bath curbside, 18"-deep wardrobe driver side, ~25.7" aisle. |
| 114–168.9 | Bed deck + garage | Deck at 36" AFF. Custom 54" deep × 78" wide crosswise mattress — both sleep across, heads to one wall, neither person climbs over the other, 36.5" sit-up headroom. Below: an 89 cu ft garage. Litter box lives here with a cat door through the bed riser and a 12 V extractor to a lower rear-wall vent. |
Works
- 89 cu ft garage — more storage than most Class B RVs have in total.
- Lightest and cheapest of the three; shortest build time.
- Zero moving parts. Nothing to fail 300 miles from a dealer.
- Two people can use the galley and the bath simultaneously.
- Heavy items (battery, water, galley) all forward of station 96.
- Negatively-ventilated litter box in the garage genuinely solves odor rather than managing it.
Doesn't
- No separate lounge — you lounge on the bed. One soft surface for two adults for a year.
- When one wants to nap and the other wants to work, it is the same surface. This is the whole cost of the plan.
- 36.5" sit-up headroom is enough to sit, not enough to work comfortably.
- Rear porch is consumed by the bed deck.
- Bath is only reachable by walking the length of the van past the galley.
Plan B — The Elevator
buys back a living room with vertical motionA motorized lift bed stows overhead so the rear 78" can be a lounge with a view, and the rear door survives as a porch.
| Station | Zone | Detail |
|---|---|---|
| 0–30 | Entry / systems / dog | House electrical driver side, dog berth curbside. |
| 30–62 | Galley | 32" run — 6" shorter than Plan A. |
| 62–91 | Bath | Over the forward wheel-well zone. |
| 91–168.9 | Lounge under a lift bed | Two facing benches, 76" long × 22" deep, with a 35.7" aisle and table between them. Rear door preserved as a porch. Bed is a 4-post motorized lift, 60" W × 76" L lengthwise (corner gussets rule out crosswise), stows at ~70.5" overhead and deploys to a 34" top surface with 44.5" sit-up headroom. |
Works
- An actual living room with an actual view, and a genuine social space.
- Keeps the rear porch — the best feature of a step van and the thing every conversion throws away.
- Both benches convert to guest sleeping.
- 44.5" of sit-up headroom in the deployed bed, 8" better than Plan A.
- The forward end of each bench sits over a wheel housing, which is otherwise dead space.
Doesn't
- $2,500–4,000 and 120–180 lb of actuator hardware you have no payload for.
- A motor that can strand you — on a discontinued platform, 300 miles from anyone trained on it.
- Violates the weight-distribution rule: lounge furniture and both occupants sit aft, behind a rear axle with 72.57" of overhang.
- Much smaller garage than Plan A.
- Back to a lengthwise bed, so one of you climbs over the other if it lands against a wall.
- Still no privacy — one room, just a nicer one.
Plan C — Two Rooms
the plan only a 14-foot box allowsAn actual bedroom with an actual door. A pocket door at station 110–114 splits the box into a living room and a bedroom.
| Station | Zone | Detail |
|---|---|---|
| 0–30 | Entry / systems / dog | House electrical driver side, dog berth curbside at the bulkhead door. |
| 30–78 | Living room | 48"-long L-settee driver side with a swing-arm laptop table; 48"-long galley curbside. Cross-section budget: 22" galley + 33.7" aisle + 23" settee = 78.7" — the widest aisle of the three plans, and the number that gets defended if anything has to give. |
| 78–110 | Wet bath + closet | Over the wheel wells. |
| 110–114 | Pocket door | The entire point of the plan. |
| 114–168.9 | Bedroom | 54 × 77" crosswise bed on a 20" storage plinth. 52.5" sit-up headroom — you can work in bed. Windows both sides. Rear swing doors open onto a sleeping porch. |
An entry door at ~station 40–72, forward of the wheel well, is the single highest-value layout enabler in the entire project. It gives the box a real front door, makes the living room a room you enter rather than a corridor you pass through, gives the dog a second exit at a sane step height, and decouples entry from the cab so the cat containment strategy stops depending on one door. Cargo-box side walls are outside every documented restricted zone — see section 02 for the cutting rules.
Works
- One of you can sleep while the other works, cooks or takes a call. Nothing else on this list gives you that.
- 52.5" of sit-up headroom — the bedroom doubles as the second office.
- Widest aisle (33.7") and the largest galley run (48").
- Keeps the rear porch and a crosswise bed simultaneously.
- Bath and closet correctly consume the wheel-housing intrusion.
- Heavy items forward of station 96; the rear 71" carries only bed and plinth.
- No motors. The one moving part is a pocket door.
Doesn't
- Smallest garage of the three — the 20" plinth replaces Plan A's 89 cu ft.
- Depends on the cab route or on cutting a new door. The cut is a real fabrication job with reframing and edge sealing.
- The wall and door cost ~4" of length and ~40 lb.
- A closed pocket door halves your ventilation path — both fans and the low intake have to be zoned around it.
- Grounded, a funded professional team building on this exact chassis, did not cut a side door.
Comparison
| A — Loft | B — Elevator | C — Two Rooms | |
|---|---|---|---|
| Permanent bed | Fixed, crosswise | Lift, lengthwise | Fixed, crosswise |
| Separate lounge | No | Yes | Yes |
| Sit-up headroom in bed | 36.5" | 44.5" | 52.5" |
| Garage | 89 cu ft | Small | Medium |
| Rear porch preserved | No | Yes | Yes |
| Privacy / two rooms | No | No | Yes |
| Est. build weight | Lightest | Heaviest | Middle |
| Est. cost delta | Baseline | +$3–4k | +$1k |
| Moving parts that can fail | None | Motor | Pocket door |
| Weight aft of station 96 | Bed only | Lounge + both occupants | Bed only |
Two adults, one dog, one cat, one year, one box. The constraint that ends year-long van relationships is not storage and it is not headroom — it is that there is nowhere to be alone. Plan C is the only layout of the three that puts a solid door between a person who is asleep and a person who is on a call, and the BrightDrop's 168.9" length and 78.7" finished width are what make a real interior wall affordable in the first place. A 54 × 77" crosswise bed costs 54" of length; a wall costs 4" more. You still have 114" left, which is a longer living zone than most Sprinter builds have in total.
The pets favor it too. The dog berth stays at the bulkhead door, low and near the entry, on the cab-step route (15.49" instead of 26.39"). The litter box goes in the bedroom plinth with the same negative-ventilation trick Plan A uses in the garage. The rear swing doors take a full-frame mesh catio panel sized to the clean 57.57 × 73.44" opening, and with the pocket door shut the bedroom becomes a closed cat zone whenever the rear is open.
Plan A is the correct fallback if payload gets tight or the build calendar slips — it is the lightest, cheapest and fastest, with no moving parts and the biggest garage. Plan B is out. It spends $3–4k and 120–180 lb of payload you do not have on a motor that can strand you, and it loads the lounge and both occupants behind a rear axle with 72.57" of overhang.
All three plans assume wheel housings ~42" fore/aft at stations 76–118 and 13–15" above the floor. The manual gives only the 15.08" width intrusion — the fore/aft and height figures are estimates. They set the bath depth in A and C and the bench height in B. They also assume the 28.21" bulkhead doorway is curbside-biased. Measure both on the physical vehicle before you order a single sheet of ply.
04Weight & payload
The traction battery already ate the GVWR. A 20-module Max Range pack weighs 2,321 lb before you add a single screw. This is the binding constraint on the entire project, and the naive build does not fit any configuration.
Everything in 4.1–4.6 was computed from the body builder manual's estimated payloads, before any door jamb had been photographed. Two things happened afterwards. First, a real sticker came in at 2,310 lb against a 2,430 lb estimate — the model runs about 120 lb optimistic. Second, a buyer's order was signed on that van (§00), which removes configuration choice from the problem — contingent only on financing. The configuration comparison below is kept because it is how the decision was reasoned, and because the 120 lb haircut has to be applied to every row in it. §4.7 carries the number the build is actually held to.
4.1 The payload matrix
Front GAWR is 5,291 lb on both GVWR codes. Rear GAWR is 5,732 lb (C5F) or 6,172 lb (C7E). Note that C5F and C7E rows share identical curb weights — the entire difference is a ratings change.
| Config | Curb wt | Payload | Payload, all options | GVWR |
|---|---|---|---|---|
| 600 FWD, Std Range (ETC), C7E | 7,590 | 3,350 | 3,200 | 11,000 |
| 600 AWD, Std Range (ETC), C7E | 7,820 | 3,130 | 2,980 | 11,000 |
| 600 AWD, Max Range (ETJ), C7E | 8,520 | 2,430 | 2,260 | 11,000 |
| 600 FWD, Std Range (ETC), C5F | 7,590 | 2,340 | 2,190 | 9,990 |
| 600 AWD, Std Range (ETC), C5F | 7,820 | 2,110 | 1,970 | 9,990 |
| 600 AWD, Max Range (ETJ), C5F | 8,520 | 1,420 | 1,250 | 9,990 |
The 20-module pack is 2,321.5 lb against 1,605 lb for the 12-module — 716 lb of pack, which shows up as a 700 lb curb-weight increase and a 700 lb payload reduction versus AWD Standard. Add the FWD-to-AWD delta and going from FWD Standard to AWD Max costs you 920 lb of payload. That is roughly a third of your entire build budget spent on cells.
4.2 Build weight, as specified
| Item | lb | Note |
|---|---|---|
| Floor system | 140 | Floating deck; the Ranger E-Floor alone would be 119 |
| Framing | 120 | |
| Insulation | 50 | 484 sq ft envelope |
| Wall + ceiling panels | 180 | |
| Cabinetry | 550 | Largest single line |
| Mattress + bedding | 90 | |
| Water system, full | 561 | 40 gal fresh (334) + 20 gal grey (167) + plumbing (60) |
| Water heater | 25 | |
| House battery, 15 kWh LFP | 300 | |
| Electrical balance of system | 120 | |
| Solar + rack | 160 | Flexible array at 16.3 W/lb; rigid glass would be double |
| Fridge | 90 | |
| Galley appliances | 35 | |
| HVAC | 65 | GE AWGP08WWF is 45 of it |
| 2 roof fans | 30 | |
| Toilet | 30 | |
| Shower | 100 | |
| Windows (4) | 100 | |
| Rear door conversion, net | −30 | Credit after deleting the roll-up |
| Seating | 150 | |
| Bath enclosure | 60 | |
| Electronics | 60 | |
| Build subtotal | 2,986 | |
| 2 adults | 340 | |
| Pets + crates + litter | 117 | Gunner G1 Intermediate + G1 Small / Sleepypod |
| Gear, food, clothes, tools | 400 | |
| Outdoor gear, ramp, chairs, awning | 120 | |
| Occupants and gear subtotal | 977 | |
| Total as specified | 3,963 |
FWD Std + C7E: 613 lb over. AWD Std + C7E: 833 lb over. AWD Max + C7E: 1,533 lb over. Not marginal, not a rounding error — the naive build is overweight on every single configuration, including the lightest one with the most generous GVWR code.
4.3 What you give up to make it fit
| Cut | Saves (lb) | Cost to you |
|---|---|---|
| Fresh water 40 → 20 gal | 210 | Fill more often. You are in towns anyway — this is the cheapest 210 lb on the list. |
| Aluminum framing + 3 mm skins instead of 3/4" ply | 200 | Higher material cost, harder fabrication, better outcome. |
| Thin wall panels | 100 | Less durable interior surfaces. |
| House battery 15 → 10 kWh | 100 | Real. 10 kWh against a ~14.2 kWh/day winter heat load is why the fuel heater is mandatory. |
| Simplify the wet bath — curtain and drain pan, no separate enclosure | 100 | Wetter bathroom, more drying time, more mold vigilance. |
| Thinner floor build-up | 50 | Directly trades against floor R-value over a cold pack. |
| Gear discipline | 100 | The one that quietly fails at month four. |
| Total savings | 860 |
Of the 860 lb cut above, 100 lb is gear discipline, which comes out of the 977 lb occupants-and-gear subtotal, not out of the build. So the build cuts total 760, not 860. Corrected: 2,986 − 760 = 2,226 lb build, and 977 − 100 = 877 lb of occupants and gear, for 3,103 lb loaded — not the 3,330 this section carried through rev 1. The old figure also propagated into §05's screening rule, where it was the "3,330 optimized" benchmark.
Optimized: 2,226 lb build + 877 lb occupants and gear = 3,103 lb loaded.
Two margin columns below, because the estimates are known to be optimistic. Est. is the body builder manual figure. Adj. applies the 120 lb haircut that the first measured sticker forced — and on the AWD Max row it is not a haircut at all, it is the measured 2,310.
| Config | Payload, est. | Payload, adj. | Margin, adj. | Fits? |
|---|---|---|---|---|
| FWD Std + C7E | 3,350 | ~3,230 | +127 | Not purchasable. There is no FWD in the 11,000 lb 2024 VIN space — see 4.7. |
| AWD Std + C7E | 3,130 | ~3,010 | −93 | Needs one more cut. Achievable, and this was the recommendation. |
| AWD Max + C7E (this van) | 2,430 | 2,310 measured | −793 | No — and this is the one he bought anyway. 4.7 is the response. |
4.4 Distribution, not just total
Rear GAWR 6,172 lb (C7E), front 5,291 lb. The rear axle sits at ~station 96 with 72.57" of overhang behind it — a long lever arm on the axle that is already the more heavily loaded of the two.
Water tanks, house batteries and the heavy galley go forward of station 96. The bed and lounge — the light things — go in the rear 71". All three floor plans are drawn this way. Plan B violates it most, putting lounge furniture and both occupants aft, which is an independent strike against it beyond the actuator weight.
Sequencing note: at 8.34 lb/gal, a full 40 gal fresh tank is 334 lb that moves as you drive. Site it forward and low, and remember the tank is empty at the scale and full on the mountain pass.
4.5 Range consequences
Two separate effects, and the intuition most people carry is wrong on one of them.
At 60 mph the aerodynamic force on this box is roughly 1,180 N. Adding 3,000 lb of build increases rolling resistance by only about 107 N — under 10% of the aero load. That is why the common "1.5% range loss per 220 lb" rule badly overestimates the highway penalty on a large, draggy vehicle. Highway loss from mass alone is 7–9%. Combined-cycle loss, where stop-start makes mass matter far more, is 12–15%.
Flush solar with a leading-edge fairing costs 1–2%. A tall rack, a permanent ladder, an awning rail and external boxes cost 5–15%, easily. On a BEV that penalty is paid in range on every mile you ever drive, and there is no gas station to make it up at. This is the entire argument for the flush-mount, stored-ladder approach in section 02.
| Config | Summer highway | Combined | Winter highway |
|---|---|---|---|
| FWD / AWD Standard Range | ~133 mi | ~154 mi | ~96 mi |
| AWD Max Range | ~207 mi | ~237 mi | ~149 mi |
Against DC fast charging that adds low → 80% in 45 min (Standard) or 70 min (Max), ~96 mi of winter highway range means stopping roughly every 90 minutes of driving. On a Standard Range truck that is the practical reality of a January travel day, and no amount of build optimization changes it.
4.6 The central tradeoff
You cannot have both range and payload. Max Range is AWD-only and eats 700 lb of curb weight, and that 700 lb comes straight out of your build.
2,430 lb payload · 207 mi summer / 149 winter
Livable range, but a build so stripped it has no wet bath, a tiny battery and 15 gallons of water. For two people full-time that is a different and worse vehicle. Only worth it if you go cassette toilet plus outdoor shower and mean it.
3,350 lb payload · ~96 mi winter highway
The most payload of any configuration, and genuinely miserable in cold weather — charging every 90 minutes of driving. Also the weakest on mountain passes and winter traction in a vehicle you are living in.
3,130 lb payload · ~150 mi summer / ~110 winter
The pre-purchase recommendation — superseded by the signed buyer's order (Max Range AWD, §00). Build to ~2,200 lb and you have real margin instead of 20 lb of it. AWD earns its weight in winter traction and mountain grades. Accept the range and plan the year around slow travel, which is what full-timing actually is.
3,130 lb of payload is the only number on this page that leaves room for the build you actually want and a vehicle that handles a snowy pass. Take the 40 → 20 gal water cut and the aluminum framing cut on day one, not as emergency measures in month six. If you find a Max Range AWD with C7E at the right price and you are genuinely willing to strip the build — cassette toilet and an outdoor shower instead of a wet bath, 15 gal of water, an 8 kWh bank — it is the better road-trip vehicle. That is a real fork, and it has to be decided before you buy the van, not after.
That fork was taken on 19 August 2026, toward Max Range, and the van was delivered 6 September 2026 (§00). The paragraph above is left standing because the strip it describes is now the assignment. See §00 and 4.7.
4.7 The measured ceiling — 2,310 lb
Everything above this point runs on estimated payloads. This subsection runs on a photograph of a label. It is the only weight section that governs the build.
VIN position 4 is GVWR and position 8 is powertrain, and they are independent — so the first eight characters triage a listing without a phone call. 2G58J3TY = 11,000 lb + Standard Range AWD, the config that fits. 2G58J3TZ = 11,000 + Max Range AWD. 2G5Z… is 9,990 lb and skippable on sight. Held on 126 of 126 full decodes across the inventory sweep, and NHTSA vPIC accepts partial VINs, so the matrix was confirmed directly rather than one unit at a time.
Two things the screen settled that the rest of this section predates. There is no FWD option in the 11,000 lb 2024 VIN space — all 33 valid characters at position 8 were scanned and only Y and Z return powertrain data, both reading EAWD, 2-motor system. That retires the comfortable "FWD Std + C7E" row above; it is not purchasable. And vPIC returns only the class band — it can never produce a payload figure. The decode is a filter. The jamb photo is the measurement.
The first real sticker, from this van: GVWR 4,990 kg / 11,000 lb exactly as the class band predicted, GAWR front 2,400 kg / 5,291 lb and rear 2,800 kg / 6,172 lb, seating capacity 2. And the line that governs everything: occupants and cargo must never exceed 1,048 kg / 2,310 lb. The estimate for this configuration was 2,430. The model runs about 120 lb optimistic, and that haircut belongs on every other row until a second sticker says otherwise.
This van was altered by Adrian Steel of Ohio in 01/2024 and carries the yellow FMVSS notice: load carrying capacity reduced by 189 kg / 416 lb. The alterer left the GVWR and GAWR fields blank, so the 11,000 lb rating stands — but 416 lb of it is already spent on shelving before anything of ours goes in, leaving 1,894 lb as it sits. Stripping the racking is assumed to return the van to 2,310 and no higher; 2,310 is GM's as-built ceiling and nothing done to the vehicle raises it. Whether the full 416 lb actually comes back is unverified — mounts, rails and patched holes stay behind, which is why the pre-delivery list asks for a scale ticket on both sides of the strip.
Screening rule that came out of this: a commercial-fleet BrightDrop may carry an upfit, so ask for the yellow reduced-capacity label alongside the jamb photo. A Standard Range unit carrying a 416 lb upfit would land ~227 lb over and look perfectly fine on the VIN alone.
The fit attempt that did not survive review
Working to 2,310, a stripped build was drawn that landed at 1,435 lb of conversion plus 777 lb of occupants and gear = 2,212 lb, fitting by 98 lb. It deleted the shower, the bath enclosure and the water heater, cut fresh water to 10 gallons, dropped the house bank to 10 kWh, went to one roof fan and two windows, and cut gear from 520 lb to 320 lb.
It was a curve fitted to a desired answer, and it is withdrawn. An independent line-by-line re-check against this document's own sections found five verified omissions and understatements:
| Line | Claimed | Defensible | Miss | Why |
|---|---|---|---|---|
| Floor system | 50 | 85–110 | ~40 | Floor area is 168.9" × 83.68" = 98 sq ft. 50 lb is 0.51 lb/sq ft. The Ranger Design E-Floor cited in §02 is 119.2 lb over 93 sq ft = 1.28 lb/sq ft; bare ¼" ply alone is ~0.7. |
| Wall + ceiling panels | 80 | 135–160 | ~80 | 80 lb across ~380 sq ft is 0.21 lb/sq ft. 3 mm ply is ~0.45. That number is only reachable with composite honeycomb stock, which was never specified or priced. |
| Insulation | 50 | ~63 | ~13 | 484 sq ft of envelope, correctly costed. |
| Fuel heater + tank + ducting | absent | 35–55 | ~45 | The most serious miss. §07 calls combustion heat the only viable option on this platform and §02 calls it mandatory — and it was carried inside a single undifferentiated 65 lb HVAC line that also has to cover the air conditioner. |
| Fasteners, adhesive, sealant, hardware | absent | 30–60 | ~45 | Never line-itemed at all. |
Worth being precise about the failure mode: insulation and HVAC were not cut in that pass — both were explicitly marked "do not cut this." They were undersized before any cutting began. Same outcome, different mechanism, and the difference matters for calibrating everything else on this page.
| Scenario | Conversion | Occupants + gear | Loaded | vs 2,310 |
|---|---|---|---|---|
| Fitted build, as first written | 1,435 | 777 | 2,212 | 98 under — withdrawn |
| Defensible aggressive | 1,637 | 777 | 2,414 | 104 over |
| Realistic first build | 2,188 | 779–960 | ~2,967 | 657 over |
The defensible build is over the ceiling on its own, and a 200 lb ready-to-travel reserve pushes it further — the magnitude is pending the bottom-up SKU mass ledger and is deliberately not quoted here. The bathroom, the water system and the gear allowance have all already been cut once. Four things are locked and do not absorb another pass — the insulated floor, real insulation, two roof fans, and the fuel heater with its tank — because letting them absorb cuts is precisely the mechanism that produced the false 98 lb fit. What is left: panel and cabinet materials, and the 320 lb gear allowance. No further total should be quoted from this page until the rebuild below exists.
The 200 lb framing cut in 4.3 only exists if the right aluminum is used. T-slot extrusion is heavier than the wood it replaces: 8020 1515 is 1.16 lb/ft and 1010 is 0.53, against SPF 2×2 at 0.44. Only thin-wall 6063 tube — 1" × 1" × 0.065" wall at 0.28 lb/ft — is genuinely about 36% under wood. Any plan claiming 80/20 "reduces framing weight by up to 50%" has the sign backwards.
Existence proof: how a funded team builds this exact van
Grounded RV's G3 is built on the same chassis in the same configuration — Zevo 400 or 600, AWD, 11,000 lb GVWR, 20-module traction pack. They did not beat the payload. They deleted the same things, and manufactured the structural parts a plywood build cannot match.
No wood anywhere
Reinforced aluminum substructure, cabinetry framed in industrial aluminum, paneled in homogeneous recycled sheet — no veneer, no edge banding, no ply core. This is the exotic-panel path, and it is a tooled production part.
16 gal fresh / 22 gal gray
The 40 gal post-diet figure this document's weight tables carried (§04, already cut down from §06's original 80 gal spec) was about 200 lb of self-inflicted weight. 16 gallons is what the company that builds these for a living actually ships.
An upcharge, not a baseline
G3 Form at $165,000 has no bathroom. A full shower starts at $180,000. The wet bath that this document treated as a requirement for two full-timers is an option at every price point below $180K.
Two honest limits on that comparison. Grounded publishes no curb weight, no dry weight and no remaining payload — checked against their site, the launch release and the trade coverage — so it proves where a funded engineering team chooses to spend pounds, not that any build closes under 2,310. And our one unavoidable delta is the fuel-fired heater: the G3 heats electrically off a 1,400 W vehicle-to-house feed from the 172 kWh traction pack, and that architecture is not purchasable as parts. Running the heat off the traction pack costs roughly 21 winter miles per 12-hour night at 2 kW, against about 5.6 lb of diesel for the same delivered heat — which is the entire argument, and it spends exactly the range the Max Range pack was chosen for.
A bottom-up rebuild of the weight budget from real SKUs and part numbers, against 2,310 lb, in two columns — conventional ply versus composite and aluminum — with the four non-negotiables held in both. That rebuild is the gate. Until it exists, every total on this page is an estimate that has already been wrong in the optimistic direction twice.
Every figure above is a computed estimate against manual curb weights. Take the finished van to a CAT scale loaded, with tanks full and both people aboard, and get per-axle numbers. Front GAWR 5,291 / rear GAWR 6,172 are independent limits — you can be under GVWR and still overload the rear axle, which is exactly what a rear-biased build does. Do this before the first long trip, not after something fails.
05Electrical & solar
24 V house system, an 11.78 kWh bank that is now bought and in hand, and a roof-solar number that must be re-run after the rooftop A/C decision. There is no alternator on this vehicle, so solar and shore power are the only two inputs to the house. That single fact makes the energy budget the hardest number on this page.
The hardware, as specified
Every part below is the exact unit costed in the BOM at §08. Photographs are the manufacturers' own product shots — nothing here is a rendering or a stand-in.
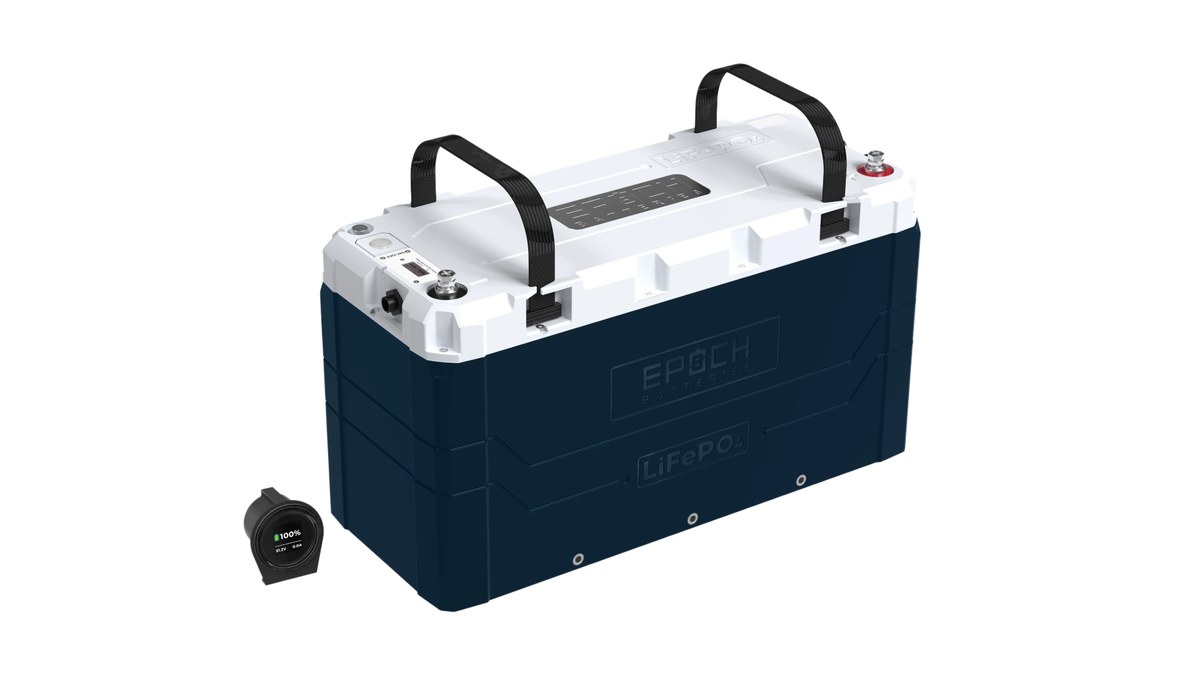

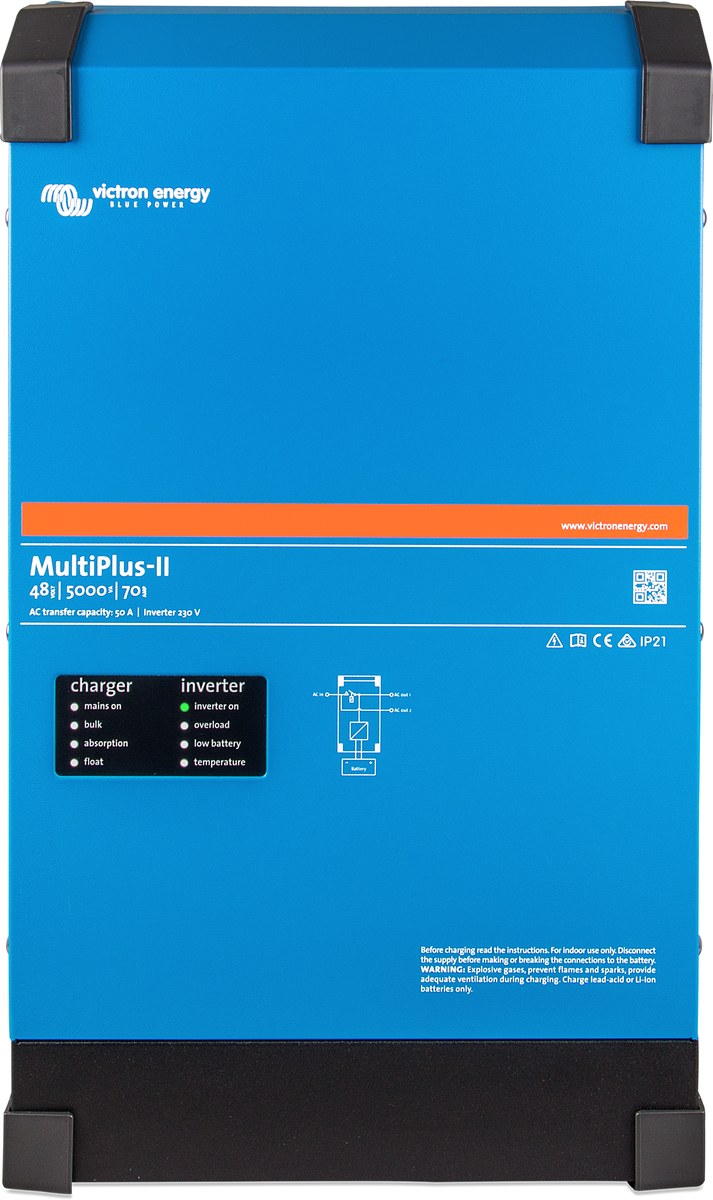
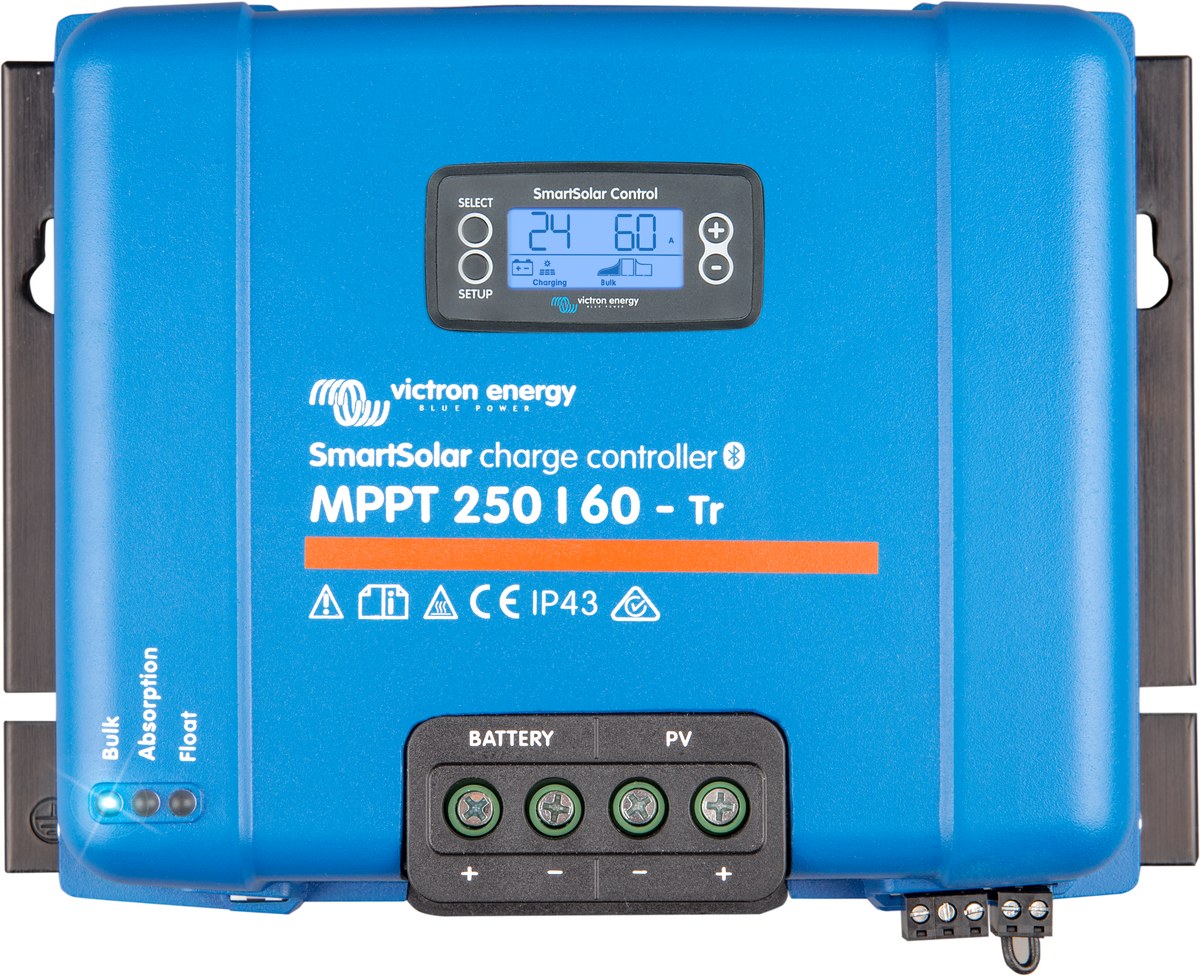
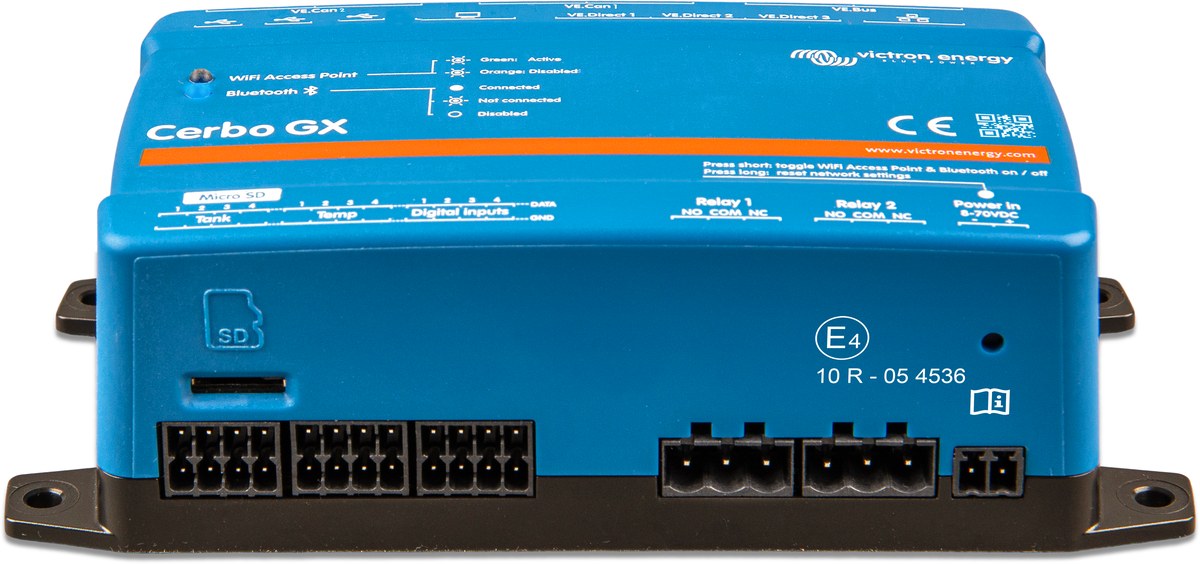
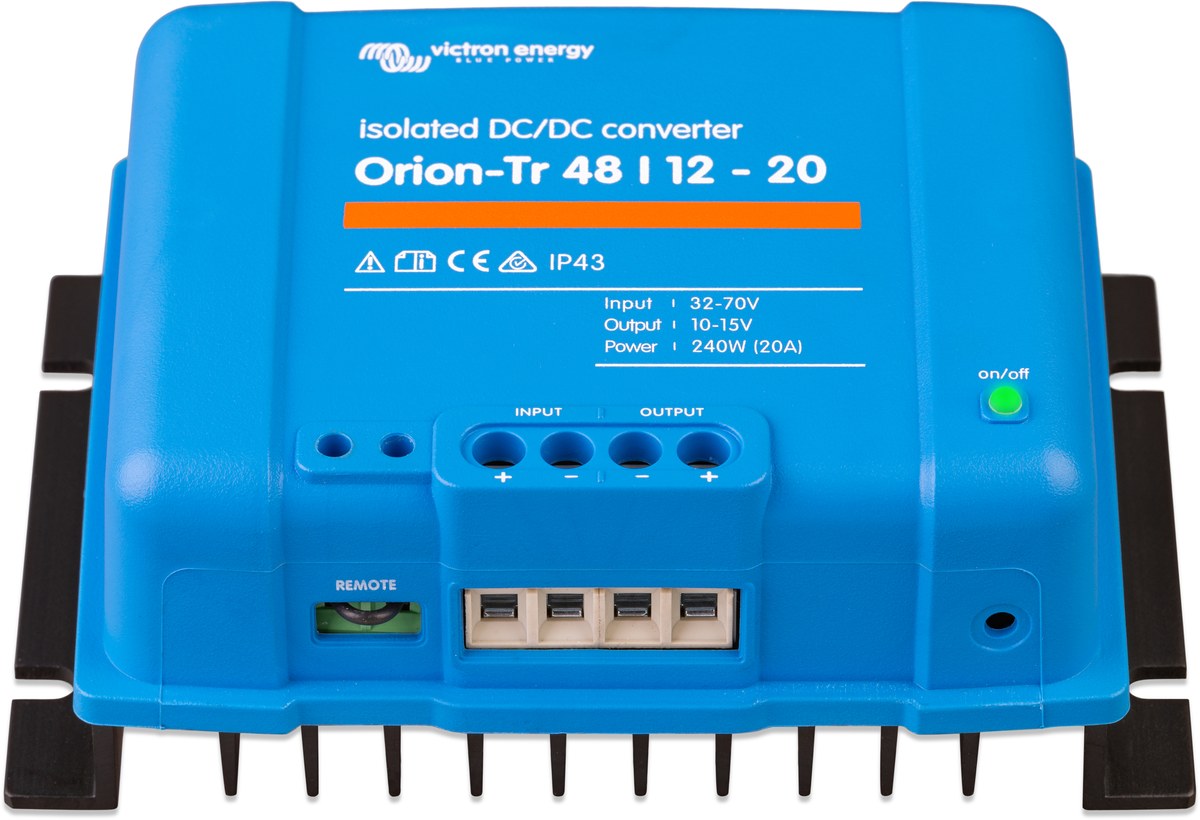
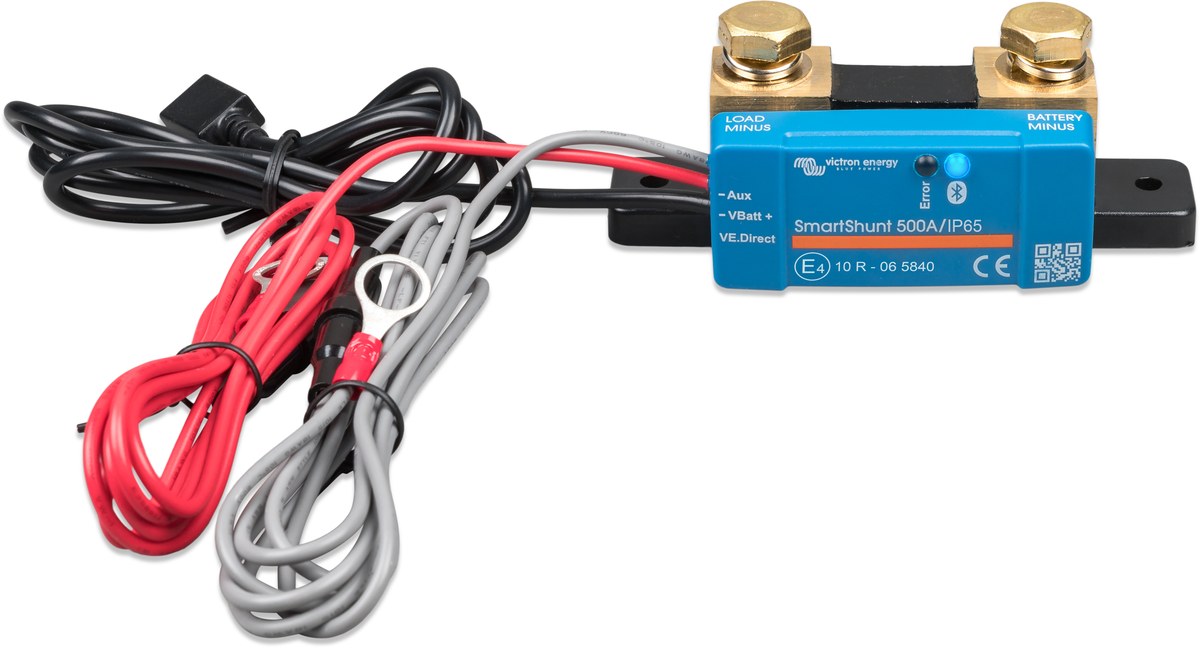
Every conventional van build has three charge paths: solar, shore, and a DC-DC converter fed by the engine's alternator while driving. On a BEV that third path does not exist. Solar and shore power are the entire input side of the ledger, and §5.6 below shows solar covers roughly one scenario out of three. Design accordingly, and read the traction-pack subsection before you assume the 173 kWh under the floor is available to you.
The analysis below made the case for 48 V and stands as written. The owner's call is 24 V, but the rooftop A/C decision reopens the A/C-specific part of that proof. The price is copper: ~208 A at full inverter output means 4/0 main runs and a 400 A Class T instead of 2 AWG. The bank becomes 6 × 24 V 100 Ah heated modules (same 15.36 kWh), the inverter a MultiPlus-II 24/5000/120-95, the DC-DC an Orion-Tr 24/12. Shore power and most downstream loads are unchanged; the A/C SKU, final roof array and energy model now need a fresh pass.
Two orders closed the electrical core. LiTime LT148307, $2,194.54: 2 × LiHeat 24 V 230 Ah dual-mode self-heating — 11.78 kWh, not the 15.36 kWh six-module Epoch bank specified below. Self-heating won over capacity, at a third of the Epoch price. Voltaico #27279, $2,102.16: MultiPlus-II 24/3000 (not the 24/5000 specified below), SmartSolar 250/60-Tr, Cerbo GX MK2, Lynx Distributor M10, SmartShunt 500 A, Orion-Tr 24/12-30, MEGA fuses, MK3-USB-C and two VE.Direct cables.
Three numbers below are now wrong on purpose, and the analysis is kept as the reasoning trail rather than rewritten: the 15.36 kWh bank is 11.78 kWh; the 5,000 VA inverter is 2,400 W continuous; and the copper follows it down — the inverter DC branch drops from ~210 A to ~125–140 A, so that leg is 1/0–2/0 with a 250 A Class T, not 4/0 with a 400 A. The smaller inverter also makes the Bosch ES4 interlock binding rather than optional: 2,400 W cannot run the water heater and the 1,800 W induction hob together.
Live per-line costs, actual against projected, are on the parts list.
5.1 · System voltage
The voltage math, as originally argued
Take a 15 kWh bank and a 3–5 kW inverter and the arithmetic decides it before any preference does.
| System | 15 kWh bank = | 3,000 W draws | 5,000 W draws | Cable required |
|---|---|---|---|---|
| 12 V | ~1,250 Ah | ~250 A | ~417 A | 4/0 for 3 kW; two parallel 4/0 per polarity at 5 kW |
| 24 V | ~625 Ah | ~125 A | ~208 A | 2/0 – 4/0 |
| 48 V | ~312 Ah | ~63 A | ~104 A | 2 AWG |
At 12 V, 15 kWh is 1,250 Ah of cells — a wall of batteries, a wall of copper, and a wall of money in lugs, busbars and Class T holders. At 48 V the same energy is three 100 Ah modules and 2 AWG. EXPLORIST.life's own threshold lands in the same place: past roughly 400–600 Ah at 12 V equivalent, or the moment you add air conditioning, go 24 V or 48 V.
The air conditioner is the actual tiebreaker
The good DC air conditioners for vans are 48 V native, and the amp gap is not marginal.
| Unit | Voltage | Eco-mode current | Notes |
|---|---|---|---|
| RecPro 48 V 13.5K heat pump | 48 V | ~6.3 A | ~1,500 W cooling input at full tilt; heat pump gives shoulder-season heat too |
| Velit 3000R | 48 V | ~6 A | Popular 48 V rooftop |
| Typical 12 V rooftop DC unit | 12 V | ~25–40 A | Roughly 4× the current for comparable output |
An air conditioner running overnight at 12 V is a 25–40 A continuous load through your entire distribution system. At 48 V it is ~6 A. Wire, fuses, disconnects and the shunt all shrink with it, and heat-pump heating becomes viable — which matters a great deal on a platform with no engine heat.
What 48 V buys
- 2 AWG instead of paralleled 4/0 on the main runs
- ~6 A air conditioning instead of ~30 A
- Three battery modules instead of a rack of them — ~180 lb total
- Heat-pump heating as a real option in shoulder season
- Every part that matters (inverter, MPPT, A/C) exists at 48 V
What it costs you
- Victron makes no 48 V DC-DC charger — Sterling if you need one
- Switchgear rated for 58 V+ DC is pricier across the board
- You still need 12 V: add a Victron Orion-Tr 48/12-20A isolated, ~$180
- Fewer plug-and-play 48 V appliances than the 12 V ecosystem
Battery bank
6 × 24 V 100 Ah heated LiFePO4 = 15.36 kWh at roughly $750–850 each (Epoch Essentials class — confirm heated 24 V SKUs at order). That is 600 Ah at 24 V, six modules in parallel with equal-length paralleling cables. More capacity is the same trap it always was: against the measured 2,310 lb ceiling (§4.7), which the current build already exceeds, every extra module's ~55 lb has to be bought back somewhere else, on top of the money and the recharge-capacity constraint.
LiFePO4 must not be charged below 0 °C. Charging a cold cell plates lithium metal onto the anode and the damage is permanent and invisible until capacity collapses. Buy heated modules and confirm the BMS has a low-temperature charge cutoff. On a vehicle with no engine heat parked in a Colorado winter, this is a matter of when, not if.
5.2 · Solar array
Three panels fit. Four do not.
Usable flat cargo roof is 4410 mm × 1820 mm per the Body Builder Manual. Modern 440–450 W residential panels in the MAH54 54-cell format are roughly 1722 mm × 1134 mm. Mount them portrait, side by side along the roof length, and the width math is brutal and simple.
| Config | Width needed | Available | Fits? |
|---|---|---|---|
| 3 panels (3 × 1134 mm) | 3,402 mm | 4,410 mm | Yes — ~1,000 mm spare for a fan or hatch |
| 4 panels (4 × 1134 mm) | 4,536 mm | 4,410 mm | No — short by 126 mm |
126 mm. Panel width tolerance will not save you, and you still need frame gaps for the clamps. Pre-A/C array: 3 × 440–450 W = 1,320–1,350 W. The rooftop A/C decision supersedes this as a final layout; keep it as the old ceiling until the roof is redrawn.
The 1722 × 1134 mm figure is inferred from the standard MAH54 format; the Aiko Nebular and Longi HiMo X10 datasheets were not retrievable during research (ENF's datasheet host returned 403). Three things to confirm on the physical van and the real datasheet before the rack is cut: (1) exact panel dimensions from the manufacturer PDF, (2) actual clear mounting length from the front air deflector to the rear door hinge hardware — 4410 mm is the panel, not necessarily 4410 mm of clear run, and (3) the M8 gutter-stud spacing, which sets crossbar placement.
| Panel | Watt | Approx size | Weight | Price signal |
|---|---|---|---|---|
| Aiko Nebular | 440 | ~1722 × 1134 mm | 8.6 kg | Premium; ABC cells, strong shade tolerance |
| Longi HiMo X10 | 560 | ~1990 mm long | heavier | ~$170 delivered — cheap per watt, too long for 3-across portrait |
| Generic 415–450 W residential | ~440 | ~1722 × 1134 mm | 9–11 kg | Cheapest $/W; verify exact dims before buying |
Aiko's 8.6 kg — about 57 lb for all three — is worth paying for on a roof you cannot weld to.
Mounting: everything loads into the M8 gutter studs
The cargo roof is a composite, non-metallic panel, not sheet steel. No welding, no magnets, no self-tappers into the skin, and no VHB-only bonding — composite plus thermal cycling plus 3.4 m of panel is a delamination story. The factory attachment points are M8 studs in the rain-gutter rails running the full length of both sides, and they are the only sanctioned load path. Span aluminum crossbars side to side, clamp panels to the crossbars, seal every stud interface with butyl plus a mechanical fastener, and leave ≥25 mm of air gap under the panels — hot panels lose 0.3–0.4 %/°C.
Since the panels are bought and the A/C and fan have to hang off the same structure, that mount is now drawn out as one frame rather than a solar rack: The roof frame — gutter-supported equipment structure →
Gutter-stud crossbars are a stronger, drier and more serviceable mount than the VHB-to-steel approach Transit and Sprinter builders use. The traction pack is under the floor, so the no-drill zones that matter are in the floor and lower body — overhead the risk is water intrusion and delamination, not high-voltage contact.
MPPT and stringing
Three panels in series at ~38 V Voc each gives ~114 V nominal at 25 °C and ~142 V at −10 °C. Cold-morning Voc is the number that destroys controllers.
| Controller | Price | Verdict |
|---|---|---|
| Victron SmartSolar 150/45 | ~$230 | 142 V cold against a 150 V hard ceiling — 8 V of margin. Too tight. |
| Victron SmartSolar 150/60 | ~$375 | Same voltage risk, more current headroom. Does not fix the real problem. |
| Victron SmartSolar 250/60 | ~$560 | Buy this. Removes cold-Voc risk entirely, leaves room for a 4th panel or a side array. |
A clear cold morning at −10 °C puts ~142 V on a 150 V controller. If the array is ever a touch colder, or Voc a touch higher than datasheet, the controller dies and Victron will not cover it. The 250 V unit costs under $200 more on a $14K system. There is no argument for the 150 V part here.
One series string of three is correct: higher voltage, thinner wire from roof to controller, and a single roof penetration. The tradeoff is shade sensitivity — one shaded panel drags the whole string, which Aiko's ABC cells partially offset. If you later add a side array, give it its own MPPT rather than paralleling into the roof string.
5.3 · Inverter and shore power
One MultiPlus-II, one 120 V leg
Victron MultiPlus-II 24/5000/120-95 120 V, ~$1,520.
| Spec | Value |
|---|---|
| Continuous output | 5,000 VA / ~4,000 W |
| Battery charger | 120 A at 24 V (~3.4 kW) |
| Max AC input passthrough | 50 A |
| AC input current limit | Adjustable 11 A – 100 A |
| PowerAssist | Yes — battery covers surges above the input limit |
The smaller 24/3000/70-32 is a reasonable downgrade if you skip resistive cooking, but the 5000 gives headroom for A/C compressor inrush stacked on an induction hob. Do not build split-phase. Two units gets you 8,000 W and 240 V for double the cost, weight and complexity, and nothing in this van needs 240 V.
The 50 A pedestal problem
This is the most consequential planning decision in the shore-power domain, and it is the opposite of what most builders assume.
A "50 A" pedestal is 50 A at 240 V split-phase — two 120 V legs. NEC 551.73(A)(1) rates it at 12 kVA, and the 80 % continuous rule caps usable draw at 40 A per leg, 9.6 kW total. Now put the van on it: the Zevo's onboard charger wants 48 A at 240 V = 11.5 kW, which exceeds the pedestal's continuous rating outright. You cannot run the van's charger at full rate on a 50 A pedestal at all.
| Van charge setting | Van draws/leg | Remaining/leg | Usable house power/leg |
|---|---|---|---|
| 48 A / 240 V (11.5 kW) | 48 A | over limit | Nothing — will not work |
| 32 A / 240 V (7.68 kW) | 32 A | 8 A | ~960 W |
| 24 A / 240 V (5.76 kW) | 24 A | 16 A | ~1,920 W |
| 16 A / 240 V (3.84 kW) | 16 A | 24 A | ~2,880 W |
| Van not charging | 0 | 40 A | ~4,800 W |
Campgrounds are installing RV PowerGate lockouts (~$29.95) that physically prevent using the 30 A and 50 A outlets on a pedestal simultaneously, explicitly because of EV charging. One operator, quoted by Mike Sokol: "I have to tell 3 or 4 campers a week that they can't use the 30A AND 50A — sometimes they are trying to charge an electric vehicle." Pedestal distribution is sized with NEC demand factors that assume the 30 A and 50 A outlets are not used at once, especially not against a continuous EV load.
Install a NEMA 14-50 inlet so you can take a full pedestal when one is available, then architect the house to be genuinely happy on one 120 V leg with the MultiPlus AC input current limit set to 8–16 A. PowerAssist covers surges out of the battery. Carry a TT-30 adapter and a 15 A adapter — plenty of sites are 30 A only, which is 3.6 kW total, 2.88 kW continuous, and still shared with the van.
5.4 · Distribution, protection, monitoring
Wire and fuse schedule
| Run | Load | Wire | Protection |
|---|---|---|---|
| Battery bank → busbar | 5 kW inverter, ~210 A peak | 4/0 | Class T 400 A |
| Busbar → MultiPlus-II | ~210 A | 4/0 | Class T 400 A |
| MPPT → battery busbar | ~56 A at the old 1,350 W roof max; rerun after final panel count | 6 AWG | 70 A breaker |
| Roof array → MPPT | ~11 A at ~114 V | 10 AWG PV wire | 15 A DC breaker + roof disconnect |
| 24 V → Orion-Tr 24/12-20A | ~12 A in | 10 AWG | 15 A |
| Orion 12 V out → 12 V fuse panel | 20 A | 8 AWG | 25 A |
| 24 V air conditioner | ~10–30 A | 8 AWG | 40 A DC breaker |
Every figure in that table is smaller than its 12 V equivalent. The inverter run is the one line that got heavier in the move from 48 V to 24 V — that is the copper tax, and it is paid once, on two short runs.
Monitoring
| Item | Price | Why |
|---|---|---|
| Victron SmartShunt 500 A | $86–226 | True state of charge. Non-negotiable — voltage is not SoC on LiFePO4. |
| Victron Cerbo GX + GX Touch | ~$300–600 | One pane of glass, remote monitoring via VRM, and the controller you need to run the water heater as a solar dump load (§06) |
| Victron Bluetooth on MPPT / MultiPlus | included | Baseline if you skip the Cerbo |
5.5 · Bill of materials
Core system, 2026 pricing
| # | Item | Qty | Unit | Ext. |
|---|---|---|---|---|
| 1 | 24 V 100 Ah heated LiFePO4 (Epoch Essentials class — confirm heated SKUs at order) | 6 | ~$800 | $4,800 |
| 2 | Victron MultiPlus-II 24/5000/120-95 120 V | 1 | ~$1,520 | $1,520 |
| 3 | Victron SmartSolar MPPT 250/60 | 1 | ~$560 | $560 |
| 4 | Solar panels ~440 W (Aiko Nebular class) | 3 | ~$260 | $780 |
| 5 | Roof rack — crossbars, clamps, M8 gutter-stud hardware | 1 set | ~$700 | $700 |
| 6 | Victron SmartShunt 500 A | 1 | $150 | $150 |
| 7 | Victron Orion-Tr 24/12-20A isolated | 1 | ~$150 | $150 |
| 8 | Rooftop A/C — exact SKU pending roof-layout and energy-model update | 1 | ~$2,100 | $2,100 |
| 9 | Class T fuses (400 A), holders, busbars, DC breakers, disconnects | 1 set | ~$750 | $750 |
| 10 | Cable (4/0, 6/8/10 AWG, PV wire, paralleling cables), lugs, heatshrink | 1 set | ~$500 | $500 |
| 11 | NEMA 14-50 inlet, shore cord, TT-30 + 15 A adapters | 1 set | ~$350 | $350 |
| 12 | Victron Cerbo GX + GX Touch (optional but recommended) | 1 | ~$500 | $500 |
| 13 | 12 V fuse panel, lights, fans, pump wiring | 1 set | ~$400 | $400 |
| Subtotal | ~$13,260 | |||
| 2 more modules → 20.5 kWh (optional) | 2 | ~$800 | +$1,600 | |
| Tilt-out side solar, 2 × 440 W + rack (optional) | 1 set | ~$1,200 | +$1,200 |
~$13.3K core, ~$16.1K fully loaded, self-installed. Add labor if not.
5.6 · Energy budget
What you use versus what the sun gives you
| Load | Hot summer (A/C ~14 h) | Mild shoulder | Cold winter (heat pump) |
|---|---|---|---|
| Air conditioning / heat pump | 10.5 kWh | 1.0 | 6.0 kWh |
| Refrigerator | 0.9 | 0.7 | 0.6 |
| Lights, fans, water pump | 0.4 | 0.4 | 0.5 |
| Laptop, Starlink, electronics | 1.2 | 1.2 | 1.2 |
| Induction cooking | 0.8 | 0.8 | 1.0 |
| Water heating | 0.5 | 0.5 | 0.8 |
| Inverter idle + conversion losses | 0.7 | 0.4 | 0.6 |
| Daily total | ~15.0 kWh | ~5.0 kWh | ~10.7 kWh |
Harvest, using daily kWh ≈ kWarray × PSH × 0.75 to account for soiling, heat, wiring, MPPT and tilt losses:
| Location / season | PSH | Daily harvest from 1.35 kW |
|---|---|---|
| Phoenix, summer | ~6.5 | ~6.6 kWh pre-A/C roof max; lower if the final layout drops a panel |
| Phoenix, annual average | ~6.0 | ~6.1 kWh |
| Mid-latitude, spring / fall | ~4.5 | ~4.6 kWh |
| Seattle, annual average | ~3.8 | ~3.8 kWh |
| Seattle / PNW, December | ~1.2 | ~1.2 kWh |
Annualized: 1 kW of array yields ~1,800 kWh/yr in Phoenix and ~1,100 kWh/yr in Seattle, so 1.35 kW is ~2,430 kWh/yr sunbelt, ~1,485 kWh/yr PNW.
| Scenario | Need/day | Solar/day | Deficit | Days on a full 15.36 kWh bank, no sun |
|---|---|---|---|---|
| Hot summer, Phoenix | 15.0 | 6.6 | −8.4 kWh | ~1.0 day |
| Mild shoulder, mid-latitude | 5.0 | 4.6 | −0.4 kWh | ~3.0 days |
| Cold winter, PNW | 10.7 | 1.2 | −9.5 kWh | ~1.4 days |
1.35 kW covers a mild shoulder-season day and essentially nothing else. Anyone selling "1.3 kW of solar for full-time off-grid with A/C" is wrong, and the roof geometry means you cannot fix it by adding panels — the fourth one does not fit. Combined with the absence of an alternator, this is the single hardest constraint in the build. Plan the year around it.
Four things actually close the gap, in order of how much they move the number:
Shore power, even crippled
8–16 A per leg is 1–2 kW, which is 10–20 kWh/day. That covers the worst case outright. The design decision in §5.3 — live happily on one throttled leg — is what makes this reliable rather than occasional.
The traction pack
173.3 kWh is an enormous reservoir and you have no clean path to it. The L1 EVSE workaround below is real but lossy, rate-limited and unmeasured. Treat it as a bridge for a bad week, not as an input you budget against.
Tilt-out side panels while parked
2–4 × 440 W on the cargo-box walls, deployed only when stationary. These do relatively better in winter, because low sun strikes a vertical surface more squarely. Cost: setup time, wind exposure, and a much more complex rack.
Fewer A/C hours
Shade, insulation, window covers and a good roof fan cut the 10.5 kWh cooling figure hard. On the demand side there is more headroom than on the supply side, because the supply side is capped by roof geometry.
The plumbing research assumes ~98 sq ft of roof supports "1,600–2,200 W" of solar and repeatedly plans against "~2 kW." The electrical research did the panel-fit arithmetic against the Body Builder Manual's 4410 × 1820 mm panel and landed at 1,320–1,350 W before rooftop A/C. The fit math wins — area alone does not account for panel format, clamp gaps, the fan, hatch, or now the A/C shroud. Where §06 sizes the water heater against a 2 kW array, mentally derate it hard and re-run again after the roof plan freezes.
5.7 · The traction pack
Can you tap the 173 kWh pack? No.
You cannot connect the house system to the Ultium pack. The HV system is a closed loop: an HVIL interlock that drops the contactors the moment a connector is disturbed, insulation monitoring that faults on an unexpected leakage path to chassis, and a contactor handshake the pack will not perform for a load it does not recognize. There is no sanctioned tap, no aftermarket adapter, and the failure modes here are arc-flash and a dead vehicle, not an inconvenience. Do not open the orange.
What the factory does offer for offboard power is small enough to be irrelevant to a house:
| Element | Value | Meaning |
|---|---|---|
| Occupant receptacle circuit | 60 A / ~720 W (F71UA + relay KR202) | The sanctioned tap. AC portion capped ~400 W. |
| V2L on 2024/25 vehicles | None | The 7.2 kW V2L capability is 2026-model hardware, and production ended. Not purchasable. |
| Accessory Mode | 30-second timeout | Deliberate, to prevent 12 V rundown. You cannot use it to hold the van awake. |
| Enhanced Battery Support Mode | 2 hours max, floor at 12 % SoC | Hard time limit and a hard reserve. |
| T-18 DC-DC fuse (F3UB) | 350 A | 4.2 kW theoretical. This is a fuse rating, not a capability rating. Fuses protect wires, not the delivery device. |
| T-18 engage / disengage | Engages below 12.56 V; disengages at 76.5–83.4 % SoC | It only turns on when the AGM sags, and it stops well before full. |
| Minimum L1 EVSE charge rate | 720 W (6 A × 120 V) | The floor cost of keeping the van awake by "charging" it. |
The community workaround, honestly
There is a real, working pattern, and it is worth understanding even though you should not build around it. It is not a direct tap — it is a loop that exploits the van's own DC-DC converter.
You plug the van's AC charge inlet into a Level 1 EVSE running off a ~1 kW inverter on your own house bank, drawing the 720 W minimum. That keeps the van awake and charging. While awake, the van's T-18 DC-DC converter pushes traction-pack energy down into the 12 V system whenever the AGM sags below 12.56 V. You tap that 12 V energy at the battery distribution fuse block, run it through a 12 V → 24 V charger, and it lands in your house bank. The traction pack is effectively feeding your house through the vehicle's own 12 V bus.
The efficiency chain is: traction pack → T-18 (~90 %) → 12 V AGM → 12 V-to-24 V charger (~90 %) → house bank, while simultaneously house bank → inverter (~92 %) → L1 EVSE → traction pack (~88 %). Keeping the van awake overnight at 720 W costs roughly 8+ kWh out of the house bank. Net gain is positive only if the T-18's sustained output substantially exceeds 720 W.
And nobody knows what the T-18 actually sustains. The 350 A fuse is not a spec, and the community has not measured the converter's real continuous output. This one unknown decides whether the whole trick is worth building. Measure it on your own van before you spend a dollar on it:
| Step | Procedure |
|---|---|
| 1 | Install a clamp meter or a temporary shunt on the T-18 output cable to the 12 V bus. |
| 2 | Draw the AGM below 12.56 V with a controlled resistive load to force T-18 engagement. |
| 3 | Log current continuously for 30+ minutes. |
| 4 | Record the current at which output plateaus, and watch for thermal derate. |
| 5 | Repeat at high ambient temperature. DC-DC converters derate hard when hot, and you will use this in July. |
If sustained output is ~100 A at 13.8 V (~1.4 kW), the loop nets ~700 W and is worth building. If it is 40 A (~550 W), you lose energy on every transaction.
The failure mode is that you drain the van's 80 Ah LN1 AGM below the point where the vehicle can wake up, and now you are stranded next to 173 kWh you cannot reach. Fit a Victron Smart BatteryProtect 12/24V-100A in series with any house-side tap of the van's 12 V system, with the low-voltage disconnect set at 12.6–12.8 V — above the 12.56 V T-18 trigger. Your house draw then disconnects before the AGM reaches a no-start state, while still letting it sag enough to invite the T-18 to engage.
Full safe implementation, in order:
| # | Step |
|---|---|
| 1 | Tap the 12 V system at the battery / distribution busbar, not the occupant receptacle fuse block. 720 W / 400 W is not worth the wiring. |
| 2 | Series-connect the BatteryProtect immediately at the tap, LVD ~12.6–12.8 V. |
| 3 | Fuse the tap at the source, within 7 inches of the connection. |
| 4 | Feed a 12 V → 24 V charger (Victron Orion-Tr 12/24 works here) into the house bank. |
| 5 | Set the charger's input current limit conservatively. Start at 30 A and raise only after measuring the T-18. |
| 6 | Log AGM voltage on the SmartShunt or Cerbo so you can watch the AGM's behavior across a full night. |
| Question | Verdict |
|---|---|
| Can you connect directly to the HV pack? | No. HVIL, insulation monitoring, contactor handshake. No upfitter takeoff exists. |
| Is there factory V2L? | No on 2024/25. The 7.2 kW capability is 2026-only hardware and production has ended. |
| Does the L1 EVSE / fuse-block loop work? | Yes, mechanically. |
| Is it efficient? | No. ~720 W of fixed overhead to harvest an unknown, limited flow. |
| Is it a substitute for shore power? | No. |
| Is it a valid emergency bridge? | Yes — that is its real job. A bad-weather week, a shore-less stretch, a winter night. |
| Should the house depend on it? | No. Build for solar plus shore. Treat the pack as a strategic reserve. |
| Prerequisite before relying on it | Measure the T-18's sustained output. |
Documented in the Body Builder Manual and the BrightDrop forum: the 400 W AC / 720 W DC offboard ceiling, the F3UB 350 A fuse, the 12.56 V engage and 76.5–83.4 % disengage thresholds, the 2-hour Enhanced Battery Support limit with a 12 % floor, the 30-second Accessory Mode timeout, and the 720 W L1 minimum. Not independently verified in the research: the specific HVIL / insulation-monitoring / contactor-handshake mechanism as the blocking cause, and the 7.2 kW 2026-only V2L figure. The conclusion — that there is no usable HV tap on a 2024/25 van — is well supported. The exact mechanism is worth confirming against the HV service documentation before you quote it to anyone.
5.8 · Failure modes
What breaks, and the backup
| Risk | Consequence | Mitigation |
|---|---|---|
| Winter solar collapse (PNW December, 1.2 kWh/day) | Bank dead in ~1.4 days | Shore power, side panels, or do not winter off-grid in the PNW |
| A/C on solar alone | Bank dead in ~1 day | Plan A/C hours around shore power or traction-pack top-ups |
| LiFePO4 charging below 0 °C | Permanent cell damage | Heated Epoch modules + BMS low-temp cutoff |
| Cold-morning MPPT overvoltage | Destroyed controller, warranty void | 250 V MPPT, not 150 V |
| Panel dimension error | Rack does not fit, 3-across fails | Verify datasheet dims before fabricating |
| Roof water intrusion | Composite delamination, interior damage | Load into gutter studs only; butyl + mechanical fastener; annual inspection |
| Pedestal lockout at a campground | No shore power for the house while the van charges | 30 A and 15 A adapters; low MultiPlus input limit; PowerAssist |
| Van 12 V AGM rundown | Van will not wake — the real stranding scenario | Smart BatteryProtect on any van-side tap, LVD above 12.56 V |
| Single-string shading | Large output loss from one shaded panel | Aiko ABC shade tolerance; park thoughtfully; second MPPT if you add a side array |
A 2 kW class inverter generator is the honest answer for extended winter or A/C-heavy off-grid stretches — it is the only thing on this list that does not depend on weather or a campground. A DC-input portable power station is worth carrying as a decoupled emergency reserve: it keeps the fridge and the CPAP-class loads alive if the main bank or the MultiPlus faults.
The electrical research cites GVWR ~9,900 lb and a nominal payload around 2,200 lb; the plumbing research cites GVWR 9,990 lb and payload ~3,230 lb from the CA HVIP spec sheet, and §04 of this document works from configuration-specific numbers (3,130 lb for AWD Standard with C7E). The spread is a GVWR-code and drivetrain difference, not a measurement error — but the house electrical system at ~400 lb installed sits inside every one of those envelopes. The payload question was settled on 19 August 2026: the jamb label on this van reads 2,310 lb (§4.7). The CAT-scale weigh of the finished van still stands as the final check.
- 25MY Chevrolet BrightDrop 400/600 Body Builder Manual — gmupfitter.com (local copy in
reference/brightdrop/): roof panel 4410 × 1820 mm, composite roof, M8 rain-gutter studs, fuse block maps (F3UB 350 A, F71UA / KR202 60 A / 720 W), 173.3 kWh pack, LN1 80 Ah AGM, 11.5 / 19.2 kW AC charging - BrightDrop Forum — power offboarding, T-18 charger, roof rails/racks, campervan buildout threads: T-18 engage 12.56 V / disengage 76.5–83.4 % SoC, Enhanced Battery Support 2 h / 12 % floor, 720 W L1 minimum, the 7.7 kW roof-plus-sidewall build
- 7Gen — BrightDrop best practices: Accessory Mode 30-second timeout, production status
- EXPLORIST.life — 12 V vs 24 V vs 48 V system voltage thresholds
- FarOutRide — DC air conditioner comparison: 48 V vs 12 V current draw, battery sizing
- Mike Sokol / RV Electricity — rvelectricity.substack.com: NEC 551.73(A)(1) 12 kVA pedestal rating, 80 % continuous rule, RV PowerGate 30/50 A lockouts, campground demand factors
- Victron Energy — MultiPlus-II 120 V lineup, AC input current limit 11–100 A, SmartSolar 150/45 and 250/60, SmartShunt, Orion-Tr 24/12-20A, Smart BatteryProtect
- Epoch Batteries, Velit, Aiko and Longi product pages — battery, A/C and panel specs, 2026 pricing
06Water, shower & toilet
As designed pre-purchase: 80 gallons fresh in two interior tanks, a 32 × 32 shower-only wet room, a Nature's Head in a separate dry cabinet, and 50 gallons of grey that gravity-drains through the rear overhang. Every tank is inside the box, because the Ultium pack owns the underfloor and there is only 7.51" of ground clearance.
This section was designed against an estimated ~3,230 lb payload. The measured ceiling is 2,310 lb (§4.7), and 80 gal of fresh water full is 668 lb the build no longer has. The locked spec is 16 gal fresh (~133 lb full) and roughly 22 gal grey — a fill every other day instead of every sixth. The physical constraints below (interior tanks only, no-drill underfloor, the rear-overhang drain, placement rules, winterization) all still govern and scale down cleanly. The capacity tables and the 2 × 40 tank recommendation are kept as the record of how the trade was reasoned, not as the shopping list.
The Body Builder Manual's "No drilling above HV Battery" prohibition covers the entire underfloor between the axles, and ground clearance is 7.51". Undermount fresh, grey and black tanks — the default answer on every other platform — are all impossible here. Nothing hangs below the frame: no tanks, no exposed valve bodies, no dump valve, no propane. That single constraint reshapes the plumbing, the freeze protection, and the floor plan.
| Constraint | Value | Consequence |
|---|---|---|
| Interior box | 168.9" L × 83.68" W × 82" H | A real bathroom is feasible, but 82" means you cannot raise the shower floor much |
| Between wheel housings | 53.53" | Anything ≤48" long × ≤18" wide drops into a tank bay cleanly |
| Floor height above ground | 26.39" | 2.2 ft of gravity head — grey drains without a pump |
| Ground clearance | 7.51" | Nothing below the frame |
| Underfloor between axles | Ultium HV pack, no-drill zone | All tanks interior, zero exceptions |
| Rear overhang | 72.57" | The only legal floor-penetration zone. Still contains 12 V (green), brake lines (red), HVAC plumbing (pink), and on AWD the rear drive unit |
| Rear cargo opening | 57.57" W × 73.44" H | A one-piece 32 × 32 × 68 shower surround physically fits through it. The curbside door is only 36.67" |
| Powertrain | BEV — no engine heat, no alternator, no fuel tank | Water heating and freeze protection are energy-budget problems, not afterthoughts |
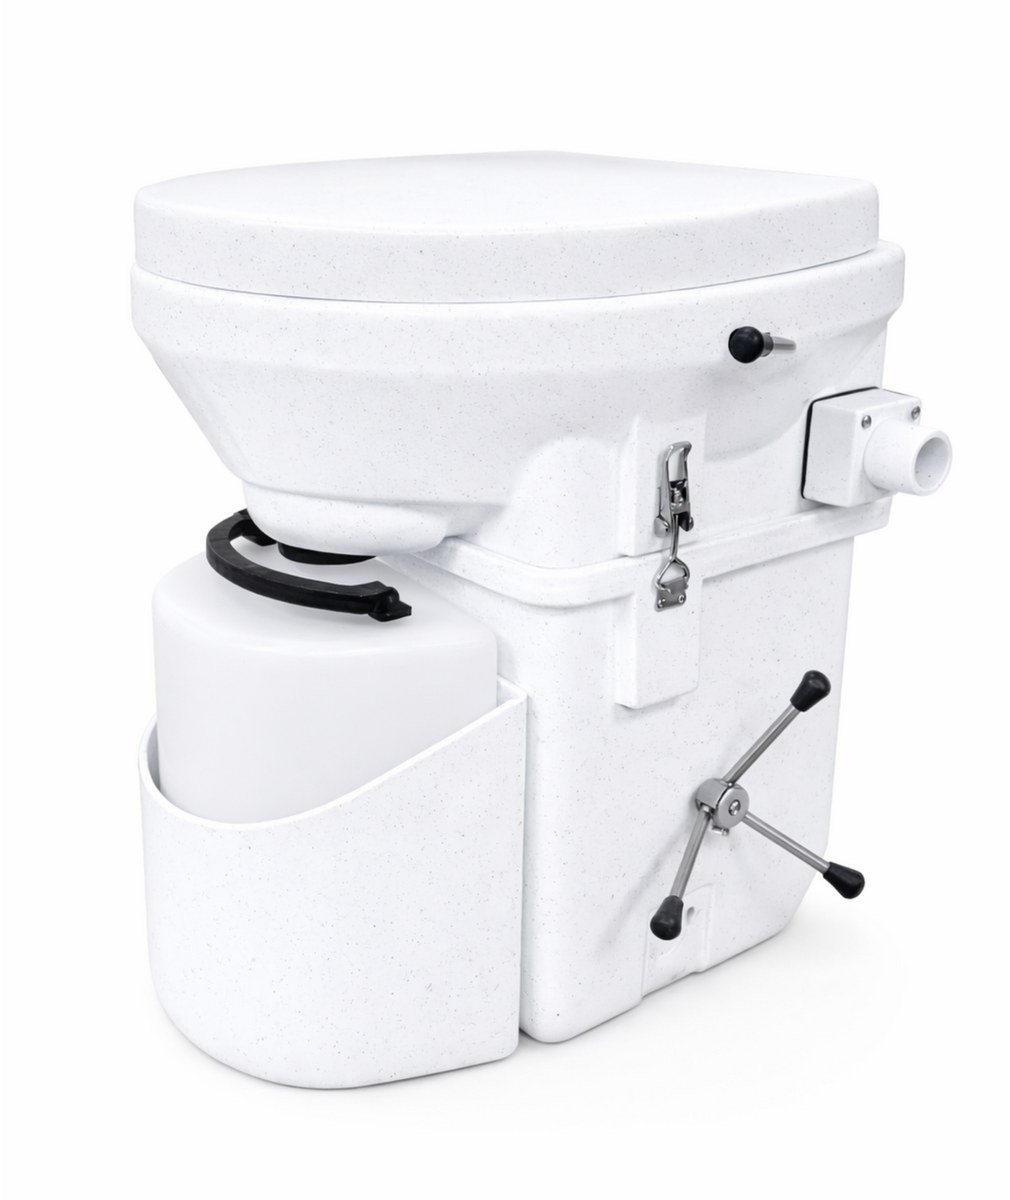
6.1 · Fresh water
Budget 12–14 gal/day, not the blog number
Published guidance clusters at 3–10 gal/person/day with showering as the swing factor. Build it bottom-up instead.
| Use | Disciplined | Realistic, month 8 |
|---|---|---|
| Drinking, 2 adults | 1.0 | 1.2 |
| Cooking | 0.5 | 1.0 |
| Dishes, cooking most meals | 1.5 | 3.0 |
| Hand, face, teeth | 1.0 | 1.5 |
| Showers, 2 × navy-style at 1.5 gpm | 4.0 (2 min ea.) | 9.0 (3 min ea.) |
| Dog and cat drinking | 0.3 | 0.4 |
| Dog wash / gear rinse, amortized | 0.3 | 0.7 |
| Total | 8.6 gal/day | 16.8 gal/day |
The disciplined number is achievable for a week. Nobody sustains it for a year. Design to 12–14 gal/day and accept that in month 8 they stop counting and burn 18.
| Fresh capacity | Days at 12 gal/day | Weight full | Verdict |
|---|---|---|---|
| 40 gal | 3.3 | 334 lb | Too small — you will chase water constantly |
| 60 gal | 5.0 | 501 lb | Workable minimum |
| 80 gal | 6.6 | 668 lb | Was the recommendation — superseded Aug 2026 by the 16 gal spec. A week between fills |
| 100 gal | 8.3 | 834 lb | Diminishing returns — grey becomes the binding constraint anyway |
80 gal split into two 40 gal tanks, for four reasons: redundancy if one cracks or gets contaminated; winterization granularity, so you can drain and bypass one and run on the other; weight distribution, symmetric about centerline instead of 668 lb in one corner; and fit — the Class A Customs T-4000 is 39.5 × 18 × 13", clearing the 53.53" wheel-housing gap easily at ~$120–180 each. The real reason to buy Class A Customs over a generic tank is that they will cut and weld bosses to your spec. If you would rather run one long tank in a wheel-housing channel, the T-5000 is 50 gal at 48 × 12 × 14".
The plumbing research sized against a ~3,230 lb payload and treated 80 gal (668 lb) as comfortable. §04 landed on a far tighter build and recommended a 40 → 20 gal water cut on day one. Both could not be true, and the door jamb settled it: the measured ceiling is 2,310 lb (§4.7), and the spec is now 16 gal fresh. The advice stands in general form: resolve water against your actual sticker before ordering tanks — it is the cheapest decision to change early and one of the most expensive later.
Placement
Fresh tanks go as far forward as practical, on the floor, low and centered, ahead of the rear axle. That loads the front axle, which is what a rear-heavy step-van build needs. Do not put fresh in the 72.57" rear overhang — 668 lb cantilevered four to six feet behind the axle unloads the front axle and degrades steering and braking. The overhang is for the drain penetration, light storage and the litter box, not mass.
Tanks sit on 3/4" ply pads with closed-cell foam between tank and pad, strapped with 2" ratchet or steel banding to floor-mounted L-track. Do not through-bolt the floor — use the eight factory 1,000 lb cargo tie-down points plus bonded and riveted L-track. A full 40 gal tank generates a real dynamic load under highway braking, so use internally baffled tanks or keep tank length ≤40".
Fill, vent and distribution
| Item | Spec / product | Notes |
|---|---|---|
| Fill inlet | Valterra A01-2004VP lockable dual inlet (city water + gravity fill), ~$45 | Lockable matters. People tamper with water inlets in cities. |
| Fill hose | 1-1/4" flexible potable hose, tank to inlet | Valterra spec: 1-1/4" or smaller |
| Tank vent | 1/2" ID hose from each tank top, routed up above the fill line, then out a high side-wall vent | Without it, gravity filling burps water back at you and the tank collapses on drawdown |
| Manifold | 1/2" PEX-A with expansion fittings (Uponor / Apollo), or JG push-to-connect | PEX-A survives a freeze cycle better than PEX-B or CPVC. Never rigid PVC for pressure lines in a vehicle. |
| Tank interconnect | 1" line between the two tanks with a ball valve | Closed = independent tanks. Open = they self-level as one 80 gal tank. |
| Low point drains | Two 1/2" ball valves at the lowest point of the pressure side | Non-negotiable for winterization |
Pump
| Pump | Flow | Draw | Pressure | Price | Notes |
|---|---|---|---|---|---|
| Shurflo 4008-101-E65 | 3.0 gpm | 7 A | 55 psi | $100–130 | Budget standard. Pulses. Needs an accumulator to feel civilized. |
| Shurflo 4048 Revolution | 4.0 gpm | ~10 A | 55 psi | $235–283 | Better. Still on/off cycling. |
| Remco Aquajet ARV (55AQUAJET-ARV) | 5.3 gpm | ~10 A | 60–75 psi variable | $300–380 | Recommended. 5-chamber variable speed, no separate pressure switch, self-primes to 13 ft. No accumulator needed. |
The Aquajet's variable-speed motor ramps to match demand instead of hammering on and off. That is the difference between "an RV shower" and "a shower," and it is the single most noticeable quality-of-life item in the water system. Energy is irrelevant — 10 A × 12 V = 120 W running, so a 3-minute shower is 6 Wh. Mount it on rubber isolation feet to a mass, not a thin panel, with 18" flexible pigtails on inlet and outlet. Hard-plumbing a pump to PEX transmits every pulse into the structure and you will hear it at 2 AM. If you go Shurflo instead, add a Shurflo 182-200 accumulator, ~$68.
Filtration — two independent chains
Chain A, inline at the fill hose. This is the most important and least discussed part: everything you fail to filter here lives in your tank for the next week. Exterior 2-stage housing on the fill line — 5 micron spun-poly sediment, then 0.5 micron carbon block for chlorine, taste and VOCs. Clearsource Premier/Ultra, or DIY with a pair of 10" × 2.5" Big Blue housings and garden-hose adapters (~$120 DIY versus $500+ branded).
Chain B, under-sink at the drinking tap only. A 0.2 micron absolute hollow-fiber or ceramic cartridge — the bacteria and cyst barrier, and it is passive with no power draw.
Acuva Technology ceased operations in 2024. Units are still being sold as new-old-stock with no support and no replacement cartridges. UV-LED polish is a fine optional layer, but do not build a critical path around Acuva.
Skip whole-system RO. Standard RO wastes 2–4 gallons per gallon produced, which on a 12 gal/day budget is catastrophic. But desert Southwest water — Quartzsite, Slab City, parts of NM and AZ — is genuinely awful, high TDS and tasting like a pool. The compromise is a countertop zero-plumbing unit, Bluevua RO100ROPOT or AquaTru, ~$350–450, run only when parked with water available, with reject water captured in a jug and used for rinsing.
Sanitization: 1/4 cup household bleach per 15 gal of tank capacity, circulate through every tap, sit 4 hours, drain, double-rinse. Every 6 months, plus any time the van sits more than 3 weeks with water aboard.
Winterization on a vehicle with no engine heat
This is the hardest problem in the build. On a diesel van the engine block is a 200 lb thermal battery you recharge every time you drive. You have none of that. If the house battery dies at 15 °F, the plumbing freezes and there is no fallback.
| # | Layer | Detail |
|---|---|---|
| 1 | Everything inside the insulated envelope | No exterior plumbing anywhere except the ~6" self-draining drain stub in the rear overhang. Tanks, pump, filters, manifold, heater and especially the grey dump valve all live inside. |
| 2 | Insulate like you mean it | Ribs every ~16" are perfect thermal bridges. Thinsulate plus closed-cell foam board on the ribs, not just between them. This matters more than any heater choice. |
| 3 | Fuel-fired heat is mandatory | Electric resistance cabin heat on a BEV is a non-starter: 1,500 W × 16 h = 24 kWh/day, more than the roof makes in a week in December. Espar Airtronic S3 D2L, 2.2 kW, 0.03–0.28 L/h, 1–3 A draw, ~0.25 gal diesel per cold day. |
| 4 | Aux diesel tank | BEVs have no fuel tank, so you install one. 5–10 gal, and it cannot go under the floor between the axles. Rear-overhang mount or a sealed, vented interior locker with an exterior fill. |
| 5 | 12 V tank pads, backstop only | Facon / ULTRAHEAT adhesive pads, 40–80 W, thermostatic at 45 °F. A 60 W pad for 24 h is 1.44 kWh/day per tank. Three tanks is 2.9 kWh/day — more than a December harvest. Emergency use, not a heating plan. |
| 6 | HepvO waterless traps everywhere | Drain Master 1.5", ~$40. No trap water to freeze, none to slosh out on the interstate and let tank odor into the cabin. Strictly better than a P-trap in a vehicle. |
| 7 | A real winterize path that gets used | Low-point drains, a Camco blow-out plug, 2–3 gal of RV antifreeze. Park in Montana in January, drain it and use the bathhouse. Refusing to accept this is how people crack tanks. |
The winter plan will become "chase 40 °F." Almost every full-timer converges on this. Budget the system for shoulder season and accept that hard winter means either a diesel heater running continuously — fuel cost, noise, exhaust smell on startup — or heading south.
07Climate & pet safety
Heating this van is a solved problem that costs about two dollars a night. Cooling it is not solved, and on a vehicle with no alternator it may not be solvable off-grid. A 484 sq ft envelope, provisional roof solar, and a cat that cannot be walked out of a hot box are the three facts that set everything below.
Heating and cooling are not symmetric problems here. Diesel heat costs 0.3 kWh and ~$2 per winter night. Running air conditioning around the clock in 95 °F costs 8.5 kWh/day for the A/C alone, 13.0 kWh/day with the rest of the house, against a pre-rooftop-A/C best-case summer harvest of 6.6 kWh/day. If the final roof layout drops to two panels, the deficit gets worse.
On a gas Sprinter you close that gap by idling the engine or by fitting a 280 A alternator charger that dumps 3–5 kW into the bank while you drive. This van has no alternator and a 400 W offboarding ceiling. Driving all day adds essentially nothing to the house bank. There is no engineering fix; there is only itinerary, shore power, and shade. §7.4 does the arithmetic honestly and it does not come out well.
7.1 · The envelope
You are insulating twice a van
Every BTU number on this page traces back to one figure. The cargo box is 168.9" × 83.68" × 82", which is 14.07 × 6.97 × 6.83 ft, and the surfaces add up like this.
| Surface | Area |
|---|---|
| Floor | 98 sq ft |
| Ceiling | 98 sq ft |
| Two sides | 192 sq ft |
| Bulkhead + rear doors | 95 sq ft |
| Total envelope | ~484 sq ft |
A 144" Sprinter envelope is roughly 300 sq ft. You have ~60 % more surface area to lose heat through, and against a 170 EXT you are still conditioning roughly twice the air volume — 614 cu ft. Every heater and A/C sizing figure written for a Sprinter build understates your job, and every insulation line item is ~60 % more material at the same spec: $900 / $1,600 / $2,500 low / mid / high for the full envelope.
Conduction loss is area × ΔT ÷ R. At 484 sq ft and a 70 °F interior:
| Effective R | 40 °F out | 20 °F out | 0 °F out | −10 °F out |
|---|---|---|---|---|
| R-3 — bare metal + trim | 4,850 | 8,080 | 11,320 | 12,930 |
| R-5 — 1" foam, sloppy | 2,910 | 4,850 | 6,790 | 7,760 |
| R-7 — 2" polyiso, realistic | 2,080 | 3,460 | 4,850 | 5,540 |
| R-10 — 2" + full thermal break | 1,455 | 2,425 | 3,395 | 3,880 |
Builders on the BrightDrop forum cite "R10 2-inch rigid foam board on 90 % of the interior" and then plan against R-10. Nominal R-10 through a ribbed body with steel structure every ~16" delivers roughly R-6 to R-7 effective once thermal bridging is accounted for. The ribs are the leak. Foam board over the ribs, not only between them, is what moves you from R-5 to R-7, and it is worth more than any heater upgrade you could buy with the same money.
Add infiltration at ACH × volume × 0.018 × ΔT: at 1 ACH and ΔT 50 on 614 cu ft that is only ~550 BTU/hr; at a leaky 2 ACH and ΔT 70 it is ~1,550 BTU/hr. Diesel air heaters are sealed-combustion — they draw combustion air from outside and vent outside — so the heater itself adds nothing to this term.
| Outside temp | Total heat demand (R-7, 1 ACH) |
|---|---|
| 40 °F | ~2,450 BTU/hr |
| 20 °F | ~4,000 BTU/hr |
| 0 °F | ~5,600 BTU/hr |
| −10 °F | ~6,400 BTU/hr |
7.2 · Heating
Espar Airtronic S3 D2L, and it is the easy part of this section
2.2 kW = 7,506 BTU/hr. Against 5,600 BTU/hr of demand at 0 °F that is 75 % duty cycle — near-continuous, but it holds. At 20 °F it loafs at 53 %. Below −10 °F you are at 85 % and losing ground, which is the correct place for a full-time van to give up and drive south.
Do not oversize to 4 kW to chase −20 °F. An oversized diesel heater spends its life at minimum output, and low-output running is exactly the condition that carbons up the combustion chamber. Insulation quality, not heater size, is the deciding variable. In a sloppy R-5 build the same 2.2 kW unit is hopeless below ~25 °F, and no heater purchase fixes that.
| Unit | Output | Fuel | Run draw | Cost | Notes |
|---|---|---|---|---|---|
| Espar Airtronic S3 D2L | 2.2 kW / 7,500 BTU | 0.03–0.28 L/hr | 1–3 A | ~$1,200 installed | The pick. Best parts and service path in North America |
| Webasto Air Top 2000 STC | 3,100–7,000 BTU | 0.03–0.06 gal/hr | 14–29 W | $1,300–1,600 kit | Equally good. Documented, serviceable, altitude variants exist |
| Velit diesel/gasoline | 4 kW / 14,000 BTU | — | — | mid | Altitude compensation, verified to 11,000 ft. Built-in CO + combustible-gas sensors |
| Propex HS2000 (propane) | 6,500 BTU | 1 lb / 3 hr | 1.4–1.9 A | $700–900 | No soot, no priming, no altitude fouling — but propane storage on this van is its own problem |
| Chinese clone 2 kW | claimed 2 kW | similar | 8–12 A start | $150–300 | Buy one as a shelf spare, not as the primary |
| Electric resistance | 3,400 BTU/kW | n/a | 1,000–2,000 W | cheap | Non-starter off-grid. See below |
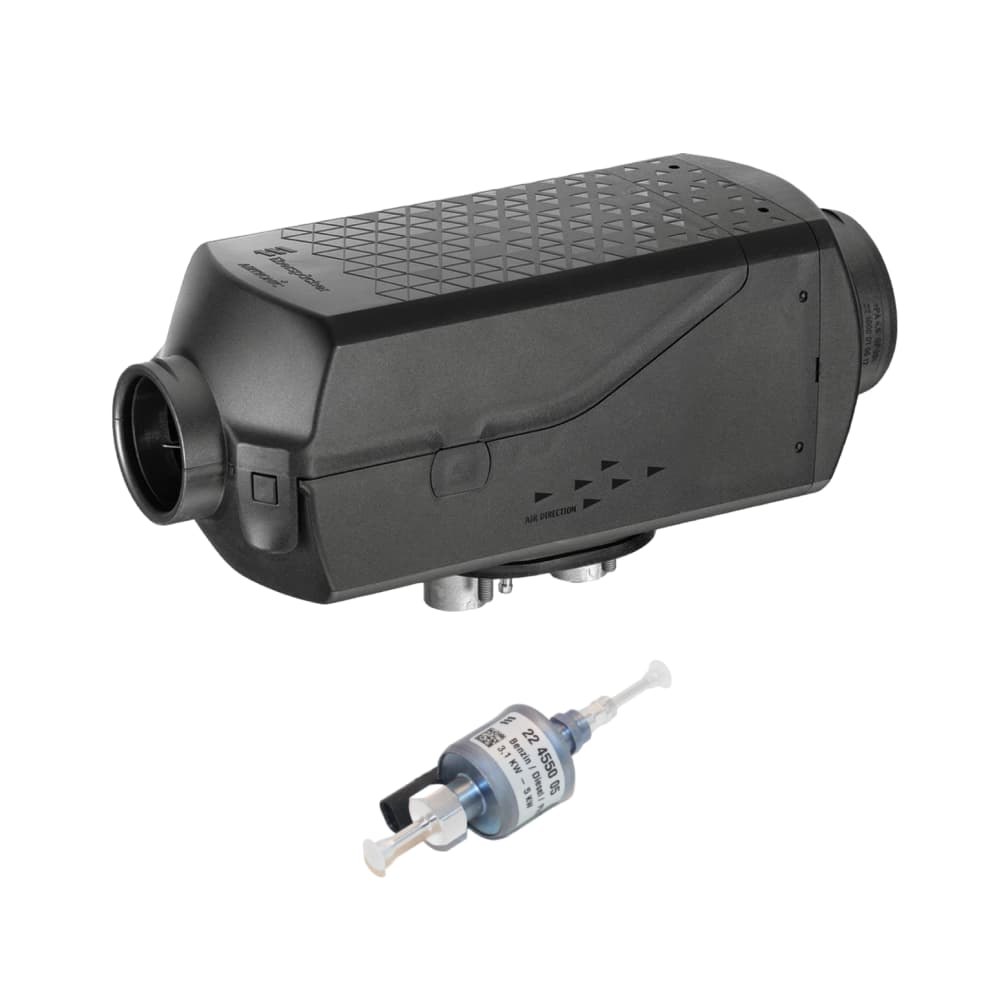
Why a diesel tank on an electric van is not a compromise
Builders feel weird about this and say so on the forum: "something just doesn't feel right about having this excellent electric van and adding a diesel tank to it." The physics does not care. Heating the box through a 12-hour winter night takes roughly 48,000 BTU. That is either:
| Path | Fuel | House-bank cost | Cash | Days of winter solar to replace |
|---|---|---|---|---|
| Diesel air heater | ~0.41 gal | ~0.3 kWh | ~$1.65 | 0.08 days |
| Electric resistance | — | ~14.1 kWh | — | 3.9 days |
48,000 BTU ÷ 3,412 BTU/kWh = 14.1 kWh, which is 92 % of the entire 15.36 kWh bank for one night, and at a winter harvest of 3.6 kWh/day it takes almost four days of sun to put back. Diesel does the same job for 0.3 kWh — under 2 % of the bank, and 8 % of a single winter day's harvest. And you cannot pull the difference from the traction pack: 400 W of offboarding is 9.6 kWh/day at absolute best, before conversion losses, and §5.7 explains why you should not build around it at all.
Run §05's winter load column both ways. With a heat pump doing cabin heat: 10.7 kWh/day against 3.6 kWh of solar = −7.1 kWh/day, and the bank is flat in under two days. With the Espar carrying the heat and the heat pump off: 4.7 kWh of house loads + 0.3 kWh of heater = 5.0 kWh/day against 3.6 = −1.4 kWh/day. Same van, same weather. A $1,200 heater and a five-gallon tank convert an unlivable winter into a manageable one. Nothing else in this build has that leverage.
The green accounting also survives contact: you burn roughly 50 gallons a year for heat, against a vehicle that is otherwise displacing thousands of miles of gasoline.
Fuel tank: 5 gallons, and it cannot go under the floor
The Ultium pack owns the underfloor between the axles and the center aisle sits directly over it. That kills the obvious mounting location, exactly as it killed undermount water tanks in §06. Real options:
| Location | Assessment |
|---|---|
| Rear bumper / spare-tire area box | Recommended. The 600 mounts its spare underneath, unlike the 400, so the area is available. Clean, outboard, no fumes inside |
| Outboard of frame, behind rear wheels | Extended vans have usable space here. Add a weathertight access port |
| Side / door-well sealed box | Acceptable if genuinely sealed and outside-vented. Less elegant |
| RotoPax on a rear-door carrier | Easy refill, easy theft, visually obvious. Fine as a reserve can |
| Interior tank in a cabinet | Least preferred. Only in a hard vented enclosure. Diesel smell is very hard to fully contain and you live in here |
Size it at 5 gallons, 10 if the rear box allows. At 0.41 gal per 20 °F night that is 12 nights on 5 gallons and 24 on 10; measured as runtime it is 5 ÷ 0.04 gal/hr ≈ 125 hours. Bigger buys nothing but weight against the measured 2,310 lb ceiling. Useful fact that removes a whole category of worry: the fuel pump will lift far more vertical rise than you will ever ask of it, so tank placement is a packaging decision, not a hydraulics one.
Electrical, and wiring for the surge
| Phase | Draw @ 12 V | Duration |
|---|---|---|
| Glow plug / startup | 8–12 A (~100–145 W); some units 17–18 A | 2–3 min |
| Ramp-down after shutdown | ~8 A | 5–10 min |
| Steady running | 1–3 A (~15–35 W) | continuous |
A 12-hour night averaging ~2 A is 24 Ah at 12 V — ~0.3 kWh, under 2 % of the bank. But wire it for the surge, not the average: 15 A circuit minimum for the 2.2 kW unit. A 10 A fuse will nuisance-blow on the glow plug on every single start, at 3 AM, in February. The heater runs off the 12 V bus fed by the Orion-Tr 24/12-20A from §5.1, and it should be one of the last loads the BatteryProtect ever sheds.
Prefer a heater that modulates output over one that hard-cycles. Every thermostat restart is another glow-plug surge and another cold-start soot event, and over a winter the difference shows up in combustion-chamber life, not in the energy budget.
Standard diesel heaters — clones and genuine Espar/Webasto alike — do not compensate air/fuel ratio for altitude. They soot and foul at elevation. If the year includes Colorado, Utah or the Sierra, this becomes a recurring decarbonize-the-burner chore. This is the specific reason forum builders point at Velit, verified working at 11,000 ft with built-in CO and combustible-gas sensors. If your route is mountain-heavy, buy the altitude-compensating unit or the Espar high-altitude kit up front.
You are sleeping in a sealed metal box, unattended, with two animals, all winter. The failure that matters is a cracked heat exchanger putting carbon monoxide into that box, and neither you nor the cat wakes up to argue about it. Two CO detectors, one low and one at sleeping height, replaced on schedule, on a circuit that does not depend on the house inverter. This is not a place to have opinions about cost.
Layered heating architecture
Espar S3 D2L, ducted low
2.2 kW, rear-bumper tank, ducted low along both sides so the floor is the warm surface. Cold air falls in a 6.8 ft box; ceiling registers heat your head and leave the dog on a cold floor.
Resistive heat on shore power
Electric mats or a small resistive heater, used only when plugged in. Free comfort, zero fuel, zero noise, zero exhaust smell. Never a plan when off-grid.
A clone on the shelf
$200 buys a spare heater whose glow plug, fuel pump and gaskets largely interchange with the Espar. Better redundancy per dollar and per pound than a second install.
Two CO detectors
One low, one at sleeping height. Independent power. Test monthly, not annually. Add the fuel-line and exhaust inspection to the same monthly walk-around.
7.3 · Cooling — the hardware
Cooling is not the mirror image of heating
Heat loss scales with ΔT. Cooling load does not, because solar gain dominates and this van has 98 sq ft of roof pointed at the sun. At a 75 °F interior, effective R-7, two adults, a dog, a cat and a compressor fridge:
| Component | 95 °F ambient | 105 °F ambient | 80 °F night, shaded |
|---|---|---|---|
| Conduction | 1,390 | 2,080 | 350 |
| Solar gain (roof + sun wall) | ~1,550 | ~1,700 | 0 |
| Internal — people, pets, fridge, electronics | ~1,450 | ~1,450 | ~1,450 |
| Infiltration + latent | ~400 | ~600 | ~200 |
| Total | ~4,800 BTU/hr | ~5,800 BTU/hr | ~2,000 BTU/hr |
Solar gain is 32 % of the daytime load and it is the cheapest term to attack: a white roof, a reflective awning on the sun side, and a windshield cover cut it materially for a few hundred dollars. In the Gulf Coast and Southeast, add 30–50 % to the latent portion — a marginally sized unit will hold temperature and leave the van clammy, which is how mildew starts in month eight.
12 V versus 48 V, in amps
§5.1 carried the voltage analysis — the build has since settled at 24 V (see the §05 decision note) — and the air conditioner was the tiebreaker on going native-DC at all. This is the table.
| Unit | Nominal BTU | Volts | Running watts | Current | Weight |
|---|---|---|---|---|---|
| Nomadic Cooling X3 | 12,380 | 12 / 48 V | ~523 W eco (5,216 BTU, COP 2.92) | 11 A @ 48 V eco; 65–105 A @ 12 V max | 57.3 lb |
| Velit 2000U under-bench (official 2026 spec) | 8,000 | 12 / 24 / 48 V | 700 W | 10–33 A @ 24 V; 20–60 A @ 12 V | 36.4 lb |
| Velit 2000R rooftop | 8,000 | 12 / 24 / 48 V | same class | same class | — |
| Dometic RTX2000 | 6,824 | 12 V | ~230 W eco | 10–58 A (120–700 W) | 70.6 lb |
| Mabru SC12DC (marine) | 12,000 | 12 V | 528 W | 44 A | — |
| Cruise N Comfort | 5,000–8,000 | 12 / 24 / 48 V | — | 38–46 A @ 12 V | — |
| EcoFlow Wave 3 (portable) | 6,100 cool | 120 V / DC | 425–690 W observed | — | portable |
Same cooling work, one quarter of the current. A 12 V rooftop unit is a 25–60 A continuous load dragged through every busbar, fuse, shunt and disconnect in the van, for ten hours a night, for a year. At 48 V it is 6–15 A and the whole distribution system shrinks around it.
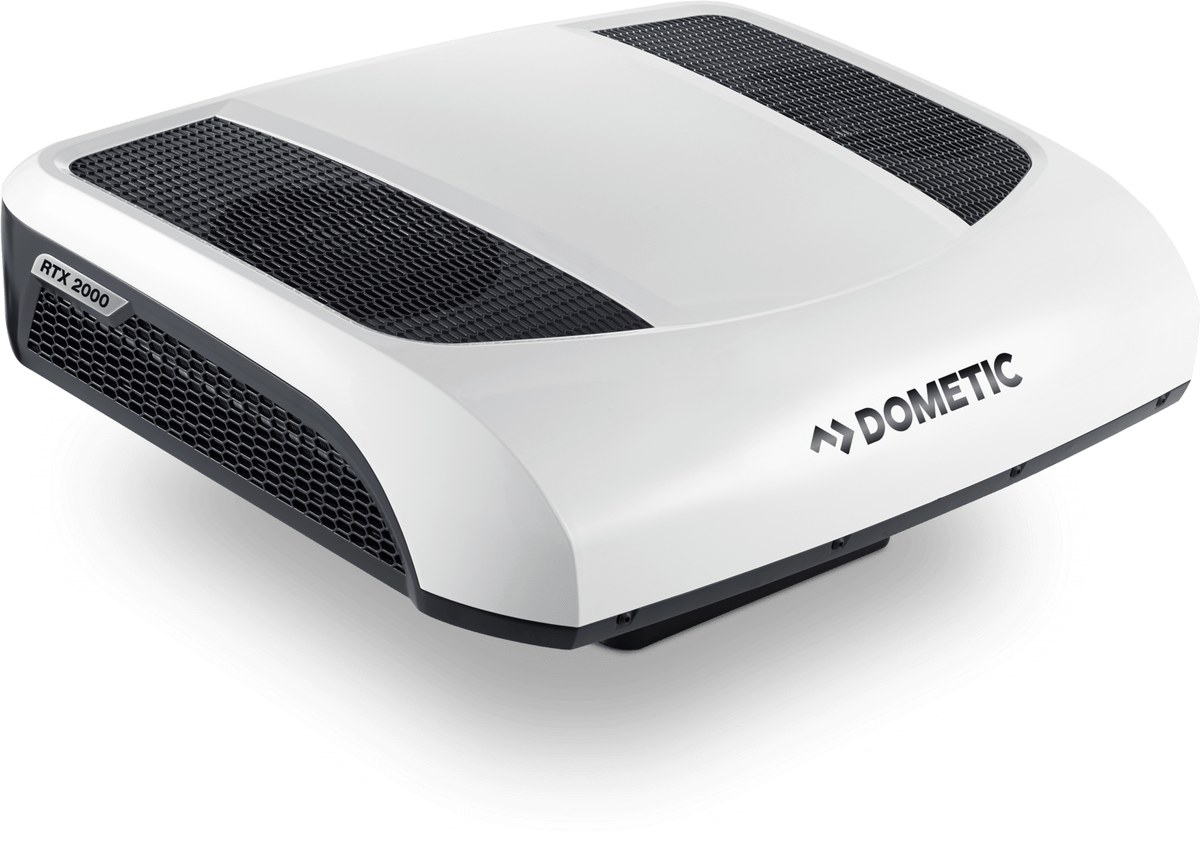
Every unit above uses a variable-speed DC inverter compressor. They soft-start, with none of the 3–5× locked-rotor inrush of a conventional 120 V RV rooftop A/C. That is the single biggest advantage of native DC over running a residential unit through the MultiPlus. Size wiring to the max-mode figure — 105 A at 48 V for a Nomadic X3 at full tilt — not to a surge multiplier.
Rooftop A/C is the current design direction
The earlier version of this page picked the under-bench Velit to preserve roof solar. That is now superseded: the build direction is rooftop A/C, with the exact SKU and panel layout still pending. Treat every solar-harvest number in this section as provisional until the roof plan is re-laid around the A/C shroud, roof fans, service clearance and wiring paths.
| Choice | Array | Summer harvest | Cooling capacity | Duty @ 95 °F |
|---|---|---|---|---|
| Rooftop A/C, provisional 2-panel case | 900 W | 4.4 kWh/day | 7,500–12,380 BTU | 39–70 %* |
| Under-bench Velit 2000U, former plan | 1,350 W | 6.6 kWh/day | 8,000 BTU | 64 %* |
* Duty-cycle and harvest figures are placeholders from the pre-rooftop-A/C model. The final table needs the chosen rooftop unit, measured roof clearances and updated panel geometry.
450 W of lost array × 6.5 PSH × 0.75 derate = 2.2 kWh/day of harvest surrendered, every sunny day the third panel does not fit. The reason to spend that energy is not a spreadsheet win; it is packaging, field serviceability, roof-mounted airflow, and not giving up interior bench volume to an under-bench unit. The trade is real and should stay visible until the rooftop SKU is picked.
Why rooftop is being chosen anyway
- Does not consume the interior bench volume the layout needs for storage
- Uses the best-supported RV A/C form factor in the field
- Keeps condensate and service access out of the finished cabinetry
- Can buy more cooling headroom if the SKU lands closer to Nomadic X3 than RTX2000
- Forces the roof-layout conflict into the open before parts are ordered
What it costs you
- Likely loses one 440–450 W panel unless the final roof geometry proves otherwise
- Adds roof mass and another roof penetration on a composite box
- Can shadow adjacent panels if the layout is lazy
- Raises height and aero drag slightly on a van already sensitive to drag
- Still does not make Southwest summer off-grid living pencil without route discipline
7.4 · What cooling actually costs
The overnight number is fine. The 24/7 number is not.
Duty cycle first, against the loads in §7.3:
| Unit | Duty @ 95 °F (4,800 BTU/hr) | Duty @ 105 °F (5,800 BTU/hr) |
|---|---|---|
| Dometic RTX2000 — 6,824 BTU | 70 % — holds, barely | 85 %+ — loses setpoint in afternoon sun |
| Velit 2000U — 8,000 BTU | 64 %* | 77 %* |
| Nomadic X3 48 V — 12,380 BTU | 39 % — comfortable | 47 % — comfortable |
Now energy. Overnight only: 10 hr × ~2,000 BTU/hr = 20,000 BTU = 5.9 kWh thermal, ÷ COP 3 = ~2.0 kWh, call it 2.0–2.5 kWh with a warm start. 24/7 at 95 °F: ~3,500 BTU/hr average × 24 = 84,000 BTU = 24.6 kWh thermal ÷ 2.9 = ~8.5 kWh. 24/7 at 105 °F, where COP degrades to ~2.6: 12–14 kWh.
Then add the rest of the house. §5.6's summer column minus the A/C line is 4.5 kWh/day — fridge, lights, pumps, Starlink, laptops, induction, water heat, inverter idle. That addition is what turns the research's cheerful overnight verdict into something bleaker.
| Scenario | A/C | House | Total | Solar | Net | Days on a full bank |
|---|---|---|---|---|---|---|
| Overnight only, shaded | 2.0–2.5 | 4.5 | 6.5–7.0 | 6.6 | +0.1 to −0.4 | indefinite, on a good day |
| 24/7, 95 °F day | 8.5 | 4.5 | 13.0 | 6.6 | −6.4 | ~2.2 days |
| 24/7, 105 °F desert | 12–14 | 4.5 | 16.5–18.5 | 6.6 | −10 to −12 | ~1.3 days |
| 24/7 on shore power | 8.5–14 | 4.5 | 13.0–18.5 | 10–20 | positive | unlimited |
Days-on-bank uses 13.8 kWh usable out of 15.36 kWh, holding a 10 % floor. Note what the first row actually says: even overnight-only cooling is break-even, not comfortable. The research's cheerful "2.5 kWh against 6 kWh of harvest" verdict is true only if you ignore the fridge, Starlink and the induction hob, and you cannot ignore them. One overcast day and overnight-only cooling is also in deficit.
Three separate exits are closed at once. You cannot add panels — the fourth misses the roof by 126 mm. You cannot charge while driving — no alternator to pull from. You cannot tap the traction pack — 400 W AC / 720 W DC offboarding on 2024/2025 vehicles, and the 7.2 kW module cannot be retrofitted; a confirmed owner report on the BrightDrop forum says so plainly.
So you will sit next to a 173 kWh battery, in 105 °F, watching a 15.36 kWh house bank die in 31 hours. That sentence is the entire argument against this platform, and it should be weighed before the deposit, not after the build.
Five things move the number, in order of how much:
Change the itinerary
Elevation and latitude are free air conditioning. 7,000 ft in July is 20 °F cooler than the valley and the 105 °F column simply stops existing. This is the real answer and everything else is a rounding error against it.
Shore power, even throttled
10–20 kWh/day off one crippled leg covers the worst case outright. In practice this means paid hookups in July — budget it as a real recurring line, not an occasional treat.
Kill the solar gain
White roof, reflective awning on the sun side, windshield cover, and park under a tree by default. Cheapest BTU you will ever remove, and it is a third of the daytime load.
A bigger bank
A fourth Epoch module takes you to 20.48 kWh and turns a 1.3-day desert deficit into a 1.7-day one. It converts a daily crisis into a two-day one; it does not create energy.
A 2 kW inverter generator
The only item on this list that does not depend on weather or a campground. It is loud, it is fuel, it is the thing you swore you would not carry, and in a Texas August it is what keeps the cat alive.
7.5 · The factory HVAC is not available to you
Camp mode — this section is superseded on one point
Later field research (the r/VanLife + build-manual field notes) documents the working procedure: brake + start button held 10+ seconds → "Automatic Shutdown Off", after which the van and its factory heat pump run indefinitely off the traction pack — measured ~2 kWh/hr overnight and an 11+ hour heat test. The findings below on timer bypass tricks predate that discovery and stand corrected. What still holds: the factory system serves the cab, quiescent draw is real, and the box must be thermally independent — camp mode is a fallback that spends range, not the design basis.
The obvious question — the van has 173 kWh and a working A/C, why not use it full-time — still has a documented answer.
| Finding | Detail |
|---|---|
| Climate times out in Park | Owner's manual p.123: "The timer will reset if the vehicle is taken out of P (Park) while it is on." Roughly an hour, then off |
| The bypass tricks do not work | Throttle/brake sequences, weight on the seat plus a stick on the brake, e-brake-plus-Neutral. Members report "no success," and Neutral leaves the drive units energized |
| The Arduino fix does not exist | Members are designing a rig to fake shift-lever and brake inputs every ~50 minutes. Nobody has shipped one, and one member notes no US company will build it for liability reasons |
| It cannot cool the box anyway | Factory system serves the cab. Stock van has no insulation. Measured: max heat while parked draws 11 kW and warms only the front half |
| Measured consumption | Owner "40-john": at a 3 kW setpoint, 170 kWh → 146 kWh over 8 hours = 24 kWh |
| Quiescent draw if you defeat the timer | ~1 kW just being awake = ~24 kWh/day before any climate load |
| Setpoint | Draw | Range lost per hour at ~1.4 mi/kWh | Over 8 hours |
|---|---|---|---|
| 3 kW moderate | 3 kWh/hr | ~4 mi/hr | ~34 mi |
| 11 kW max heat | 11 kWh/hr | ~15 mi/hr | ~123 mi |
That 24 kWh measurement was taken on a max-range van; on the Standard Range pack it is a much larger fraction of your day's driving. Architect the box to be thermally independent. Close and insulate the bulkhead door, run house-battery HVAC, and use the factory system only for the cab while driving. Every experienced builder on that forum thread reached the same conclusion.
A rig that fakes shift-lever inputs every 50 minutes to keep the factory climate alive is a fun project and a catastrophic life-safety system. It has an unbounded failure surface, no fail-safe state, no alerting, and it depends on a vehicle whose manufacturer has been discontinued. The cat does not get a vote on your firmware.
7.6 · Pet safety
The cat is the binding constraint on the entire build
A dog can come with you into most of the places you are going. A cat cannot. That means the van itself must stay habitable while unattended, which upgrades cooling from a comfort system to a life-safety system with the same rigor as the CO detectors.
Do the arithmetic. The interior air is 614 cu ft × 0.075 lb/cu ft = 46 lb, × 0.24 BTU/lb·°F = 11 BTU per °F. With the A/C dead at 95 °F in sun, 4,800 BTU/hr = 80 BTU/min is pouring in. If air were the only mass in the van the interior would climb 7 °F per minute.
It is not the only mass — but the 16 gal water spec (~133 lb) plus ~1,200 lb of cabinetry and gear is only ~600 BTU/°F of ballast, so the bulk of the van heats at closer to 8 °F/hr — twice the rate the original 80 gal design would have bought. Reality sits between the two: air spikes hard in the first ten to twenty minutes, then the whole box tracks upward. Alert at 78 °F, treat 90 °F as the emergency, and you have on the order of 20–40 minutes, toward the low end, to physically be back at the van. That number, not your comfort, sets the return radius.
What actually happens when the power fails while you are in the grocery store
Walk the failure through. You are 200 ft away, inside a building, with the phone in your pocket. The house bank's BMS trips on an overtemp cell, or a breaker opens, or the A/C compressor faults. Now:
| Layer | Does it survive a house-bank failure? |
|---|---|
| The A/C | No. It is the thing that died |
| Cerbo GX / VRM alarms | No. The Cerbo runs off the bank, and its alert path runs over Starlink, which also runs off the bank |
| OEM app remote climate | No. Never worked — see below |
| Roof fan on the house circuit | No. Same bus, same failure |
| Cellular monitor with its own battery | Yes. This is the whole point of the internal battery |
| Roof fan on a separate battery, thermostatic | Yes. Buys time, does not fix heat above ~85 °F ambient |
| Portable A/C with its own battery | Yes, for 1.5–2.4 hours. See the Wave 3 note |
Every layer that shares the house bus fails simultaneously with the thing it was supposed to catch. That is the entire design principle: nothing in the pet-safety chain may draw its power from the system it is monitoring.
A 2024 owner reports on the forum that he has never been able to connect his van: the BrightDrop app was pulled from the App Store and the Chevrolet app does not recognize the vehicle. With the brand discontinued, the odds of that improving round to zero. Assume no remote climate, no remote status, no OEM alerting, ever. Anything the OEM app would have done for you, you build yourself.
Monitoring hardware — two devices, two carriers
| Product | Connectivity | Price | Subscription | Backup power | Notes |
|---|---|---|---|---|---|
| MarCELL | Verizon 4G only | ~$125 | Required | Yes | Primary. US-made, and it makes phone calls, not just push notifications |
| Waggle Pro / Pro Plus | 4G multi-carrier — AT&T, T-Mobile, Verizon | $99–150 | Required | Internal, ~2 days | Secondary, for carrier diversity. Ad-heavy app, mixed reliability reports |
| Temp Stick | Wi-Fi | ~$149 | None | AA, long life | No subscription is genuinely appealing — but it needs your router, which needs the bank that just failed. Third device at best |
Buy the MarCELL for the phone call. A push notification is trivially missed in a grocery store with the phone on vibrate in a coat pocket; a ringing phone is not. Buy the Waggle because Verizon has no bars in exactly the canyon you will want to park in, and a monitor on a dead network is decoration. Both must have internal batteries. Subscriptions run $150–250/yr combined.
Five layers, no shared failure point
| # | Layer | Implementation |
|---|---|---|
| 1 | Prevention | Adequate A/C, real insulation, reflective shade, park in shade by default. The best failsafe is a system nowhere near its limit — a unit at 39 % duty has margin, one at 85 % has none |
| 2 | Redundant alerting | MarCELL on Verizon with call escalation + Waggle Pro on AT&T/T-Mobile. Two devices, two carriers, two internal batteries |
| 3 | Automatic thermal failsafe | Thermostatic MaxxAir roof fan on a separate circuit and its own small battery, trickle-charged from the house through a charger, not paralleled onto the bus. Trips automatically if the A/C stops |
| 4 | Power monitoring | Alert on state of charge, not only temperature. A temperature alert tells you the failure already happened; an SOC alert tells you it is coming. Both MarCELL and Waggle offer power-loss alerting — wire that trigger to the house bus so it fires the instant the bus drops |
| 5 | Independent cooling path | EcoFlow Wave 3 with its own 1,024 Wh battery, stored charged, deployed for charging stops and as the failure fallback |
1,024 Wh at the observed draw of 425–690 W is 1.5 to 2.4 hours, not eight. Eight is an eco-mode-with-nothing-to-cool number. That is still a genuinely useful bridge — it covers the drive to a shop or the wait for a mobile tech — but do not put it in the plan as a night of independent cooling. It is also fussy about insulated ducting and is not a permanent installation.
The charging stop, specifically
This is the scenario people assume is the hard one, and energetically it is not. A 45-minute DC fast-charge stop at 95 °F costs the house bank 4,800 BTU/hr ÷ 3,412 = 1,407 W thermal ÷ COP 2.9 = 485 W × 0.75 hr = 0.36 kWh, roughly 2.5 % of the bank. The house system is entirely independent of the vehicle's charging, so the A/C simply keeps running while the van charges.
The risk at a charging stop is not energy. It is that you are 200 ft away in a Buc-ee's for 45 minutes and a single component failure has a 20–40 minute fuse on it. The mitigation is the same five layers, plus one behavioral rule: on a hot-weather charging stop, one adult stays with the van. That is a real constraint on how two people travel together and it should be agreed on before the trip, not litigated in a parking lot in Amarillo.
Set thresholds low — 78–80 °F, not 90 °F; you are alerting on a trend, not an emergency. Never exceed a self-imposed 20–30 minute return radius. Confirm cell signal at that specific site before leaving pets, every time. Cracked windows plus a fan is a mild-weather plan and nothing more. And accept the underlying asymmetry: the dog gets to come along, the cat makes the van itself the safety system.
7.7 · Budget and verdict
| Subsystem | Low | Mid | High | Contents |
|---|---|---|---|---|
| HVAC | $2,500 | $4,000 | $6,000 | Rooftop A/C selection pending, Espar S3 D2L, aux tank and lines, roof fan(s) |
| Insulation | $900 | $1,600 | $2,500 | 484 sq ft: 2" polyiso, Thinsulate in cavities, sound deadening |
| Pet safety | $350 | $600 | $1,000 | 2× cellular monitors + subscriptions, thermostatic fan circuit, backup battery |
| Section total | $3,750 | $6,200 | $9,500 | Excluding the Wave 3 and a generator, ~$1,200 more if you carry both |
Heating: solved, cheap, and the diesel tank is correct. Espar Airtronic S3 D2L, 2.2 kW, rear-bumper 5 gallon tank, ducted low, two CO detectors, a clone on the shelf, and an altitude-compensating unit if the route is mountain-heavy. 0.3 kWh and ~$2 a night. Insulate to a genuine effective R-7 — over the ribs, not just between them — and this van is comfortable to 0 °F.
Cooling: rooftop A/C is now the direction, but not yet an orderable SKU. The old under-bench recommendation preserved solar; the new direction prioritizes packaging and field-proven service. Overnight cooling off solar is break-even, not comfortable, and the rooftop layout may make the energy deficit worse. No purchase closes that gap, because the fourth panel does not fit, there is no alternator, and the traction pack is sealed.
So the summer plan is not a product, it is a route. Elevation, latitude, shade, and paid hookups in July. Budget campground fees as a real recurring cost and carry a 2 kW inverter generator you hope not to use. Build the pet-safety chain so that nothing in it draws from the house bank: MarCELL plus Waggle on two carriers with internal batteries, a thermostatic roof fan on its own battery, SOC alerts ahead of temperature alerts, a 78 °F threshold, a 20–30 minute return radius, and one adult with the van on hot-weather charging stops.
If that travel plan is unacceptable — if the year has to include a Southwest August, off-grid, with the cat alone in the van — this is the wrong platform, and the honest alternative is a gas Sprinter whose alternator makes 3–5 kW while you drive. Choose the BrightDrop with clear eyes, for the volume and the quiet and the fuel cost, not because a spreadsheet said the cooling works. It does not.
- Build It Solar / PSU heat-loss references —
BTU/hr = area × ΔT ÷ R, ACH infiltration formula; envelope areas derived from the 25MY Body Builder Manual cargo-box dimensions - BrightDrop Forum — power offboarding (7.2 kW module not retrofittable to 2023–2025), camp mode thread (Park timer, failed bypasses, 11 kW parked heat, 170→146 kWh over 8 hr), insulation and sound deadening (R-10 board claims, diesel-tank debate), end of BrightDrop (app never connected)
- 2025 Chevrolet BrightDrop owner's manual p.123 — climate timer resets only on shifting out of Park
- Webasto Air Top 2000 STC, Propex HS2000, Velit air heater, HEATSO clone comparison, Exod comparison
- Dieselheat FAQ and Wireframe wiring guide — glow-plug surge, steady-state draw, circuit sizing
- Nomadic Cooling X3, X3 48 V, Dometic RTX2000, Velit 2000U, Cruise N Comfort, EcoFlow Wave 3
- The Vansmith solar sizing — harvest rules of thumb; array and PSH figures reconciled against §5.2 and §5.6 of this document
- Waggle vs MarCELL, The Wayward Home roundup, PetPalHQ 2026
08Cost & bill of materials
A used orphan van at 60% off sticker, plus a conversion that costs more than the research's generic buckets because §05 and §06 replaced those buckets with real part numbers. The donor half of this is no longer an estimate — a signed buyer's order totals $39,571, though financing is still open and the purchase has not closed (§00). Plan on $91,000 all-in and 750 hours. The lean version lands near $74K and gives up things you will notice every day.
Three orders are placed and paid: $263.05 Lectron NACS adapters (LEC#155615, 09-05), $2,194.54 LiTime 2 × 24 V 230 Ah self-heating house bank (LT148307, 09-08) and $2,102.16 of Victron core through Voltaico (#27279, 09-08) — inverter/charger, MPPT, Cerbo, Lynx, shunt, Orion, fusing and cables.
Vendor-shopped, $17,807.05 of parts remain, putting the parts side of this build at $22,366.80 all-in — inside the buckets below, and $704 better than the 2026-09-06 projection, almost entirely because the inverter downsized from a 24/5000 to a 24/3000 during a below-MAP sale. The tables in this section are the original planning envelope and are not updated per purchase; the parts list is the live ledger, actual against projected, line by line.
Three columns everywhere: Lean is the cheapest build that is still safe and still full-time livable. Build is the specification this document actually recommends — the parts named in §05, §06 and §07. High is what it costs when the panel does not fit, the window cut goes wrong, and you buy the tool twice. Where a figure comes from a real part number it is exact. Where it is derived, the arithmetic is inline. Items marked * are estimates the research does not price.
8.1 · Donor vehicle
Buy at the bottom of a market that has no floor
Roughly 4,000 units remained at discontinuation and a forum member estimates ~2,800 of those sit on dealer lots, owned by the dealerships, not by GM. Dealers are carrying floorplan cost on orphaned inventory that has no fleet buyer. That is the entire reason this build is financially interesting.
| Source | Range observed | Notes |
|---|---|---|
| Cars.com aggregate, used Zevo 600 | $28,970 – $53,615 | 5 to 70,633 miles |
| Carsforsale.com | from $31,995 | 64 units listed |
| Commercial Truck Trader | $39,670 – $75,535 | avg ~$47,882, mixed new and used |
| TrueCar | — | 147 used units nationwide |
| Reported real transaction | $55,000 all-in | New 2025 Zevo 400, $79,910 MSRP |
The research budgeted $32K / $40K / $50K for a Max Range AWD, and §04 of this document argued for the cheaper Standard Range truck instead. This van is the Max Range one, at $34,795 before fees. That lands inside the observed band and below the research's own mid tier — the price was never the reason §04 said no. The payload was. See §00 for the buyer's-order numbers and §4.7 for what it costs in pounds.
| Line | Actual | Notes |
|---|---|---|
| Vehicle price | $34,795.00 | 2024 Zevo 600 AWD, 20-module Max Range, C7E, 76 miles. Leaselot Inc. dba Recharged, Richmond VA. Sold used, as-is. |
| Processing + electronic filing | $999.00 | $699 + $300. Flagged as a double-dip in §00 — it survived onto the signed order. |
| Tax, title, registration | $2,372.44 | Texas 6.25% sales tax ($2,174.69 — exact to the penny), $177.75 registration, $20 title. Tarrant County. The Virginia-tax exposure flagged earlier is resolved. |
| Delivery, Richmond → DFW | $1,405.00 | Cheaper than self-driving once ~$700 of DC fast charging, a one-way flight and 3–4 days on the road are counted (§00, flag 2). kWh/mi baseline comes from shakedown runs. |
| Buyer's order total | $39,571.44 | Foots exactly — no rounding gap this time. $5,000 deposit paid; balance $34,571.44, settled at closing ahead of the 6 Sep 2026 delivery. The 5.99% × 72 figure quoted at signing would have run ≈$572.79/mo and ≈$6,670 interest — that was a pre-close scenario, and the actual loan terms are not recorded in this document (§00). |
The conversion is still an estimate with three columns, because none of it has been bought. The van is a single signed number now — pending close. In the §8.7 totals the donor line is $39,571 in all three columns, which is why the lean all-in moved from ~$66K to ~$76K without a single conversion part changing price.
C5F and C7E have identical curb weight. C7E is a ratings change that buys +1,010 lb of legal payload for roughly $1,000 when new — and on a used truck it costs nothing extra, because nobody pricing these listings knows the difference. Against a build that §4.7 shows is over even at the measured 2,310 lb, a C5F truck does not work at any price. The rule held: this van is C7E, verified on the jamb photo, not from the salesperson.
8.2 · Electrical & solar
$13,260 core, and this is the line you do not touch
The full item-level BOM is in §5.5. Summarized here because it is 33% of the conversion and because the lean column is where people make the mistake.
| Item | Lean | Build | High |
|---|---|---|---|
| 6 × 24 V 100 Ah heated LiFePO4 (Epoch Essentials class) — 15.36 kWh | $4,800 | $4,800 | $4,800 |
| 2 more modules → 20.48 kWh | — | — | $1,600 |
| Victron MultiPlus-II — bought: 24/3000/70-50 (spec'd 24/5000) | $1,520 | $837.52 | $1,520 |
| Victron SmartSolar MPPT 250/60 | $560 | $560 | $560 |
| 3 × ~440 W panels + gutter-stud rack | $1,280 | $1,480 | $1,480 |
| Tilt-out side array, 2 × 440 W | — | — | $1,200 |
| Rooftop A/C — exact SKU pending roof-layout and energy-model update | $2,100 | $2,100 | $2,100 |
| SmartShunt, Orion-Tr 24/12-20A | $300 | $300 | $300 |
| Cerbo GX + GX Touch | cut | $500 | $500 |
| Class T fuses, busbars, breakers, cable, lugs — sized for ~210 A at 24 V | $1,250 | $1,250 | $1,250 |
| NEMA 14-50 inlet, shore cord, TT-30 + 15 A adapters | $350 | $350 | $350 |
| 12 V fuse panel, lights, fans, pump wiring | $400 | $400 | $400 |
| Subtotal | $12,560 | $13,260 | $16,060 |
The full six-module bank. 15.36 kWh is already only ~1.0 day of hot-summer autonomy at 15 kWh/day (§5.6). A four-module 10.2 kWh bank is 15 hours. You will be plugged in or in trouble.
The 250/60 MPPT. Three panels in series hit ~142 V at −10 °C against the 150/45's hard 150 V ceiling. Saving $330 buys an 8 V margin and a destroyed controller that Victron will not warranty.
Heated battery modules. Charging LiFePO4 below 0 °C plates lithium permanently and invisibly. There is no engine heat on this platform to save you.
Class T fusing and correctly sized cable. This is the one line where cutting cost produces a fire in a metal box you sleep in with two animals.
The Cerbo is the only genuinely optional item, and it is a real loss — Victron Bluetooth on each device covers monitoring, but you lose VRM remote visibility and the programmable relay that §06 uses to run the water heater as a solar dump load. Cut it if you must; add it in month three when you are tired of walking to the panel.
8.3 · Climate — heat side
The A/C budget sits above. This is everything else.
The rooftop A/C line is still carried in the electrical/HVAC budget above until the exact SKU is selected. Do not double-count it against the heat-side bucket, which bundles the diesel heater, fans, ducting and safety hardware.
| Item | Lean | Build | High | Notes |
|---|---|---|---|---|
| Espar Airtronic S3 D2L 2.2 kW diesel air heater | $1,200 | $1,400 | $1,600 | Espar ~$1,200 installed; Webasto Air Top 2000 STC kit $1,300–1,600. Velit if the year is heavy on Colorado and Utah — it is the only unit verified to 11,000 ft. |
| Spare clone heater, shelf stock | $150 | $200 | $300 | Many parts interchange. Better redundancy than a second install. |
| Spare glow plug + fuel pump * | $80 | $120 | $200 | The two parts that actually fail. |
| Aux diesel tank 5–10 gal, lines, rear-overhang mount * | $300 | $450 | $600 | Cannot go under the floor between the axles. §06. |
| 2 × MaxxFan Deluxe 7500K * | $300 | $600 | $800 | Lean = one fan, and you lose the 110" longitudinal sweep from §02. |
| Ducting, thru-hull, muffler, exhaust wrap * | $120 | $200 | $400 | Ducted low along both sides. |
| 2 × CO detectors | $50 | $80 | $120 | One low, one at sleeping height. |
| Subtotal | $2,200 | $3,050 | $4,020 |
A 12-hour winter night takes ~48,000 BTU. That is ~0.4 gal of diesel, about $1.60, and ~0.3 kWh off the house bank — under 2% of 15.36 kWh. The electric equivalent is ~14 kWh, which is the entire bank plus more than a full day of solar. A 5-gallon tank is roughly 160 hours of heat. Over a year you burn maybe 50 gallons. Combustion heat is not a compromise on this platform, it is the only option that works, and it costs less to run than the refrigerator.
8.4 · Shell — insulation, glazing, cutting
| Item | Lean | Build | High | Notes |
|---|---|---|---|---|
| Polyiso + Thinsulate + sound deadening, ~485 sq ft envelope | $1,100 | $1,500 | $2,500 | §02 material budget. Polyiso $0.50–0.90/sq ft; Thinsulate SM600L $2.26–2.38/sq ft for curves and rib returns. |
| 4 × windows | $1,400 | $2,836 | $3,900 | Lean = 4 × AM Auto half-slider @ $350. Build = 2 × Arctic Tern 550×700 @ $778 + 2 × 450×500 @ $640 = $2,836. |
| 4 × VanMade insulated covers | $320 | $480 | $800 | $80–200 each. Worth more R-value than upgrading the glass, for a tenth of the price. |
| Aluminum sub-frames, 3M 08115, edge seal, blades * | $200 | $300 | $400 | The 1.6 mm composite skin cannot carry a window load unreframed. |
| Subtotal | $3,020 | $5,116 | $7,600 |
This runs above the research's $1,200–$3,500 glazing bucket because that bucket assumes two or three windows on a Sprinter. This van has 192 sq ft of side wall, all of it outside every documented restricted zone, and §02 specs four windows. More glass on a bigger box costs more. It is not an overrun.
Nominal R-10 delivers about R-6 to R-7 effective through a ribbed body after thermal bridging, and every HVAC number in this document is computed on the R-7 row. Drop to R-5 and the 20 °F heat demand goes from ~4,000 BTU/hr to ~4,850, and the 95 °F cooling load climbs past what a single unit holds. $400 saved on foam is paid back in diesel, in A/C duty cycle, and in campground fees for the rest of the year. Insulation quality, not heater size, is the deciding variable.
8.5 · Plumbing, wet bath, interior
Deriving the plumbing line without double-counting
§06 quotes ~$12.25K all-in including cabin heat and contingency. Both of those live elsewhere in this table, so strip them out before using the number:
| Step | Amount |
|---|---|
| §06 stated all-in | $12,250 |
| Remove the embedded 20% contingency — $12,250 ÷ 1.20 | $10,208 |
| Remove cabin heat, now counted in §8.3 | −$2,000 |
| Plumbing, wet bath and toilet, net | ≈$8,200 |
| Item | Lean | Build | High | Notes |
|---|---|---|---|---|
| Water system — tanks, pump, heater, manifold, two filtration chains | $3,000 | $5,400 | $7,200 | All tanks interior. There is no undermount option on this platform. |
| Wet bath — pan, surround, HepvO traps, ventilation | $500 | $1,700 | $2,700 | Lean deletes the wet bath entirely for an outdoor shower. |
| Composting toilet | $400 | $1,100 | $1,100 | Lean = cassette. Counted here, not in appliances. |
| Countertop RO for desert water | — | — | $450 | Bluevua RO100ROPOT or AquaTru, $350–450. Optional, parked use only. |
| Cabinetry, framing, flooring, wall panels, upholstery | $3,000 | $5,500 | $8,000 | Aluminum extrusion, not lumber — §04 spends the premium to buy back payload. Includes mounting track and tie-downs. |
| Appliances — 12 V compressor fridge, induction hob, sink | $1,500 | $2,600 | $4,000 | Toilet excluded, see above. |
| Subtotal | $8,400 | $16,300 | $23,450 |
§06 designed 80 gal fresh and 50 gal grey against 12–14 gal/day, and §04 recommended cutting to 20 gal on day one, because 80 gal full is 667 lb. The 2,310 lb measured ceiling (§4.7) ended the debate: the locked spec is 16 gal fresh, ~133 lb full. That costs a fill roughly every other day instead of every sixth day, and it is not negotiable — water was one of the first casualties of the sticker, and buying tanks to the old §06 design would sink the build on day one.
8.6 · Everything else
| Item | Lean | Build | High | Notes |
|---|---|---|---|---|
| Pet safety systems | $350 | $600 | $1,000 | MarCELL ~$125 (Verizon, phone-call escalation) + Waggle Pro $99–150 (multi-carrier) + subscriptions $150–250/yr + thermostatic fan circuit on its own battery. |
| Connectivity — Starlink Roam + hardware, cell booster | $600 | $1,200 | $2,000 | |
| Tools | $800 | $2,000 | $4,000 | Track saw, jigsaw, router, rivet gun, hydraulic crimper, clamps. Assume a first-time builder buys most of it. |
| RV title, registration, weight certificate, insurance setup | $300 | $600 | $1,200 | CAT scale certificate is ~$15 and you need it anyway. |
| Charging kit — see §9.2 | $700 | $1,100 | $1,600 | Portable L2 EVSE, 50 A EMS, GM-approved CCS adapter, extension, adapters. |
| Subtotal | $2,750 | $5,500 | $9,800 |
Two cellular monitors on two different carriers, both with internal batteries so they keep reporting after the house bank fails — that is the entire point. And note the platform-specific reason this cannot be done cheaply: the OEM app does not work. The BrightDrop app was pulled from the App Store and the Chevrolet app does not recognize some vans. There is no remote climate, no remote status, no fallback. A cat cannot be walked out of a hot van.
8.7 · Totals
| Subsystem | Lean | Build | High |
|---|---|---|---|
| Electrical, solar & A/C (§8.2) | $12,560 | $13,260 | $16,060 |
| Climate — heat side (§8.3) | $2,200 | $3,050 | $4,020 |
| Shell — insulation, glazing, cutting (§8.4) | $3,020 | $5,116 | $7,600 |
| Plumbing, bath, cabinetry, appliances (§8.5) | $8,400 | $16,300 | $23,450 |
| Pets, connectivity, tools, title, charging kit (§8.6) | $2,750 | $5,500 | $9,800 |
| Conversion subtotal | $28,930 | $43,226 | $60,930 |
| Contingency at 20% | $5,786 | $8,645 | $12,186 |
| Conversion total | $34,716 | $51,871 | $73,116 |
| Donor vehicle (§8.1) — signed order, not a tier | $39,571 | $39,571 | $39,571 |
| ALL-IN | ~$74,000 | ~$91,000 | ~$113,000 |
The research's independent bottom-up estimate lands at $54K / $80K / $117.5K with a stated likely zone of $78,000–$90,000. This table, built from actual part numbers rather than buckets and now carrying a signed donor price rather than a tier, lands at $74K / $91K / $113K. Two documents arriving in the same $90K neighbourhood by different routes is the strongest signal in this section. If your number is under $80K you have not finished pricing something.
It is $8,645 on the recommended build. It goes to: the panel dimension that was 30 mm off and cost you a rack; the second track saw; the window that cracked during install; the $600 in shipping on a $260 panel; the Sikaflex that failed on composite and had to be redone; and the four separate trips to the fastener aisle that were, cumulatively, a weekend. On a platform with no pre-cut window kits, no bolt-in roof racks and no wiring harness adapters, the rework rate is structurally higher than a Sprinter build. Budget it as a line item, not as optimism.
8.8 · Labor versus DIY
750 hours is $56,000 you are not counting
General guidance puts a DIY conversion at 200–500 hours. That guidance is for a Sprinter and it understates this job badly.
| Phase | Hours | Outsource? |
|---|---|---|
| Design, research, CAD/layout | 60–100 | No — this is where you learn the van |
| Strip, clean, rust and sound treatment | 30–50 | No — cheap hours, high knowledge return |
| Insulation, 485 sq ft envelope | 60–90 | No — tedious, not skilled |
| Windows, roof fans, A/C penetration | 40–60 | Yes — first cut into a 1.6 mm composite skin is the worst place to learn |
| Framing, walls, ceiling | 80–120 | Partial |
| Electrical — 24 V, solar, inverter, shore | 80–140 | No — you must know this system cold at 2 a.m. in Wyoming |
| Plumbing and water systems | 40–70 | No |
| Cabinetry, bed, galley | 120–200 | Yes — biggest single block, most commoditized skill |
| HVAC install — heater, fuel tank, ducting | 30–50 | Partial — a shop that does Espar installs daily is worth it |
| Finish, trim, troubleshooting, rework | 60–120 | No |
| Total | 600–1,000 |
Call it 700–800 hours — 9 to 14 months of nights and weekends, or 4 to 5 months full time. At a nominal $75/hr of engineering time, 750 hours is $56,000 of opportunity cost, which is most of the gap to a turnkey Grounded G3. Farming out the two flagged rows removes 160–260 hours, roughly a quarter of the build, and those are the two rows where a professional is measurably better than you are on your first attempt.
What DIY actually buys
- ~$80,000 in cash versus a Grounded G3 at $165K
- Exactly your layout, for two adults and two animals, not a fixed floor plan
- Total system knowledge — you can fix it in a canyon with no signal
- Every part number documented, which matters enormously on a dead platform
What it costs
- 600–1,000 hours, and no warranty on any of it
- You own every mistake, including the structural ones
- No 1,400 W vehicle-to-house — Grounded has it, you cannot replicate it
- Nine to fourteen months during which you are not on the road
8.9 · Versus the alternatives
| Option | Cost | What you get | What you give up |
|---|---|---|---|
| This build — DIY BrightDrop 600 | ~$91K | Same chassis and same AWD Max Range configuration as Grounded, your layout, full system knowledge, 614 cu ft | 700–800 hours; no build warranty; no V2H |
| Grounded G3 (Form) | $165K | Turnkey, 286 mi, 1,000 W solar, self-heating LiFePO4, 1,400 W V2H, Starlink, warranty | ~$73K premium; fixed layout; no bathroom at this trim |
| Grounded G3 (Function) | $180K | + 15 kWh house bank, shower or desk | |
| Grounded G3 (Freedom) | $200K | + 20 kWh bank, lift bed, full kitchen and bath | |
| DIY gas Sprinter 144/170 EXT | $70–110K | 3–5 kW alternator charging while driving, fuel anywhere, nationwide service, idle for A/C, trivial RV titling | Fuel cost, noise, maintenance, ~half the interior volume |
The G3 includes 1,400 W of vehicle-to-house. §05 establishes that you cannot replicate that on a 2024/2025 van at any price — there is no HV takeoff and the 7.2 kW module is 2026 hardware that no longer exists to buy. You are building a different, more energy-constrained vehicle for $76K less. Weigh that against the fact that Grounded's own future is uncertain now that its only platform is dead — forum members flatly speculate "Grounded is probably dead" — so the warranty in that $165K may be worth considerably less than it appears.
Alternator charging delivers 3–5 kW while driving and solves the exact failure mode that constrains this build — §5.6 showed a 15 kWh summer day against a 6.6 kWh harvest before rooftop A/C, and there is no third input to close it. If the new roof layout drops panel count, that constraint tightens. The BrightDrop wins on interior volume, on quiet, on fuel cost, on low moisture permeability versus a stick-built RV, and on being genuinely interesting. Choose it with clear eyes, not on a spreadsheet.
8.10 · What a lean build cuts, and what it must not
Comfort and convenience
Cerbo GX. Fourth battery module. Side solar. Countertop RO. The second roof fan. AM Auto sliders instead of Arctic Tern. Lumber framing instead of aluminum — but only if you have payload margin, and §04 says you do not.
The wet bath
Outdoor shower plus a cassette toilet, and 16 gal of water instead of 80. This is the single biggest lean saving and also the one you feel every single day in February in a parking lot. It saves ~500 lb — and the 2,310 lb measured ceiling (§4.7) has since made it the baseline, not the lean option.
Anything that fails at 3 a.m.
Three battery modules. The 250/60 MPPT. Heated cells. Class T fusing and correct cable. A real diesel heater with a spare on the shelf. Two CO detectors. Two cellular pet monitors on two carriers. Full insulation. The 20% contingency.
The C7E code and the title conversion
$1,000 for 1,010 lb of payload, and ~$600 to turn a commercial-titled cargo van into a Texas motorhome. Skip the second one and the $53,000 of systems you installed is uninsured. Both are the cheapest risk reduction available.
The build is held to the 2,310 lb measured ceiling of §4.7 — and the current defensible build is over it with reserve — magnitude pending the SKU mass ledger. The house electrical system alone is ~400 lb installed. Eighty gallons of fresh water would be 667 lb, which is why the spec is 16. Price and mass are correlated but not identical — aluminum framing costs about 20% more than lumber and saves 100+ lb, and that trade is worth making every time on this platform. Run the weight column beside the dollar column from the first spreadsheet, not from month six.
- Cars.com, Carsforsale, TrueCar, Commercial Truck Trader — used Zevo 600 listings, $28,970–$53,615, 147 units nationwide
- BrightDrop Forum — ~2,800 units on dealer lots at discontinuation; $55K all-in transaction on a $79,910 MSRP 2025 Zevo 400; C5F vs C7E identical curb weight
- §05 of this document — electrical BOM, $13,260 core / $16,060 loaded, 2026 pricing
- §06 of this document — $12,250 water and cabin-heat all-in, from which the $8,200 plumbing figure is derived
- §02 of this document — insulation material budget $1,100–1,500; Arctic Tern, AM Auto and VanMade pricing
- Webasto, Espar/Eberspächer, Propex and Velit product pages — heater output, fuel burn, electrical draw, pricing
- GM Authority and InsideEVs — Grounded G3 pricing and 1,400 W V2H
- VanLifeEscape, The Vansmith — baseline $15–25K conversion-only figures for comparison
- Waggle, MarCELL and Temp Stick product pages — pet monitor pricing, connectivity and subscription terms
09Charging, logistics & platform risk
~207 miles of built-out summer range and ~149 in winter on the Max Range pack, a 120 kW charge peak that is genuinely slow for 173.3 kWh, and a 22-foot step van that does not fit the stalls. The year runs on ~145-mile legs and 50-amp pedestals. Then the part nobody wants to read: what happens when a body panel is unavailable and there is no manufacturer left to ask.
This section was originally written around the Standard Range truck §04 recommended. This van is the 20-module Max Range — 173.3 kWh useful (§00). Every leg, pedestal-hours and DC-stop figure below has been re-run against that pack. The net: legs stretch from ~105 to ~145 miles, an overnight pedestal no longer fills the pack, and DC stops roughly double in length. The strategy conclusions — RV parks primary, 50 A sites only, EMS non-optional — all survive.
9.1 · The travel cadence
This van is bad at 600-mile days and good at the trip you actually want
Start from the range numbers in §04 and take the honest usable fraction. A 10→80% DC charging window is 70% of the pack:
| Condition | Range, built out | Usable leg (10→80%) | Legs per 200 mi day |
|---|---|---|---|
| Summer, 60 mph, flat | ~207 mi | ~145 mi | 1–2 |
| Summer, 70 mph or headwind | ~180 mi | ~126 mi | 2 |
| Mountain grades, loaded | ~165 mi | ~116 mi | 2 |
| Winter, 20 °F, cabin heat on | ~149 mi | ~104 mi | 2 |
At 60 mph, a 145-mile leg is about 2.5 hours of driving followed by 80–95 minutes of charging. That is the rhythm. A stock Max Range owner reports "3 hours driving, 1 hour charging, still easy to do 600+ miles a day with 2 stops" — that is this pack, but in an empty van. Built out, ~1,600 lb heavier and carrying a roof kit, your version is 200–300 mile days with one or two stops: a full pack plus one DC stop covers ~350 miles on a good summer day, and each additional stop buys ~145 more at the cost of an hour and a half standing still.
A year on the road at 200–300 miles a day is 2–4 driving days a month and three weeks of actually being somewhere. That is what full-timing converges on anyway. The failure mode is treating it like a road trip: a 500-mile push day on this van is two to three 80–95 minute charging stops and eleven-plus hours, and one out-of-service station turns it into an unplanned night in a Love's parking lot. Decide the cadence before you leave, because the vehicle will enforce it either way.
9.2 · RV parks are the primary charging strategy
The pedestal math, and why this is not a fallback
A "50 A" pedestal is 240 V split-phase at 50 A, rated 12 kVA under NEC 551.73(A)(1), with the 80% continuous rule capping usable draw at 40 A per leg — 9.6 kW. §5.3 establishes the complication: the van's onboard charger wants 48 A at 240 V, or 11.5 kW, which exceeds the pedestal's continuous rating outright. You throttle the EVSE and split the pedestal.
| EVSE setting | Van draw | Left for the house | Hours for 10→100% (156 kWh) |
|---|---|---|---|
| 48 A / 240 V — 11.5 kW | 11.5 kW | over limit | Will not work |
| 32 A / 240 V — 7.68 kW | 7.68 kW | ~960 W | ~20.3 hr |
| 24 A / 240 V — 5.76 kW | 5.76 kW | ~1,920 W | ~27.1 hr |
| 16 A / 240 V — 3.84 kW | 3.84 kW | ~2,880 W | ~40.6 hr |
| Van not charging | 0 | ~4,800 W | — |
The Max Range pack is 173.3 kWh useful per the body builder manual. A 10→100% fill is ~156 kWh, so at 32 A that is 156 ÷ 7.68 = 20.3 hours — an overnight no longer fills it. A 6 p.m. to 8 a.m. window at 32 A puts back ~107 kWh, roughly 140 built-out miles — more than a typical travel day, which is why the RV park stays the primary charging strategy and not a backup: a 22-foot van that struggles at DC stalls fits a pull-through site perfectly, and the interior West has far more 50 A pedestals than CCS stalls. A dead-empty to full fill is a two-night job; plan it that way, or split it with one DC stop.
TT-30 is 120 V / 30 A = 2.88 kW continuous, not 7.2 kW. At that rate a 156 kWh fill takes 54 hours and the van is effectively not charging. It is perfectly good for the house bank — 2.88 kW is 69 kWh a day, four times the worst-case house load — but you must book 50 A sites for the van. Many older and smaller campgrounds are 30 A only, and the listing will say "electric" without saying which.
Campgrounds are installing RV PowerGate lockouts (~$29.95) that physically prevent simultaneous use of the 30 A and 50 A outlets, explicitly because of EV charging. And the economics are real: twelve hours at 7.68 kW is ~92 kWh, far more electricity than a nightly site fee contemplates. Call ahead, say plainly that you are charging an EV, and offer to pay a surcharge. Some parks prohibit it outright. Finding that out at 9 p.m. after a 140-mile day is a bad way to learn.
The kit
| Item | Spec | Why |
|---|---|---|
| Portable Level 2 EVSE | NEMA 14-50, 40 A, UL-listed for outdoor use | Grizzl-E, Lectron or similar. Adjustable amperage is mandatory — it is the knob that makes the table above work. |
| 50 A surge protector / EMS | Full EMS, not a surge strip | Non-optional. Pedestals are notorious for miswiring, open grounds and low voltage. It protects the van's onboard charger and the MultiPlus at once. |
| 50 A 240 V extension | 25 ft | Only if needed. Heavy, bulky, expensive — buy the shortest that reaches. |
| Adapters | 14-50 → TT-30, 14-50 → 5-15 | For house-bank charging at weak sites where the van cannot usefully charge. |
| CCS-to-NACS adapter | GM-approved only | The owner's manual recommends carrying one and explicitly cautions against adapters not approved or manufactured by GM. |
9.3 · DC fast charging reality
CCS1, ~120 kW, and a vehicle that does not fit the stall
The van is CCS1 with a 120 kW DC peak, port behind the driver's side rear wheel. It is not transitioning to NACS. On the Max Range pack this van carries, 10→80% moves 173.3 × 0.7 = ~121 kWh, which takes 80–95 minutes at a ~90 kW average against the 120 kW peak. The Standard Range truck had the good ratio — 71.7 kWh in about 45 minutes — and §04's payload pick would have bought that better curve as a side effect. That fork went the other way on 19 August 2026: the price of the bigger pack is that every DC stop is a long lunch, not a coffee. Plan stops around meals and dog walks, and lean harder on the pedestal strategy above.
The physical problem is worse than the electrical one.
| Problem | Detail | Mitigation |
|---|---|---|
| Two parking spaces | A ~22 ft step van does not fit a car stall. Forum members chose the 400 over the 600 explicitly for this. One 600 owner's method: "back the 600 into a perimeter slot and hang its ass over the grass." | Favor pull-through and truck-stop sites |
| Port position | Behind the driver's side rear wheel — orientation relative to a short cable decides whether you can charge at all | Read PlugShare photos before committing to a station |
| Canopy height | Urban chargers sit under structures. Worse than the parking problem because you discover it at the last second, nose-in, with cars behind you | Verify clearance in advance; assume no canopy site works |
| Tesla Superchargers | Frequently the tightest sites of all — nose-in, short cables. A forum member cited Supercharger access as a reason to buy the 400 | Treat the NACS adapter as an option, not a plan |
Electrify America locations at travel plazas, and GM's announced network of ~2,000 chargers at truck stops (Pilot / Flying J). Pull-through geometry, height clearance, and staff who are unsurprised by a 22-foot vehicle. Filter PlugShare for these first and check recent photos every time. Always have a second station inside remaining range before you commit to the first.
9.4 · Route planning
The gaps are longer than your range, and that is not hyperbole
| Finding | Consequence for a 105-mile leg |
|---|---|
| "The four worst states for CCS1 are WY, SD, ND and MT by far" | Glacier, Yellowstone and Grand Teton corridors are genuinely difficult, not merely inconvenient |
| DC coverage at or below 30% in every state except CA (79%), NV (71%), WA (49%), RI (39%) | Outside the West Coast, assume the map is thinner than the app suggests |
| Zion → Las Vegas → SLC stretches exceeding 270 miles with limited charging | 270 ÷ 105 = you need two intermediate charges in a gap that has zero. A stock Max Range van barely clears this. You cannot. |
| Central Nevada US-50, southern Utah, west Texas / Big Bend, eastern Oregon, central Idaho | Sparse enough that a single out-of-service charger has no alternative within range |
| Eight Western governors committed to chargers every 50–100 miles | JD Power data indicates they have a long way to go. Do not route on announcements. |
The research recommends keeping a 100-mile reserve entering the sparse regions. On a Max Range truck that is a third of the pack. On yours it is two-thirds, which means you never leave. Replace it with a percentage rule: never enter a charging gap you cannot clear with 25% SoC remaining — roughly 37 summer miles, 27 winter miles of margin. Arithmetic: a leg that puts you below 25% on arrival is a leg you do not start. In practice that caps you at ~110 summer miles and ~80 winter miles between confirmed working chargers, and it means US-50 and the Zion–SLC corridor require an RV park in the middle, not a DC station. Plan those routes on an RV-park app first and PlugShare second. That inversion is the single most useful planning habit on this platform.
9.5 · Season by season
| Season / climate | Mix | Why |
|---|---|---|
| Spring / fall, mild | 80% boondocking | ~5 kWh/day house load against a 4.6 kWh harvest. Nearly break-even. Charge the van every 4–6 days at a 50 A site. |
| Summer, >90 °F | 60–80% campground on 50 A | 15 kWh/day against the old 6.6 kWh solar case was already −8.4 kWh — about 1.0 day on a full bank. The rooftop A/C layout may make this worse. This is forced, not chosen. |
| Winter, cold | 70% boondocking | Diesel heat costs ~0.3 kWh and ~$1.60 a night. The house system is fine. The van's range is what suffers. |
| Extreme heat, >100 °F | ~100% hookups, or leave | 12–14 kWh/day of cooling is unwinnable off-grid with no alternator. Elevation and latitude are free air conditioning — this is the real answer. |
50 A sites run $50–90/night. At ~40% hookup nights: 0.40 × 365 = 146 nights × $50–90 = $7,300–$13,140/year, call it $8–12K. That is a real line item and it partially erodes the fuel savings versus a diesel Sprinter. Budget it separately from the build.
Winter behavior
Three things change at once and they compound.
~110 mi, ~77 mi per leg
A 25–40% winter reduction is documented across EVs and it applies here. Three charging stops per 200-mile day, roughly every 75–90 minutes of driving. No build optimization changes this.
1.2 kWh/day in a PNW December
Against a 10.7 kWh winter house load, that is a −9.5 kWh day and a dead bank in ~1.4 days. Winter off-grid means shore power on a schedule, not opportunistically.
No charging below 0 °C
Heated Epoch modules with a BMS low-temp cutoff, and there is no engine heat to borrow. Precondition the traction pack on shore power before a cold departure — it is free range and it is the one thing that is easier plugged in.
The winterize path gets used
Low-point drains, a blow-out plug, 2–3 gal of RV antifreeze. Park in Montana in January, drain the system and use the bathhouse. §06 is blunt about this: refusing to accept it is how people crack tanks.
The winter plan becomes "chase 40 °F," and the summer plan becomes "chase 7,000 feet." Almost every full-timer converges on this, and on this platform the energy budget forces it harder than on any gas van. That is not a failure of the build. It is the itinerary the vehicle is asking for, and it happens to be a good one.
9.6 · Title, registration and insurance
Do this before you leave, or $53,000 of systems is uninsured
Texas requires 4 of 6 permanently installed independent life-support systems for an RV title conversion. This build satisfies all six: cooking facility, refrigeration, self-contained toilet, heating and air conditioning, potable water with faucet and sink, and separate 110–125 V supply.
| # | Step | Detail |
|---|---|---|
| 1 | Finish the conversion first | The inspection is of the finished vehicle |
| 2 | Certified weight certificate | CAT scale, ~$15. You need it for the payload question anyway |
| 3 | Photograph every life-support system | Documented evidence of all six |
| 4 | Form VTR-61 + VTR-130U | Converted vehicle, plus title transfer at purchase. Texas DMV Assembled and Reconstructed Vehicle Manual, converted vehicles chapter |
| 5 | Title and register as a motorhome | Then, and only then, buy RV insurance |
A BrightDrop arrives titled as a commercial vehicle, and forum members flag "classification for insurance weird — commercial" as a standing pain point. Until you convert the title you are on commercial auto insurance, which is more expensive and typically excludes the conversion contents entirely. Progressive added DIY camper van conversion coverage nationwide and is the common carrier here; Roamly is the specialist alternative. Both require a permanently installed sleeping area, a permanent cooktop, a fresh water system and an RV title. Disclose the solar, the batteries and every modification with photo documentation, or you risk a denied claim on precisely the most expensive parts of the van.
One wrinkle specific to this build: C7E puts you at 11,000 lb GVWR, over the 10,000 lb line, which carries commercial-registration and DOT implications in some states. Re-titling as a motorhome generally resolves it — but verify in your domicile state before you buy the van, not after. Your home-state title governs elsewhere, so satisfying Texas is sufficient once it is done.
9.7 · Orphan platform risk
What discontinuation actually means
GM confirmed the end of BrightDrop production at CAMI Assembly in Ingersoll, Ontario on October 21, 2025. Production had already been suspended since May 2025 — the plant sat stopped for six months. Production will not be moved to another site. GM states that fleet customers are expected to continue receiving parts and service and that "OEM services to existing fleets remains unchanged." Read that as a statement of current intent, not a contractual guarantee, and note that a forum member's research found no US federal law requiring a manufacturer to maintain parts availability for any period at all. That appears to be correct.
From the forum: "If you have a Brightdrop take comfort in the fact that your EV shares almost all its internal components with the Silverado EV." The Silverado EV is on the same Ultium platform, selling well and accelerating, and will be supported for years. Battery modules, drive units, inverters, DC-DC converters, thermal components and charge modules carry substantial commonality. You are not orphaned the way a Canoo or Fisker owner is. The genuinely BrightDrop-unique parts are body panels, glass, interior trim, the roll-up door and some harnesses — things a body shop deals with, not things that strand you in Wyoming.
Risk register
| Risk | Severity | Assessment and action |
|---|---|---|
| Traction pack service | Medium | Any GM EV-certified technician works on Ultium; the pack is not BrightDrop-specific. But few dealers have a bay that fits a step van and fewer want it. Call and confirm specific dealers along the route before you need them. |
| HV fault in a remote area | High | The scenario that should worry you most: a flatbed for a ~9,000 lb, 22 ft vehicle from rural Wyoming to a certified dealer that will accept it. Buy premium roadside with high mileage limits and confirm in writing that the policy covers this weight, length and a commercial title — many consumer policies cap at 10,000 lb or refuse commercial vehicles outright. |
| Body and trim parts | High | BrightDrop-unique. A minor collision could mean months waiting for a panel, or no panel. The composite body sides and roof are especially concerning. Assume a comprehensive claim may total the vehicle rather than repair it — and price your insurance accordingly. |
| Connected services | High | Already broken for some owners: the BrightDrop app was pulled from the App Store and the Chevrolet app does not recognize some vans. One 2024 owner has never connected his. Assume no remote start, no remote climate, no remote status. This is why §8.6 buys two independent cellular pet monitors. |
| Software updates | Med-High | Forum consensus: "I wouldn't count on software updates. We might see some security fixes, but I suspect feature releases are done." No camp mode is ever coming. Build for the van as it is today. |
| Known defects | Medium | Real recall history: front drive unit fires (66 units, 2022 MY — drive pinion piercing the casing); HV battery pack enclosure sealing; intermediate steering shaft failure (2023–2024, built 3/15/23–7/16/24); rear electric drive module replacement under a Customer Satisfaction Program on select 2024 Zevo 400 and 2025 BrightDrop 600 (cross-threaded or missing differential nut). |
| Warranty on a used unit | Medium | GM EV battery warranty is typically 8 yr / 100,000 mi and transfers. Verify the specific VIN's remaining coverage in writing before purchase. Your conversion does not void the powertrain warranty under Magnuson-Moss — but any HV tapping absolutely would. |
| Bad update / remote bricking | Low-Med | A forum member plans to "yank the cell phone module or SIM." Paranoid, but the reasoning holds once the dev team is gone. It also kills any remaining security fixes. Optional, and reversible. |
| Resale | High | A forum member: "Selling a used one 5 years from now will be challenging." Assume you recover very little. Buy at the bottom of the fire-sale market and treat the $39,571 as largely consumed by the trip — which, at roughly $3,300 a month for a year of housing, is a defensible way to think about it. |
Is an aftermarket forming?
What exists
- Grounded (G3, official upfitter) and RollAway built conversions on the platform
- Coachmen had a BrightDrop product
- brightdropforum.com — genuinely active, technically substantive, real builders posting real measurements. The single best resource, and the source of half this document
- A handful of small upfitters, including one Seattle-area shop soliciting collaboration on the forum
What does not
- No pre-cut window kits, roof rack systems or bolt-in accessories
- No wiring harness adapters or plug-and-play electrical interfaces
- No HV-tap solution — the one thing that would transform the platform
- And the trend is negative: members' reaction to discontinuation was "Coachman is screwed. Grounded is probably dead."
The community is your aftermarket. It is a good one and it is roughly a hundred enthusiasts, not an industry. The counter-argument has real merit: orphaned RVs get sustained by owner groups for decades — the GMC Motorhome is still supported 45 years on — and a forum member argues the BrightDrop is unusually well suited to it, "the large square size like a small class A with the low moisture permeability of a van," unlike Class A motorhomes that rot from bad roof sealing. This may become a cult platform. That is a real possibility, not a plan.
The highest-value unsolved problem is a safe HV-to-house DC-DC converter. John Forde, one of the most experienced owners: "1.5 to 2 kW is what I really need... the place for a do-it-yourself to access the traction battery might be through the heat pump connection. I am hoping someone will blaze this trail." Even 1.5 kW would deliver 36 kWh/day — over five times your solar harvest — and would end the cooling problem outright from a 102–173 kWh reservoir.
Do not blaze it. 400 V DC at pack current is lethal, it voids the powertrain warranty, it may void your insurance, and an improper tap risks a pack fault or fire in a vehicle you sleep in with two animals. §05 documents the HVIL, insulation-monitoring and contactor-handshake barriers. Watch the forum. If a credible engineered product ever appears it is the best upgrade available for this van. Until then, design for 400 W and treat any HV tap as pure upside.
9.8 · The pre-departure checklist
What to verify, stockpile and pre-plan before you leave DFW
| When | Item | Why |
|---|---|---|
| Before purchase | Run the VIN through NHTSA; get a dealer to confirm all open recalls and CSP items are closed, in writing | Front drive unit fire, HV pack enclosure sealing, steering shaft, rear EDM — all real, all documented |
| Before purchase | Verify remaining 8 yr / 100,000 mi battery warranty by VIN, in writing | It transfers, but "should transfer" is not a document |
| Before purchase | Read the door jamb sticker for C7E, and the window sticker for the range figure | C5F makes this build illegal at weight. The sticker says 164 mi, the manual says 179 — believe the sticker |
| Before design | Weigh the van at a CAT scale | ~$15. One owner weighed ~500 lb over the listed curb weight; GM's published figures have been off by 300–400 lb in both directions |
| Before departure | Texas RV title conversion complete, RV policy bound, all mods disclosed with photos | Until this is done, the build is uninsured |
| Before departure | Premium roadside/towing, confirmed in writing for 11,000 lb GVWR and 22 ft | The single most likely uncovered catastrophe |
| Before departure | Call GM EV-certified dealers along the planned route; log which have a bay that physically fits a step van | Do this from a couch, not from a shoulder |
| Stockpile | Spare clone diesel heater ($150–300), spare glow plug and fuel pump | Better redundancy than a second install, and many parts interchange |
| Stockpile | Spare LN1 80 Ah AGM for the van's 12 V system | §05: a dead AGM is the actual stranding scenario, parked next to 102 kWh you cannot reach |
| Stockpile | GM-approved CCS-to-NACS adapter, 50 A EMS, adjustable L2 EVSE, TT-30 and 5-15 adapters | §9.2. This kit is what makes the RV-park strategy work |
| Stockpile | Consumables only — filters, fuses, sealant, spare MPPT, HepvO cartridges | You cannot stockpile a composite body side. Insure properly and accept that a real collision may total the van |
| Document | Photograph and part-number every subsystem; keep the Body Builder Manual PDF offline | On a dead platform, your own documentation is the service manual |
9.9 · Bottom line
1. Buy the AWD Standard Range with C7E at $30–38K. Verify recalls, warranty and the door jamb code. Weigh it at a CAT scale before you design anything. Max Range costs 891 lb of payload and a worse charging curve; C5F costs 1,010 lb of payload and makes the build illegal. Superseded on 19 August 2026: this van is the AWD Max Range with C7E, at $34,795. The C7E half of this held; the range half did not. What that costs is quantified in §4.7 — a 2,310 lb measured ceiling against a defensible build that lands at 2,414 lb loaded. The CAT scale instruction is unchanged and is now the first job, before and after the upfit strip.
2. Budget $91,000 and 750 hours. Not $60K, not 400 hours. Insulate ruthlessly to a real R-7 effective, heat with a quality diesel unit and a spare on the shelf, cool with the 24 V unit, build the bank at 15.36 kWh, and treat pet monitoring as a life-safety system because the OEM app is already dead.
3. Plan the year around the energy budget, not the other way around. 100-mile legs, 150–200 mile days, 50 A pedestals as the primary charger, an RV-park app opened before PlugShare, 25% SoC reserve into every gap, and an itinerary that chases elevation in July and 40 °F in January.
If any one of those three is unacceptable — if you want 400-mile days, or a $60K budget, or the freedom to sit in 105 °F desert heat off-grid with the animals — buy a gas Sprinter. The alternator alone delivers 3–5 kW while driving and solves the exact constraint that shapes every page of this document. The reason is the cooling and charging math, not the sticker price, and no amount of clever building changes it on a 2024/2025 van.
What the BrightDrop gives you instead is 614 cubic feet, near silence, roughly $3,000 a year in fuel you do not buy, a body that does not rot, and a genuinely interesting vehicle on a platform whose guts are shared with a truck GM will support for a decade. That is a real trade. It is just not the obvious one.
- Camp and Charge — 50 A pedestal 240 V/50 A, 80% continuous rule, 9.6 kW usable; TT-30 is 120 V
- Mike Sokol / RV Electricity — NEC 551.73(A)(1) 12 kVA rating, RV PowerGate 30/50 A lockouts, campground demand factors
- InsideEVs and 7Gen — CCS1, 120 kW DC peak, port location, GM-approved adapter guidance
- BrightDrop Forum — owner range data (2.13 mi/kWh over 2,600 mi, 298 mi best leg), step-van charging access, Ultium/Silverado parts commonality, HV tap discussion, discontinuation reactions
- Nature Communications / Carnegie Mellon — state-level DC fast charging coverage metric
- JD Power — Zion/Vegas/SLC 270-mile gaps, Western governors corridor initiative status
- GM Canada and GM Authority — CAMI production end 10/21/2025, suspension since May 2025, no relocation
- Texas DMV Assembled and Reconstructed Vehicle Manual — VTR-61, VTR-130U, 4-of-6 life-support requirement
- Progressive DIY camper van and Roamly — RV title prerequisite, disclosure requirements
- NHTSA recall database — front drive unit fire (66 units, 2022 MY), HV pack enclosure sealing, intermediate steering shaft (built 3/15/23–7/16/24), rear EDM CSP
10Inspiration & reference builds
The Zevo 600 box is 168.9" long, and once the walls, ceiling and floor are built up it finishes at about 78.7" wide by 78.5" tall. That is a rectangular room, not a van. Almost all vanlife content — Sprinter, Transit, Promaster — is solving a curved, cramped, 70"-tall problem you do not have. The useful reference class is box trucks, step vans, ambulances and skoolies. Everything below was checked for existence; nothing here is a guess.
The scale drawing below is generated straight from the Plan C numbers at 4.6 pixels per inch, so anything you measure on it is real. There were two AI interior renderings here; they have been deleted. Both drew the room noticeably wider than it was tall, when the finished cross-section is very nearly a perfect square, and both drew a residential sofa where Plan C has a 23" bench. A picture that misstates the one thing this build is fighting over is worse than no picture. Every other image on this page is a photograph of the actual specified part.
The room, to scale
This is the part that decides whether the build works. The raw box is 83.68" wide and 82" tall. Two and a half inches of wall on each side, two inches of ceiling and an inch and a half of floor take that to 78.68" wide by 78.5" tall — which means the finished cross-section is, to within a third of an inch, a perfect square. Any picture that shows a room noticeably wider than it is tall is lying to you.
The wall number is the one to watch, because everything downstream hangs off it. The documented stack — ½" thermal break over the steel rib, 1.5" foil-faced polyiso, furring, ¼" panel — only lands at 2" if the furring is recessed coplanar with the insulation. Stack ¾" furring on top of the foam instead and you are at 2.5" before adhesive and tolerance. Polyiso also loses R-value as it gets colder, so the advertised R-9 to R-10 at 1.5" is a warm-lab figure, not a 0°F one. Plan at 2.5" until a physical wall mock-up says otherwise, and note what that costs:
| Wall build-up, per side | Finished width | Room around a 78" mattress |
|---|---|---|
| 2.0" — best case, recessed furring | 79.68" | 1.68" total. Buildable. |
| 2.5" — planning number | 78.68" | 0.68" total. Effectively zero. |
| 3.0" — if 0°F forces a thicker stack | 77.68" | Does not fit. |
Do not buy a 78" mattress. Specify a 76–77" custom instead: at 77" in a 78.68" box you get about 0.84" a side, which is the difference between a bed that drops in and a bed that has to be fought in. Giving up an inch of mattress protects the insulation; giving up the insulation to protect the mattress is the wrong trade in a van meant to sit at 0°F. Final size gets confirmed by tape measure after the shell is built, not before.
And a 2–2.5" wall keeps the van comfortable at 0°F with the heat running. It does not make it passively freeze-safe. That distinction belongs in the plumbing plan, not the insulation one.
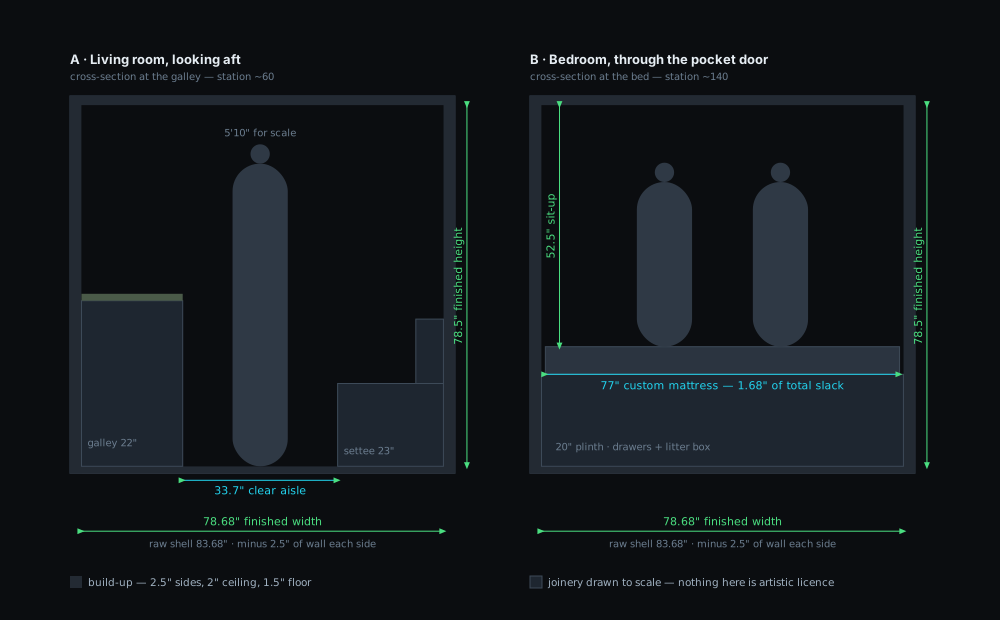
tools/cross_sections.py if the wall build-up changes.The closest analogs that actually exist
Two builds are on the same platform family. Everything else is a dimensional cousin.
Gus Bus Boondocks — Zevo 400 DIY
closest existing analogA private owner converting a BrightDrop Zevo 400. Same drivetrain, same no-alternator constraint, same orphan-platform questions — one size down on the box. youtube.com/watch?v=YoJzzkn_hgE
Grounded RVs
professional · exact shellBuilds finished RVs on the Zevo 600 shell. The best available read on what the finished proportions look like and how a professional resolves the roof, windows and service access. groundedrvs.com
Gallichan Truck Life
box truck · full-timeLong-running full-time box truck build with detailed room-splitting and storage. The layout logic transfers directly. youtube.com/@GallichanTruckLife
Box Truck Dreams
written build logWritten build documentation rather than video — useful for the parts of a box conversion nobody films. boxtruckdreams.com
Instagram accounts worth following
These handles were verified to exist. Individual reel permalinks were not verifiable programmatically, so these are accounts to browse rather than specific posts.
| Handle | Why it is relevant |
|---|---|
| @boonboxers | Box truck conversion, heavy on the finish carpentry |
| @box.car.child | Box truck interior with a genuine two-room split |
| @betsytheboxtruck | Full-time box truck living, day-to-day reality |
| @jemsadventurebox | Box build with strong window placement decisions |
| @tinyhometruck | Residential-feeling finish inside a box |
| @escapingthemidwest | Box conversion documented through the build stages |
| @roadtopitches | Box truck, working-on-the-road setup |
| @canadianstealth | Cold-weather box build — relevant to the diesel heat plan |
| @stormynorma | Step van conversion |
| @lamontzenki | Box truck build detail |
| @arstrauss1 | Box conversion, storage-forward |
| @tisha.talks | Box truck living, first-person |
Communities
| Forum | Use it for |
|---|---|
| r/BoxTruckConversions | The main box-specific subreddit. Note that r/boxtruckconversion, r/boxtruckcamper and r/boxtruckliving do not exist, and r/StepVans is private. |
| r/stepvan | Step van platform questions — chassis, doors, service |
| r/AmbulanceConversion | Best community anywhere on cutting into a rigid box and mounting to ribs |
| r/skoolies · skoolie.net | Long-body layout theory — two-room splits, wet baths, plinth beds |
| Expedition Portal · Van Living Forum | Systems-level threads, and the box-truck window-cutting thread in particular |
Builders, if the DIY math stops working
Named because they publish step van or box work specifically, not because of a quote.
Detail references, by problem
These are the seven specific things Plan C asks you to build that a stock van kit will not answer.
The 32" × 36" wet bath
A retractable shower door is the single highest-value part in a bath this size — it gives the aisle back when the shower is dry. Stoett Nautilus retractable screen. For the toilet, the decision is cassette versus composting: Thetford cassette is smaller and needs a dump point; Nature's Head composting is bigger and needs no black tank at all. Layout walkthroughs: Acts of Adventure, Vanlife Outfitters.
The pocket door at station 110
Use RV-rated pocket hardware, not residential — residential rollers rattle themselves loose on a chassis. BJ's RV stocks the RV hardware; Raydoor is the reference for slim sliding panels. The forum consensus from Transit builds is unambiguous: fit a positive latch at both ends of travel, or the door becomes a 40 lb pendulum every time you brake.
The 48" galley run
The Lagun swing-arm table mount is the exact part for the settee — single leg, swings away, holds a laptop and two plates. VanLifeKitchens publishes real counter-depth and reach numbers for short runs, and KUL's 48" galley is the same length as yours.
The 20" bed plinth
A 54" × 78" crosswise platform wants a lift, not a lid you wrestle. Hatchlift makes the RV-specific kit; Gastac publishes the strut-force math so you can size for the actual mattress weight. Build detail: The Vanimals, Bearfoot Theory.
The dog and the cat
Honey Built Home publishes a hidden litter box cabinet with a full cut list — that is the plinth-storage litter solution, already drawn. For the externally-vented version, this build is the clearest one filmed: youtube.com/watch?v=cw1QFNR9mjM. For the dog berth, Trail & Kale covers the crate-in-the-under-bed-garage pattern, and Divine On The Road covers full-time travel with both animals.
Windows in a windowless box
Your walls are flat, which is an advantage: Motion Windows will make custom flat-wall units, and CR Laurence is the commercial glass source. Arctic Tern awning windows are the vanlife default and mount flat. Overhead, a Dometic Mini Heki adds light without eating solar roof.
The thing to get right is cutting the ribs. A box truck sidewall is structural; the Van Living Forum thread on box truck window installs walks through re-framing after the cut, and FarOutRide's DIY install is the best general procedure. Placement rule worth following: put glass where you sit and where you cook, not where you sleep.
The feel of the place
A cedar plank ceiling (Gnomad Home) does more for a box interior than any other single finish — it breaks up 168 inches of flat white. FarOutRide's 12V dimmable puck layout is the lighting reference. For overall tone, the "zen office" box truck on Tiny House Talk is the closest published look to what an 80"-wide room can feel like, and Outside Van and Vanlife Customs galleries are worth a scroll for material palettes.
Two finish palettes, both proven on video
Neither of these is a box truck, and neither is electric. But both are the same order of interior volume, and both answer the question this build has not answered yet: what does it actually look like inside. Pick one and commit — the failure mode in a narrow room is mixing three wood tones and four metals until the eye has nowhere to rest.
| Palette A — sage & brass | Palette B — plaster & walnut | |
|---|---|---|
| Source | @courtandnate 60-second tour | Reel tour |
| Cabinet faces | Muted sage / pistachio green, flat slab | Dark walnut, flat slab with a finger pull |
| Walls | Warm cream, flat | Warm neutral microcement / plaster texture |
| Secondary wood | Light oak / birch trim and shelving | Exposed ceiling beams in the same walnut |
| Metal | Brass / unlacquered gold | Matte black, everywhere, no exceptions |
| Counter | White solid surface | Same walnut, oiled |
| Reads as | Bright, cottage, feminine-leaning | Dim, hotel, monastic |
From A: the arched passthrough between cab and cabin — it costs nothing but plywood and does more for the "not a truck" feeling than any other single cut. A skylight directly over the bed. Square tile in the wet bath, stopped at shoulder height rather than run floor-to-ceiling.
From B: a reeded-glass shower door instead of a curtain — it passes light both directions, which a 30" wet bath badly needs. A lift-up bench seat over the storage rather than a drawer front. A tall, narrow pull-out pantry beside the galley, roughly 9" wide. Full-height hanging closet instead of two half-height ones. And the best idea on either video: an outdoor shower head and city-water fill mounted at the rear bumper, which turns the back of the vehicle into the mud room the interior does not have room for.
The walkable roof deck. Palette B carries about 400 W of solar and gives up the rest of the roof to a deck. Before the rooftop A/C call this build used the roof for up to 1,350 W across three 440–450 W panels, and a fourth already missed the available run by 126 mm. There was no spare roof then; there is even less now. Deck, A/C and power all compete for the same surface.
Tile and plaster. Both finishes are beautiful and both are dead weight against the measured 2,310 lb ceiling the build is already over. Microcement over a rigid substrate is roughly 3–5 lb/sq ft installed; ceramic tile with thinset is worse. In a wet bath that is tolerable as an accent, over 484 sq ft it is not. Use a printed acrylic or a large-format PVC panel where the camera would have seen tile, and spend the saved weight on battery.
Exposed ceiling beams. Palette B's beams are decorative on a chassis with 6'4" of standing height to spare. Interior height here is 79.68" at a 2.0" wall build-up, and every inch of it is already spoken for.
Every reference above is on a combustion chassis with an alternator and a fuel tank. None of them face the two constraints that define this build: no alternator, and 484 sq ft of thermal envelope to cool. Copy their carpentry. Do not copy their power budget.
11Build sequence
The whole document, reordered into the sequence you actually execute. Every step cites the section that justifies it. Nothing here is new information — it is the same build, arranged so that no step ever has to be undone to do a later one.
This sequence plus the §08 bill of materials, merged into one standalone page — consolidated shopping list with prices and order-first flags, the tool list, and phase-by-phase instructions with install detail from the research corpus: The build manual →
Three rules generate the whole order. Holes before insulation — every penetration of the composite skin (windows, fans, heater exhaust, wire glands) happens while the walls are bare, because cutting through a finished wall wrecks insulation and finish in the same stroke. Weight gates before money gates — the van gets weighed at four points, and each weigh is a go/no-go on the next spending phase, because §4.7 proved the estimates run ~120 lb optimistic. Bonds cure on the calendar, not on enthusiasm — 3M 08115 is 90 minutes of working time, 4 hours clamped, 24 hours to full strength (§02), and every bonded stage has a hard wait built in.
Phase 0 — Before the van moves anywhere
Paperwork and procurement. None of it requires touching the vehicle, all of it gates something later.
| # | Task | Why now |
|---|---|---|
| 1 | Photograph the certification jamb label and the yellow FMVSS reduced-capacity label; file with the buyer's order | Done pre-contract (§00) — these two photos are the build's governing documents. Keep copies off the phone. |
| 2 | Confirm commercial-vehicle insurance is active for the pre-conversion period | It titles as a commercial step-van until the motorhome retitle in Phase 13 (§9.8). RV insurers will not touch it yet. |
| 3 | Get written confirmation from a GM commercial dealer on parts, software support and any open recalls for the VIN | Production ended 21 Oct 2025 (§REF). Get it in writing before money goes into the box. |
| 4 | Buy the portable EVSE (32 A / 240 V capable) and the 50 A EMS surge protector | Charging is the daily constraint from day one (§09). The EMS protects the onboard charger at the first sketchy pedestal. |
| 5 | Done 2026-09-08. Long-lead electrical core ordered: 2 × LiTime 24 V 230 Ah self-heating (11.78 kWh), MultiPlus-II 24/3000/70-50, SmartSolar 250/60-Tr, Cerbo GX MK2, Lynx M10, SmartShunt, Orion-Tr, MEGA fuses. Still to order: 250 A Class T + 24 V sub-block, Blue Sea 8099 AC panel, 1/0–2/0 cable (§05 BOM) | These are the longest lead times in the build and the bench work in Phase 7 can start before the shell is done. |
| 6 | Order windows, 2 × MaxxFan Deluxe 7500K, and the aluminum sub-frame stock + 3M 08115 | Phase 4 is the critical path. Everything it needs should be on the shelf before the first cut. |
| 7 | Line up covered workspace with 240 V power for the build months | Bonding has temperature windows, and an EV conversion without a plug is a logistics problem daily. |
| 8 | Download the 25MY body builder manual sections for no-drill zones and HV routing; print the underbody exclusion maps | Every hole in Phases 4 and 8 gets checked against these maps first (§02, §REF). |
Phase 1 — Delivery week: measure before you believe anything
The point of this week is to replace the last estimates with measurements, on the exact vehicle.
| # | Task | Output |
|---|---|---|
| 1 | CAT scale, as delivered — per-axle, with the Adrian Steel shelving still in | Weigh gate 1. The baseline ticket. Front and rear axle numbers, not just gross (§4.7: GAWR 5,291 F / 6,172 R are independent limits). |
| 2 | Strip the upfit — shelving, rails, partitions; patch and seal the abandoned holes | The 416 lb FMVSS deduction is assumed to come back. Assumed, not known (§4.7). |
| 3 | CAT scale, stripped — same scale, same fuel/charge state | Weigh gate 2. The number that replaces every curb-weight estimate on this page. Ticket 2 − ticket 1 = what the strip actually returned. |
| 4 | Battery health check — 100 % charge, then a measured highway run; log kWh dispensed vs indicated SoC | A used pack's real capacity. The §09 charging plan assumes 173.3 kWh useful — verify before route-planning on it. |
| 5 | DC fast-charge test — one 10→80 % session at a working 150 kW+ station; log the curve | Confirms the 80–95 min figure in §09 on this pack, and that DCFC works at all before you are 400 miles out. |
| 6 | Inspect the roof at the intended solar and fan locations; verify M8 rain-gutter studs and solid (non-CC4) panel sections | The §02 mounting plan, confirmed against this van instead of the manual. |
Before any design is frozen and any hole is cut: the bottom-up weight budget from real SKUs, against the measured 2,310 lb, in two columns — conventional ply versus composite/aluminum — described at the end of §4.7. As of this revision that rebuild does not exist yet, and the current defensible build is over the ceiling with reserve — magnitude pending the SKU mass ledger (§00). No total on this page is quotable until it closes. The four non-negotiables hold in both columns: insulated floor, real wall/ceiling insulation, two roof fans, fuel-fired heat (§04).
Phase 2 — Design freeze
Run the SKU rebuild with the Phase 1 scale tickets as input. Decide, on paper, and then stop deciding: layout (§03 Plan C geometry, with the bath bay held as storage — bathroom is last-in-if-at-all per §8.5), 16 gal fresh / ~22 gal grey (§06), Velit 2000U under-bench for cooling (§07), Espar S3 D2L for heat (§07), the §05 one-line diagram unchanged. Every cut in Phase 4 comes off this frozen drawing. A change after freeze costs a re-audit of the weight budget, by rule.
Phase 3 — Shell prep
Degrease and scuff every bond area. Map and mark every rib, the no-drill zones, and the HV routing from the printed manual maps onto the actual walls in tape. Dry-fit the floor deck, the window sub-frames and the fan garnish rings. Template every penetration in cardboard and tape it in place. Walk the whole layout at full scale before anything is irreversible — this is the cheapest day of the entire build to find a problem.
Phase 4 — Holes: every penetration, while the walls are bare
| Penetration | Method | Cure gate |
|---|---|---|
| Windows | The 1.6 mm composite skin cannot carry a window unreframed (§08). Bond aluminum sub-frames with 3M 08115, glass-bead bond line, then set the windows into the frames | 4 hr clamped, 24 hr before glazing |
| 2 × MaxxFan Deluxe 7500K | Solid roof sections only, never CC4 (§02). Frame the aperture, bond, seal | 24 hr before loading |
| Heater exhaust + combustion intake | Thru-hull low on the body per the §07 install plan, clear of the underbody exclusion zones on the printed maps | Sealant cure per spec |
| Roof rack / solar mounts | M8 rain-gutter studs — the factory attachment points (§02). No new roof holes for the array | — |
| A/C exhaust + condensate | The Velit 2000U ducts its condenser air out through the floor or a lower side panel (§07) — cut and seal that path now, clear of the underbody exclusion zones, plus the condensate drain | Sealant cure |
| Shore inlet + wire glands | NEMA 14-50 inlet (§05) and any antenna/monitor glands, drilled and sealed now | Sealant cure |
When Phase 4 ends, the shell is watertight again and never gets cut after this point. Hose-test every seal before insulation goes over it.
Phase 5 — Insulation
To a genuine effective R-7 — over the ribs, not just between them (§07). The ribs are the thermal bridges; insulating only the bays leaves a radiator grid in the wall. 484 sq ft of envelope, costed at ~63 lb in the §4.7 audit. Vapor-open where the assembly needs to dry, sealed where it must not loft moisture at the skin.
Phase 6 — The floating floor
Zero fasteners through the floor at any point (§02) — the Ultium pack owns the underfloor. The deck floats: wall framing traps it laterally, bonded aluminum cleats (08115) at the bulkhead and rear sill trap it fore-aft. Insulated floor is a non-negotiable (§04). Cleat bonds get the full 24 hr cure before the deck is walked on.
Phase 7 — Electrical
Build per the §05 one-line, and bench-commission before installing: 2 × LiTime 24 V 230 Ah self-heating in parallel, equal-length paralleling cables (11.78 kWh) → 250 A Class T fusing → MultiPlus-II 24/3000/70-50 → single 120 V leg, SmartSolar 250/60 on the final roof array, Orion-Tr for the 12 V panel, SmartShunt on the bank. Set the MultiPlus AC input current limit to 8–16 A so the house is happy on one shared pedestal leg (§05). Wire the A/C circuit to the chosen rooftop unit's max-mode figure, not a surge multiplier (§07). Then mount the panels, fly the array, and verify harvest on a real day.
Phase 8 — Heat
Espar Airtronic S3 D2L, 2.2 kW: 5 gal aux diesel tank in the rear box (12 nights at 0.41 gal per 20 °F night, §07), fuel line and dosing pump per spec, ducting low along the floor where the heat is needed, dedicated fused circuit, and two CO detectors before the first light-off. Run the full high-elevation burn-in per the §07 notes, and put the $200 clone heater on the spare shelf.
Phase 9 — Water
The locked spec: 16 gal fresh (~133 lb full), ~22 gal grey, every tank inside the box (§06) — the underfloor is HV territory and there is 7.51" of clearance. Fresh forward of the rear axle, low and centered; grey may sit further aft; the rear overhang gets the drain penetration only, never mass (§06). Remco Aquajet ARV pump — no accumulator needed — and HepvO waterless traps at every drain: nothing to freeze, nothing to slosh (§05/§06). Plumb the winterization loop now, not in November (§06).
Phase 10 — Walls, ceiling, cabinetry
Anchor to the Ranger Design 6550-BZL mounting track — the drill-free, purpose-built attachment for this body (§02) — with cabinet frames in thin-wall aluminum per whichever column won the Phase 2 rebuild. Every cabinet is crash mass: tie every carcass to track or bonded cleat, rated for a stop, not for gravity. Weigh sub-assemblies as they go in and log against the frozen budget — this is where the ~120 lb optimism error historically accumulates (§4.7).
The rooftop A/C installs only after the roof layout is frozen around panels, fans, service clearance and wiring. The old Velit 2000U bench-bay step is superseded; do not build cabinetry around it or order it as the cooling pick.
Phase 11 — Pet safety & monitoring
The cat is the binding constraint (§07): MarCELL on Verizon (it phones you) as primary, Waggle Pro on AT&T/T-Mobile for carrier diversity, both with internal batteries. Alert on state of charge, not just temperature — wire the power-loss trigger to the house bus. Thermostatic fan circuit on its own isolated supply, so a house-bank fault cannot take ventilation down with it.
Phase 12 — Commissioning
| # | Check | Pass condition |
|---|---|---|
| 1 | Water: pressure-hold on the fresh side, dye/leak walk on every HepvO joint | No drop overnight, no weep at any joint |
| 2 | Electrical: full-load inverter test, solar harvest day, shore charge through the EMS, 12 V rail under load | Numbers match the §05 design figures |
| 3 | Heat: overnight burn at duty cycle, CO detectors live, fuel consumption logged against 0.41 gal/night | Cabin holds temperature; CO flat |
| 4 | Pet stack: pull shore power and main bank breaker; confirm the MarCELL call and Waggle alert both arrive | Phone rings. Actually rings. |
| 5 | CAT scale, systems in — before final trim goes on | Weigh gate 3. Still under budget with trim + occupants + gear (777 lb, §04) remaining, or trim gets re-scoped now |
| 6 | CAT scale, finished and loaded — tanks full, both people, the dog, the cat, the gear | Weigh gate 4. Under 11,000 GVWR and under both GAWRs per axle (§4.7). This ticket is also Phase 13 paperwork |
| 7 | Shakedown: one week, within 100 miles, including two nights off-grid and one DCFC session | The punch list, found near home instead of far from it |
Phase 13 — Title and insurance, in exactly this order
The order matters because each item is the prerequisite of the next (§9.8): finish the conversion → weight certificate from the loaded CAT scale → photograph the permanently installed systems → file VTR-61 + VTR-130U (Texas converted-vehicle process, which wants 4 of 6 life-support systems permanently installed) → motorhome title issues → then, and only then, RV insurance. An RV policy on a commercial title is a claim denial waiting for its moment. Keep the commercial policy live until the day the RV policy binds.
Phase 14 — Departure stockpile
Consumables and the failure points, not fantasy spares (§9.9): heater clone + glow plug + fuel pump, spare MPPT, water pump head, HepvO cartridges, 08115 + sealant, fuses at every rating on board, filters, and the printed one-line diagram taped inside the electrical cabinet. You cannot stockpile a composite body side — that risk is what the insurance in Phase 13 is for.
Measure (0–1) → decide and freeze (2) → cut every hole (3–4) → close the envelope (5–6) → power, heat, water (7–9) → furniture and safety (10–11) → prove it (12) → make it legal (13) → leave (14). Weigh at 1, 1 again, 12.5 and 12.6 — and nothing gets built until the §4.7 SKU rebuild says on paper that it fits under 2,310.
12Forum research
A full crawl of brightdropforum.com — the only active community of BrightDrop owners — read against this specific build. Every thread on the forum was indexed, the relevant ones were kept, and the highest-value threads were deep-read in three lanes: power & energy, structure & envelope, and builds / platform / buying. Full notes live in the research corpus; this section is the distilled version plus the complete link index.
Every owner build documented with pictures on the forum — the complete camper conversions plus the platform-detail shots (bulkhead removal, wheel-well insulation, under-seat batteries, roof solar) — is archived with captions on a dedicated page: Owner builds, in pictures →
The §08 bill of materials and the §11 sequence merged into one executable page — shopping list with prices, order-first flags, tools, and phase-by-phase instructions: The build manual →
Every BOM line shopped against live vendors — cheapest reputable source, current price, direct order link, priced alternates, and the review gate each item waits behind: The parts list, where to buy →
The recommended van-build canon — FarOutRide, Engineers Who Van Life, DwnShifters, Moser Makes — scraped guide-by-guide and distilled to what applies to an electric platform: The reading list, distilled →
Power & energy — what the owners have proven
- Camp mode is real and changes the heating math. Brake + start button held 10+ seconds → "Automatic Shutdown Off"; the van and its factory heat pump then run indefinitely off the 173 kWh traction pack. Measured: ~2 kWh/hr overnight heating or cooling, 4 kW peak cooling in 104 °F sun — 3+ days of factory HVAC on a full pack. It competes directly with the diesel heater whenever pack margin exists. (11+ hr heat test, camp mode hack)
- The no-alternator gap has a proven DIY answer: harvest the T18. The factory 400V→12V converter feeds an always-hot buss bar under the driver's feet and auto-wakes when the rail sags. One owner runs a Kisae DC-DC charger off it — proven at 240–480 W continuous (~6–12 kWh/day), targeting 600 W. A ~$300 charger recovers "alternator charging" without touching high voltage. Caveat: heavy ignition-off harvesting corrupted his displayed SOC, so harvest mainly while driving. (offboarding series, T18 explained)
- 2026's factory power offboarding (KV7) does not retrofit to a 2024 — it's built on a different onboard charger plus VIN-level enablement; dealers report no retrofit path. The house bank stays justified. (KV7 deep dive)
- Real-world efficiency for trip planning: 2.78 mi/kWh @ 40 mph, 2.41 @ 50 mph, ~155 kWh usable — documented 417 mi on one charge at 40 mph. A loaded camper at highway speed should plan around 2.0–2.2 mi/kWh. Rules of thumb: −10% per 5 mph of headwind, −10% at 25 °F. (six efficiency graphs)
- DC fast charging caps at 120 kW, and Tesla Superchargers throttle it further (80–90 kW). Electrify America holds the full 120 kW to ~80% — prefer EA/IONNA on road days, and enroll in the MyChevrolet app to unlock Tesla/IONNA/EVgo access. (long-run threads)
Structure & envelope — what the owners have proven
- The roof mid-span is flimsy; carry solar and A/C loads to the edges. M8-1.25 threaded studs protrude above the rain gutter along both roof edges — coupling nuts + unistrut bolt straight into the wall structure with zero drilling. The old 1,350 W array was within what owners are flying, as long as weight lands on the edge studs, not sheet mid-span. The rooftop A/C decision means the structure and panel count must be rechecked together. The '24 does not have the load-bearing roof that became standard on '26s. (roof weight support, roof rails)
- Thermal bridging is the envelope problem, not field R-value. Foaming the aluminum ribs showed no measurable benefit on thermal imaging; the fix is a thermal break on the cabin side of every aluminum member. The build's 6063 tube frame must be isolated from the van's skin (butyl, CCF) or it becomes a radiator. (box channels)
- No XPS on the roof — rated ~165 °F and the skin exceeds that in sun. Polyiso, EPS, Thinsulate or wool up top; one builder names XPS as his known mistake. (roof insulation)
- ~250 lb of free payload exists in the bulkhead + roll-up door. Roll-up door 152 lb, bulkhead ~150 lb (bolt-in replacement cage ~50 lb), rear step 26 lb, spare + tools ~99 lb. Bulkhead removal is proven and the service guide calls it nonstructural — but experienced builders add replacement lateral structure anyway. (weight-shedding, bulkhead removal)
- The aluminum-tube framing approach is field-validated. An owner framed windows in 1-1/4" aluminum box tube tied to the side framing with butyl isolation — "actually made the wall more solid." The 3 mm sidewall composite is non-structural; never hang loads from the panel itself. (window + panel work)
- Condensation is severe on the bare body — near freezing, an uninsulated ceiling literally rains. Two people + pets means continuous ventilation, a dehumidification plan, and floor-to-ceiling vapor discipline. A proven ~R-5 floor recipe exists (Foamular 150 under the OEM mat, longer bolts). (condensation, floor insulation)
Builds, platform & buying — what the owners have proven
- Two complete camper conversions exist to crib from. The EVaded "IVAN" build is the forum's most methodical (a year of CAD and mockups before cutting) and documents the real bulkhead-removal procedure: drill out the floor-plate spot welds first, then release hidden cab-side adhesive behind the headliner — 11–12 hours, with curtain airbags anchored in the upper corners, so 12V disconnected before touching it. Barajabali's BD600 Max conversion is the same van as this one (bought ~$52k against $83k MSRP): windows in the pocket-door cavity, raised-floor shower that avoids drilling, furniture anchored to the old bulkhead mounts and factory D-rings — because the HV battery under the rear floor makes drilling there off the table.
- The 11,000-lb GVWR (C7E) appears to be paperwork, not hardware — identical axles, springs and tire ratings to the 9,990-lb C5F per photo forensics, part numbers and multiple dealers. Real-world: a stripped 400 scaled 8,530 lb dry, and GM curb weights run 300–500 lb off actual — which is exactly why this build weighs at four gates. (GVWR 9,990 vs 11,000)
- Two things must happen before the walls close: a hose test and killing the motion sensor. 2024s sit in the chronic water-leak window (box wheel wells, sliding doors, roll-up door — one owner fought GM for a year and his replacement '26 still leaks), and the cargo-ceiling ultrasonic anti-theft sensor will trigger the alarm on anyone sleeping inside a locked van — unplug and remove it; the service alert self-clears in about a month. (leak history, ceiling devices)
- Four recall campaigns to run the VIN against at my.gm.com/recalls — most relevant: N232420460, roof-rail airbag on 2023–24 600s with the optional jump seat, plus battery-pack sealing, steering shaft, and the rear drive-module satisfaction program. (airbag recall, recall news)
- Reliability is genuinely good — 58k miles in two years for the highest-mileage owner — with one behavioral warning: a van left plugged in at a fixed charge limit for two months threw a U2B9B27 pack fault and needed a full HV battery replacement (covered; 8 yr/100k warranty unchanged). Don't store it plugged in, and locate a BrightDrop-capable dealer now — many owners drive 70+ miles for service, and the 65 mph limiter is not removable. (pack replacement, two-year report)
- The market has already bottomed: Max-pack 600s trade at $40–55k real money, roughly half MSRP — broker liquidations hit $46,750 for new 600 Max units, and a 554-mile 2023 closed under $38k. The 173 kWh pack is the value anchor, and warranty runs from the in-service activation date, not model year — a 2024 badge likely has more coverage runway than it suggests. (buying playbook, bargain prices)
- Nothing from 2026 retrofits — KV7 PowerBase V2L, the Universal Vehicle Module, and the reinforced roof rack are all locked to '26 hardware and VIN enablement, which confirms the DIY house-bank architecture in §05 as the right call for this van. Parts outlook: drivetrain shares Ultium components with Silverado EV and Hummer EV; BD-specific body panels and glass are the long-term exposure. ('26 vs older, parts availability)
Three forum findings belong in §11 before any insulation goes in: hose-test the wheel wells, sliding doors, roll-up door and roof seams and reseal what fails; remove the cargo-ceiling anti-theft sensor so the alarm can't fire on occupants sleeping in a locked van; and run the VIN through GM's recall lookup — the roof-rail airbag campaign applies to 2023–24 600s with the jump seat.
What changed between the August and October crawls
Re-crawled 2026-10-11. 101 threads moved and 414 posts landed after the first crawl; these are the ones that change a number or a decision on this page. Full post text is archived in the research corpus.
GM's BrightDrop consumer cash — $28,000 on 2025s, $20,500 on 2026s, plus 0% for 72 months — expired 2026-09-30 with no October successor. A tracked Max Range 600 at AutoNation Greenacres went from $55,644 to $83,644 overnight, and GM Fleet now shows only $1,000 fleet cash + $500 upfit cash on a 2025. A dealer posting on the forum says GM has moved the remaining pool to a liquidator in tranches: roughly 1,820 2025 vans, all standard battery — 600 FWD 11,000 GVWR ×90 · 600 AWD 9,990 ×280 · 600 FWD 9,990 ×550 · 400 AWD ×400 · 400 FWD ×500 — with the warranty clock starting at ship. In that pool the 11,000-lb rating appears only on FWD 600s, so the AWD + C7E combination this build wants is scarcer than §01 assumed. Separately, Hertz buy-back 2024 Max Range 600s (1–10k mi, many 11,000 GVWR, cosmetically beaten, warranty already running) are landing at Chevy dealers about ten at a time. Re-check the §08 donor-price band ($30–46K) against this before committing; the forum's own read is that GM has every reason to put money back on the hood if October sales stall. (subsidy thread, Max-pack availability)
Buying & platform
- New Max Range 600s are effectively gone. Three confirmed live 2025 units nationally on 2026-10-05; the 2026 ETJ vans exist only as "In Transit" in GM's BrightDrop Pool. No change to this build (Max Range is disqualified on payload in §04) but the fallback is closed. (845)
- How rare the van is: ~25–30k built lifetime; US deliveries 146 / 497 / 1,535 / 4,971 for 2022–25 (7,149 total); the 2026 model year is likely low hundreds. (847)
- Governor removal is now a repeatable dealer job. Techline bulletin, proof of ownership (bill of sale), GM engineering caps the limit at 85 mph, the software expires 14 days after issue, allow more than 48 h. Paid: $189 at South Charlotte Chevrolet, ~$450 all-in at Sport Chevrolet (Silver Spring, MD), $700 quoted in California. (729)
- Two coil-spring part numbers exist for the 600 (85626729 and 87838653) against one for the 400, and nobody has tied one to the 11,000-lb code yet. The "C7E is paperwork, not hardware" finding above is less certain than it reads. (200)
- The 2026 roof is a compression-moulded SMC assembly (SPE award) that owners call far more robust than the 2024 "flimsy thin sheet". The roof-load caution for 2024/25 vans stands. (875)
- Wheel-well dimensions on a '25 400: 13.5 in tall × 13 in wide × 36 in long, +10 in rearward on the charge-port side; ~61 in of headroom above it to the door track. (861)
- 12 V battery swap has a procedure. Follow Upfitter Integration Bulletin 190b (wait out battery-maintenance mode, engage HV service lockout) or expect "service high voltage system", a 0% pack reading and a dead charge port; the battery monitor module needs ~4 h to recover. (775)
- A "45-day rule" was reported: OTA updates must be taken within 45 days of issue to keep warranty; a stuck update took after "restart in safe mode". One owner's reading of GM's terms — unverified. (469)
Power & energy
- A flexible-panel array burned the roof. After a year and 10,000 miles, two cells in a 9 × 130 W EcoWorthy flexible tilt array failed, produced a burning-plastic smell and charred the roof where the sagging array touched it. Output never dropped, so nothing flagged it. For the §05 array: keep a real air gap under any flexible panel, avoid edge shading, inspect at every tilt — or use glass. (375)
- T18 harvesting has a ceiling. While driving, keep total 12 V draw under the summed fused upfitter + 12 V + 120 V circuits (135 A on a MY2025) — power steering and ABS ride on that rail. One owner runs 75 A (930 W) continuous today, 180 A was seen for a minute, and a shorted T18 means replacing the whole bus bar. (819)
- Charging on the road, from two long trips: Tesla V2 Superchargers will not charge a CCS van — only stalls shown in the Tesla app work, with a Lectron NACS→CCS (500 A) adapter at V3/V4. Electrify America membership for DC, a ChargePoint L2 to sleep plugged in, and RV-park 50 A pedestals charged overnight for the park fee. Six weeks / 8,000 mi / 17 states cost about a third of a ¾-ton diesel's fuel. (857, 801)
- A working 400 averaged 2.1 mi/kWh over 10,000 mi with a roof rack, about 10¢ a mile. (865)
- The GM Powerbar remains the only charge-port inverter that works on this van. (269)
Envelope & systems
- Spray foam: unanimous no. The 3 mm composite panels flex with the wind; adhered rigid board only, and canned foam in closed cavities never cures. Polyiso derates in the cold. Supports the §02 wall build-up. (853, 593)
- HVAC decisions from the Bainbridge build: the GE window heat pump was dropped (the plenum ate the space) for a 48 V DC mini-split (fullbattery.com) run straight off the EcoFlow bank; GREE Vireo R32 9k was the 115 V finalist. The Pundmann / Turbro / Pioneer / iHider under-bench units appear to share a factory, and one arrived dead with poor cold performance. An inverter inside the envelope heats the room you are cooling — go DC and 10k BTU or more. HRV picked: Vents Freshbox 100, HRV not ERV, to dump moisture overboard. Cross-check against §07. (437)
- Cab noise: there is no air seal above the sliding doors — a ¾ in bulb seal, doubled windshield side seals, Thinsulate above the headliner and stiffened bulkhead-door panels are the proven fixes. (191)
- Cargo floor liner is 60.6 lb including tie-downs; two T35 bolts have welded nuts underneath — drill them. (771)
- Side windows through the sliding-door pocket are proven on both sides, with shade and screen as separate units. A Chinese cargo-trailer rear door with windows replaces the roll-up (Anhui Qiyue via Alibaba, international wire only; a Seattle group buy is under way). Photos in the archive. (783, 741)
- Underbody: a ~16 gal grey tank fits behind the rear axle of a 400; use RecPro poly tanks, not epoxy-laid fibreglass. Grey under the cab is the Bainbridge answer on a 600. (797, 811)
- Breakover is 8.7° on a 600 (10.5° on a 400); a lift buys almost nothing and costs range. (761)
- Solar rack prototype: Whiteman Motors is printing contour brackets for a rack that rests on the roof on foam and clips to the wall supports. Field feedback, which matches §05: mount to the structural side aluminium, keep the rear 15° plastic ramp, skip flat bifacial. (881)
Builds
- Farley (now "BettyWhite", a 400) is complete — Nova Kool RFU6406D fridge, tambour shower draining through the track. Bainbridge (600, Apogee Fab, 15 kWh EcoFlow, heated Schluter floor, barn-door garage with awning window) targets December; Apogee has three BrightDrops in the shop. Barajabali's 600 Max build and TinkerDadd's window and door work are now in the photo archive, which was rebuilt from complete threads. Kelson Lau has started a YouTube conversion series. (Owner builds, in pictures →)
The complete relevant-thread index
All 483 build-relevant threads from the crawl, grouped by forum section, in thread order. Open a group to browse.
General discussion 396 threads
- Anyone looking to build a zero emissions RV? BrightDrop EV600 upfitting?
- Powertrain/drive unit
- General Motors is making their own EV chargers!
- Interior Dimensions
- BrightDrop Sets World Record For Longest Electric Delivery Van Journey
- Find All BrightDrop EV600 Reviews Here!
- Video: Brightdrop EV600 First Drive Review by Two Guys In Traffic
- GM’s BrightDrop Vans Should Be Eligible For Commercial EV Rebate In Canada
- GM's $1,500 OnStar, Connected Services plan forced option on new cars
- 2022 BrightDrop Zevo 600 May Have Issues At Public Charging Stations
- GM Introduces Ultium Home and Ultium Commercial Power Solutions for Customers
- 89 BrightDrop EV600 Vans Recalled For Battery Pack Sealing Issue
- Quality second seat
- This Is RollAway's BrightDrop Based EV Camper Van
- 2023 BrightDrop Zevo 600 Sold Out, Reservations Open For 2024 Model
- GM Detuned The BrightDrop Zevo 600 For Durability
- GM Reveals 2024 BrightDrop Zevo Interior Images
- BrightDrop Zevo Gets New Power Door Package
- Brightdrop to open 19 sales and service centers in us and canada
- Zevo range. First hand experience.
- My Zevo 600 range experience
- Brightdrop EV600 Turned Into $200,000 Camper Van
- BrightDrop Zevo 600 Recalled For Roof Rail Airbag Deployment Issue
- Brightdrop absorbed by GM. CEO Travis Katz out.
- 411 miles range
- Tow Hitch
- Rev limiter
- BrightDrop Vans Moving To Chevy
- 2025 Prices Leaked
- Brightdrop need 'Camp mode'
- Next challenge for Brightdrop "Power base"
- Heating & Cooling Options
- BrightDrop Camper Van Group
- Brightdrop 400 retail parking and insurance concerns
- Cargo areas window recommendations and panel work
- 120v plugs are only 400w?
- 2025 and 2024 GM BrightDrop Manuals:
- BrightDrop CAD Files - Acquired, DM me to collaborate to build 3D Model
- Chevy is stockpiling BrightDrop vans
- Auto insurance for Brightdrop?
- I called GM and they are sending our questions now to the right people!
- 3M Thinsulate (TM) SM600L Acoustic Thermal Automotive Insulation for van and car
- 80 mph limited
- Six helpful efficiency graphs, 2023 Brightdrop 600 AWD, 173kWh battery
- Window Tinting
- Upfitter Thread
- Battery bolts on floor?
- 3 Front Seats Mod
- Roof rails/racks
- Costco Executive members get MASSIVE $31,500 off Chevy Brightdrop van
- Interior cargo area mods to secure items to the walls
- BD 600 AWD max-range first road trip thoughts...
- Chevy-Installed Vehicle Speed Sensor (Governor)?
- Leaky doors and roof
- BrightDrop 600 as a camper!
- Vega Build
- Simple Additions
- $10 hack to quiet the back door
- My camper layout in two photos
- Compatible Third-Party Key Fob?
- Range and temperature for cross country driving
- 2025 Incentives Availability
- 23 vs. 24 vs. 25
- Blind anchor bolts for Tie Down anchors for interior wall bars
- Jump seat - making it more comfy for longer trips
- Aluminum Extrusions
- Build HVAC systems
- Is there a way to know if a car was ever stolen and recovered?
- Has anyone here made a long range trip greater than 600 miles?
- Economizing
- Yes, you can charge at Tesla Superchargers
- Sound Dampening
- Power offboarding
- Top & bottom of battery
- Sliding Door Pocket Cover
- Devices in cargo area ceiling
- A few questions...HVAC, seats, etc.
- Insulation and Sound Deadening materails
- More power offboarding
- Roof insulation
- First Long Trip ~1800 miles
- Kitchen sink in front dash
- Novel power offboarding
- Flood Vehicle Check – How Can I Be Sure?
- How our 12 volt batteries get charged - the T18 battery charger
- Anyone else with wiper issues?
- Tesla Supercharging w/BrightDrop 600
- YouTube channel of a BD being built into a camper.
- Floor insulation
- Warranty - is it ok to install rivet nuts in wall frame?
- Service mode
- Huge dash improvement for $41
- How do you deal with humidity?
- Brightdrop and Ecoflow
- What Are You Paying Out the Door for Your BrightDrop?
- Shorthand efficiency
- Those with a 2025 can you show me what you see when you open the climate screen?
- Aerodynamic tail. Final 3 photos.
- Interaction between house power and camp mode.
- Do you have water in your floor board when using AC?
- Camp mode success! Last night I got 11+ hours of heat.
- Best passenger seat
- Charger Requirements for 2025 Brightdrop ZEVO 600
- IKEA Bed Hack
- Any trick to keep cargo lights always on?
- Smartfloor and L track installation
- Conversion From Commercial to Auto License Plates
- Brake fluid reservoir
- Charging above 72% SOC
- BD Energy coefficient for climbing and descending
- Single charge drives: 417 miles @ 40 mph, 372 miles @ 50 mph
- cargo ramp
- My thoughts on "Brightdrop" after finding one.
- Windshield Sunshade anyone
- Maximum voltage for on board 19.2kw charger?
- Weight Support of Roof
- Never fallen in and out of love so fast. Power offboarding
- Legality and Insurance for adding seats in the back
- Venting - Just some thoughts.
- Making BD Work Van - Heat is Gettin To Me :)
- How to disable cargo light motion sensor?
- Towing or NOT!
- Direct Bev charging?
- Offboarding fail and deadline.
- Longest run on TWO charges, 790 miles, with 44 total miles remaining in the battery
- Insulating AC expansion line
- Cheaper awning
- Outequip 12V AC installed on work van.
- First buildout video on BD Service truck
- Bed in the Cab
- Successful Electric Power Offboarding!
- 400 or 600 for campervan?
- Model 3D
- 2026 Brightdrop pricing
- Charge port well cover nut/washer loose
- Round the clock Power offboarding now works
- Dash Warning Light - Red Brightdrop with exclamation
- Offboarding power clarification
- Rear door power unlock inconsistency
- RV Loan
- Two year anniversary of receiving my BRIGHTDROP!
- Adding Armrests
- Just a little confused over fleet sales
- 24 hour power offboarding upgrade from 20 amps to 40 amps
- Legend Upfitting for Brightdrop Wall Ceiling Liners and More
- Window Option
- Range question
- Brightdrop Keys - Program Yourself and save Big $$$$$
- Level 1 120VAC charging limitations
- dirt roads and rear door sealing
- What is this? Power offboarding?
- Rear Access Open Error
- OutEquip 12V AC Installation On My Bright Drop - Whew :)
- Update on offboarding success @ .62 kW continuous
- GM's "Universal Vehicle Module"
- 2026 vs Older Model Years Features
- Tiltable solar array
- Can anyone recommend van build software?
- Universal Right Armrest Installed - Left Side No Go Tho :)
- RVEX From Coachmen
- Anyone used these Murphy Bed Parts - L-Track quick release brackets?
- Latest Data Sheets from GM BrightDrop Team - Power Offboarding and more.
- IKEA Bed Hack Brainstorming
- Seat upgrade with workcenter table
- 600 Mobile lab
- Brightdrop 400 Lithium Ion Battery Service Now.
- 3rd party battery bank and solar panels such as Anker Solix
- Road noise and weather proofing the cab
- Needs service ???? Already ????
- Efficiency @ 55. mph
- Side composite panel
- Wheel sizes?
- Bulkhead door rattle fix?
- How many Brightdrops were actually built?
- Mandatory service intervals?
- GVWR, 11,000 LBS Option
- Hunting for 2026s
- solar/electric diagram
- Third seat in front, first draft of repurposing the stock jump seat.
- Best Emergency Flat Repair for BrightDrop EV (No Spare) – Need Advice on Foamed Tires!
- Center seat by repositioning the flip seat.
- 12-48VDC AC-Heat Pump discussion
- RVEX Electric Camper Van 3-Day (new)
- Removing or elevating ceiling of Brightdrop 400
- Toilets
- Tip From A Commercial Guy On Roof
- 3 components to offboard power
- Looking for Recommendations : Replacing the Trundle Door with Barn / Swing Doors on the Back
- Removing the rear step?
- bulkhead door, doesn't always work.
- Camper conversion - Bulk head removal
- New update just downloaded.
- Easing my windshield worries ......
- Wall thickness
- 400 miles at 2 cents per mile
- BD Production Status?
- A Totaled New Brightdrop ? Looks Brand New
- Looking for a ladder
- Rotating noise in front
- Radio Shelf DIY Action
- Storage access
- Dec 4 software update GM V653.10
- Rear door conversion
- Dimensions of Pocket Door Covers?
- Key Fob Antennae Question
- Op Ed in Yesterday's Paper on Reviving the BrightDrop Production Facility
- So you are aware, the 3D CAD files of BrightDrop vans are available from GM Upfitters for free.
- My new 2026 Brightdrop issue on day 1
- Additional $15000 Massachusetts rebate: easy to get and how to not get it
- seat swap
- No GPS or nav data
- Roll Up Door Handle Upgrade Mod.
- Locate and use the 30A Upfitter Electrical Wiring Provisions? (2025)
- Three peeps up front!
- Hello! Camper layout feedback?
- 2025 BD400 1500miles Service High Voltage system warning
- Understanding energy efficiency both in and out, in gasoline equivalents.
- Are there more Brightdrops in a GM depot somewhere? Are more coming to dealers?
- Any tips for framing out cargo sliding door wall?
- Installing a Roof Top AC Unit
- Lights coming on
- Cold weather battery drain?
- My Heater that in my 400 Chevy Bright drop
- Black BD build
- Brightdrop Part List and Diagram
- Camp Mode Hack
- Where can I tie into a switched power for passenger seat heat?
- Left side mirror
- Build awning back door like on the RVEX?
- black box in with 12v battery?
- Spare tire/wheel weight
- Sound Deadening Material Off-Gassing
- Crazy condensation - anyone else?
- BrightDrop Battery Replacement Under Warranty – My Experience (U2B9B 27 Code)
- Drain options for front half of cab
- Connector how to
- New Back Door!
- 48V house system
- Anyone Insulated These Upper Metal Box Channels?
- Another rollup door replacement thread
- Brightdrop Underbody Informational Video
- Onboard Heating/Cooling capabilities vs. additional A/C and/or diesel heater.
- Mystery Holes
- Service Theft system
- 2nd time failure High voltage coolant heater
- Wiper motor assembly failed at 982 miles
- Comparing Early 2024 to 2026 Brightdrop
- Brightdrop 600 options for V2L
- Share your W/K heat transfer numbers/graphs
- Questions about the 2026 BrightDrop 600 with power offboarding option
- Onboard heating/cooling system diagram
- Cargo Racking Needed
- Faster charging? Not much.
- Considering Cork Flooring, Walls and Ceiling - Has anyone else used in their conversion?
- Dashboard Kitchen
- Finally getting some work done
- Air ride seat
- Discontinued parts availability
- House battery setup theorycrafting
- Road trip from Greenville SC to Jupiter Fl
- Roll up Door.
- Air Sealing Sliding Doors
- Lemon Law Van Replacement Saga
- New OS moved my "knee" from 72% SOC up to 84%
- GM Releases Widespread Telematics Control Module Fix
- NEW Brightdrops! Bargain prices!
- New Eco Hitch installed
- Link to Brightdrop front hitch if interested
- Link to roof rack system
- Need help finding a BD for sale...
- Rear swap with Chevy Silverado EV?
- Cool to Warm Lightbulb Conversions
- 12V Battery Maintainer?
- Another camp trip to Fort Clinch State Park FL
- Hearing GM has just raised incentive to $28k!!!
- Corrosion
- Are the translucent roof and load bearing roof on the 26 models mutually exclusive?
- How do you know if your BrightDrop has the UVM?
- Side lower trim removal
- Drilling through the floor(Bd 400)
- Fluid leaking
- Someone has 100 Brightdrop Available
- Confirmation on reality of GVWR 9990 vs 11000
- Ability to add power door option later?
- 7.2 kW Power base on a 2026 BD
- Dimension of curbside sliding door cavity in cargo area
- Can the Brightdrop be towed, or must it ride flatbed?
- Help - Cargo Lights Flicking Off Then On Right Away for the Past Day
- BD600 Camper Conversion - Barajabali
- Anker SOLIX F3800 Portable Power Station
- Max power inverter watt?
- Whaaaaa...a parts truck?
- U2220
- Spare Tire in my Chevy Bright Drop 400
- Has anyone added a dedicated 12V fused auxiliary output?
- Solar Simulator to plan a BrightDrop solar setup before you buy anything
- Eco hitch and wiring harness
- New Passenger Seat
- Where are the 2 30A fused connections available for upfitters?
- Drilling out rivets - advice for someone that has never done it?
- Dead 12v battery disaster
- Before and after custom rain visors
- SOC not reading properly.
- Wheels and tires
- No-cut ventilation for cargo area
- Torklift rear ecohitch installation on 400
- Electric System Sanity Check
- Any no cut cable pass-throughs at rear of BD 400?
- Box above bulkhead door?
- BD Vehicle to load adapter by A2Z
- Several Beginner Questions 1 - Display won't turn off
- Beginner Question 2. / Charger model recommendations
- Right Front Seat Base possibilities and resources - Add yours please!
- Deep Dive: Understanding the 2026 Power Offboarding (KV7) system
- CONDENSATION LEAKS ON FLOOR IN PASSENGER SECTION. 2025 BRIGHTDROP400.
- Slide open skylight / escape hatch
- Charging faster while off?
- CA - Brightdrop 400 deals
- More AC power from 2025 long range 400 model?
- Roadside Assistance Options
- Replacing 12v in 2023 BD
- Max Range payload with family of 5 weight-shedding mods? (bulkhead removal, rear door, seating changes)
- How crazy are you to source your parts?
- Is this a BD 24 hour distance record? 909 miles in 23:15
- Brightdrop 400 towing trailer
- Really suprised at amount of openings!
- When your vehicle outlives its cloud: What happens next?
- Commercial Registration and insurance?
- How accurate are online build details compared to factory records?
- A little bit of solar for occasional use
- Ready to order double rear doors from Alibaba
- Cross country charge planning, latest refinement.
- Window vents
- 2024 Models
- How to reset codes?
- Front Cab Window Dimensions?
- Aerodynamics advise
- Tatami floor
- My first exploration of solar.
- The single most valuable advice for first time BD owners
- Easy and Inexpensive Running Water for Kitchen Sink
- Driver display will not turn off
- EVaded IVAN Build Thread
- Free Charging
- Close to solving 1kW offboarding but need help.
- XT60i T18 direct connection to Powerstation
- T1 DC/AC Converter Control Module
- Rear camera drops out in high temperatures
- Cardboard, am I nuts?
- Level-able bed
- Jailbreak
- Another Successful Rear Door Removal/Replacement
- Looking for 2026 or 2025 BD400, ideally with max battery
- Removing the under-dash cubby
- Brightdrops added to ABRP (A Better Route Planner)
- Power offboarding. Yes! Final!
- Rear Rollup Door Replacement Journey.......
- Rear handle for mounting
- Plumbing... water heaters, pumps, tanks, sinks, etc...
- How to lock plug in charge port.
- Service Required Notice
- drivers seat belt 400 series 2025
- Suspension lift for light off roading
- Ranger Shelving Install
- Service Appointment the Day Before 24-night Roadtrip, 12 Days After Purchase
- The Electric Space Ship is three years old.
- Cargo floor liner removal
- Changed 12v battery major problems
- Off boarding Power with 240V 11kW Tankless Water Heater GE11SNHPDG
- Side Windows through the sliding door area
- Outpost EV in Enumclaw, WA has Brightdrops
- Stumbled upon Coachman Rvex BD600 on YT
- Free space?
- 25 Day Road Trip in BD600
- Mini Split for refrigeration / Food delivery van
- Interior Door Handle Cover
- Brightdrop 600 3d Model
- Brightdrop 600 Tanks
- New guy seeking advice
- More house power: Highest amps from T-18 via 12v buss bar?
- Rear door handle problem
- Building out contractor 400
- 600 max pack availability
- How many Brightdrops produced, and other stats
- Brightdrop passenger seat
- Spray foam insulation
- Road Trip
- FedEx Buys More Electrics
- Wheel Well Height and Bulkhead
- My 400 Service Vehicle letter
- GM Eliminates Large Brightdrop Subsidy
- Roof material.
- Solar Panel Roof Rack
- Garage Door Tracks/Rails?
- Kelson Lau RV conversion youtube
- 2026 Power Offboarding Option
Introductions 25 threads
- Considering an Evo 600 Vanlife Motorhome
- Building out a camper
- RV no-build with BrightDrop 600
- Brightdrop camper van build
- Vehicle to Load for 2025 Brightdrop
- Love to hike - 2025 Chevrolet Brightdrop 600 AWD Max Range, 11,000 lb GVWR, 19.2 kW Charging
- bones -25bd600 - Thermal Pics and questions
- Camper Logic - 2025 Brightdrop 600 AWD
- New Member Hello - curious about Brightdrop as camper but admitted eSprinter admirer
- Simple 3D outline model for 600 floorplan
- Campervan Buildout
- New 2025 brightdrop 600 camper build pics
- Buying BD 400 Max/AWD today for camper conversion. Nervous about seat replacement!
- Introduction, wild ideas, adding exterior insulation, Mobile UPS platform idea.
- Live in van build
- Upfitting a Brightdrop with a cargo area cooling unit
- Looking to build an RV conversion
- Just spent my first night in my brightdrop
- My ride is a 2025 Chevrolet Brightdrop, and I'm doing a little custom work on it.
- Hi team, making a remote work van. Digital design for tech.
- Drawings/Models/Repository of Projects
- My first post here, turning my Brightdrop Zevo into a service vehicle
- Hello from erikshomes, I have a 2025 Chevrolet 400.
- BD400 Service Truck
- Hey folks, sapienstory here with my 2023 Chevrolet Zevo 600 AWD!
Photos 17 threads
- Rollup door removal
- New York Auto Show 2025: Grounded's Brightdrop RV
- Cab with Headliner Removed
- 400 Rear Cargo Area Framed
- Request: Photos of your bed and fridge setup
- Supercharging
- Wheel well insulation
- 249 volt Heater
- Rooftop and ground deployed solar panels
- House battery under drivers seat
- 'Farley' Campervan Buildout
- Black BD build
- Build pics of "Falkor"! Subfloor missteps
- 4 boxes of 80mil Killmat
- Bainbridge Island Build
- 2025 Grounded G3 Campervan
- Getting ideas for solar array on my BD using AI
News 15 threads
- Features announced for 2024 Zevo 600 and 400
- BrightDrop Becomes Part Of General Motors
- GM, Pilot Company & EVgo Open First 25 EV Charging Stations In America
- GM vehicle access to Tesla Supercharger network
- 2025 Models?
- BrightDrop Wheel Supplier Files For Bankruptcy
- 2026 Brightdrops will have 3 Range Options
- 2026 Brightdrops will offer "Power Offboarding"
- Recall News
- Plant shut down till october
- Electric Drive Transmission Module Recall
- end of Brightdrop
- Clarifying 2026 BrightDrop’s Off-Board Power Outlets
- A European Firm Is Racing To Save This GM Canadian Plant
- Colorado Camper Vans Brightdrop Pop-Top!!!
Prices & orders 14 threads
- Heavily discounted 2025 Models
- Buy now or later
- Great deal in Alabama
- Current deals
- October-December *dealer* incentives?
- Buying new 2026 BD 400
- Good prices still available!
- Has anyone bought a BrightDrop using the GM Supplier Discount program?
- used 2023 600
- Looks like incentives are unchanged for july
- How to Buy a BrightDrop for the Lowest Possible Price (What I've Learned So Far)
- what would be a good price for a 2026 400 with awd max batter and power offboarding
- Availability of 11000 GVWR brightdrop 400.
- 2023 Brightdrop 600 / 554mi / <$38K OTD
Charging & batteries 6 threads
Classifieds 7 threads
Videos 2 threads
Crawled 2026-08-29/30 and re-crawled 2026-10-11: all 738 threads on brightdropforum.com indexed by title and screened for relevance to a camper conversion on this platform (483 kept). The October pass pulled every thread with activity since the first crawl (101 threads, 414 new posts) and re-read it in full; the photo archive was rebuilt from complete threads rather than first pages. The highest-value threads were then read post-by-post across three research lanes; the full notes — including per-thread summaries and every figure's source post — are archived in the research corpus alongside the other deep-dive documents in Sources.
REFSources & method
Every dimension, weight and rating on this page traces back to the GM body builder manual or to a named primary source. Where a figure is computed rather than published, the arithmetic is shown inline in the relevant section.
25MY Chevrolet BrightDrop 400/600 Body Builder Manual — the authoritative source for cargo box dimensions, GVWR/GAWR codes, curb weights, mounting restrictions, no-drill zones, high-voltage routing and the underbody exclusion areas. All structural and payload numbers on this page come from it.
Research corpus
Roughly 143 distinct sources were consulted across four deep-dive research documents (electrical, layout, plumbing, and climate/cost/logistics). The load-bearing ones:
| Area | Principal sources |
|---|---|
| Platform & ownership | BrightDrop Forum owner threads (28 citations), GM Authority, GM Upfitter, InsideEVs, TrueCar / J.D. Power valuation data |
| Electrical & solar | EXPLORIST.life 48 V system design, Victron Energy documentation, Epoch Batteries specifications, FarOutRide build data |
| Heating | Heatso (Espar / Webasto technical data), Webasto, DieselHeat, Truck Camper Adventure |
| Cooling | Velit, Cruise N Comfort USA, Fogatti, EcoFlow, SwisClima |
| Plumbing & sanitation | Thetford, Lippert, Panther RV Products, Fresh Water Systems, Go2Marine, RV Geeks |
| Structure & upfit | Ranger Design, OZK Customs, The Van Smith, Contravans, Defender fasteners |
| Insurance & registration | Roamly, Progressive, iRV2 community threads |
| Payload & VIN screening | NHTSA vPIC decoder (VIN positions 4 and 8, 126 units cross-checked), the GM certification label and FMVSS second-stage reduced-capacity label on VIN 2G58J3TZ8R9101101, dealer purchase sheet |
| Production benchmark | Grounded G3 launch release via RV PRO, groundedevs.com specification and FAQ pages, InsideEVs, owner video reviews |
Sections 00 and 4.7 are the only parts of this document written after a physical van existed. Their numbers come off labels and a signed buyer's order (ordered 19 Aug 2026, delivered 6 Sep 2026), not off the body builder manual. Where they disagree with anything else on this page, they win. Three findings are worth carrying: the payload ceiling is 2,310 lb measured, not the ~3,010 lb this model had been estimating; the estimating error ran optimistic by ~120 lb twice in a row against measured data; and a second-stage upfitter's label can remove 416 lb of that ceiling without changing a single published spec.
This is a planning document, not an engineering sign-off. Three things must be verified against the physical vehicle before any irreversible work: the actual curb weight on a CAT scale, the underbody high-voltage and exclusion zones on your specific VIN, and the roof structure at your intended solar mounting points. The manual describes the platform; your van is a used example of it.
GM ended BrightDrop production on 21 October 2025. Parts availability, software support and warranty status should be confirmed with a GM commercial dealer in writing before purchase.